This guide explains how to use Omeka.net. From Chapter 3 onward, the instructions also apply to Omeka Classic.
Creative Commons - BY -- 2014
Use Case: Scholars, Omeka.net, http://info.omeka.net/omeka-net-help/use-case-scholars/
(Translated and revised by: Satoru Nakamura)
Items are the building blocks of Omeka. To build a digital archive, you first need to add items.
Before Adding Items
You can refer to the "Site Planning Tips ( http://omeka.org/codex/Site_Planning_Tips )" page to think about how to build your site and what you want to do with items. Items contain metadata, or data describing that particular object, based on the Dublin Core Metadata Initiative. Items belong to collections, can be tagged with multiple keywords, and can be used in multiple exhibits.
For more details on working with Dublin Core, refer to the relevant documentation on Omeka.org ( http://omeka.org/codex/Working_with_Dublin_Core ).
For an overview of adding and managing items, also see the screencast ( https://vimeo.com/102040466 ).
Adding an Item
Click the "Add an Item" button from the Items page ( mysite.omeka.net/admin/items ).
This will take you to the admin/items/add page, where the navigation bar at the top shows various tabs for adding items. You can check the "Public" and/or "Featured" boxes on the right side of the item form at any time. You can also change this status from the /admin/items page without opening each individual item.
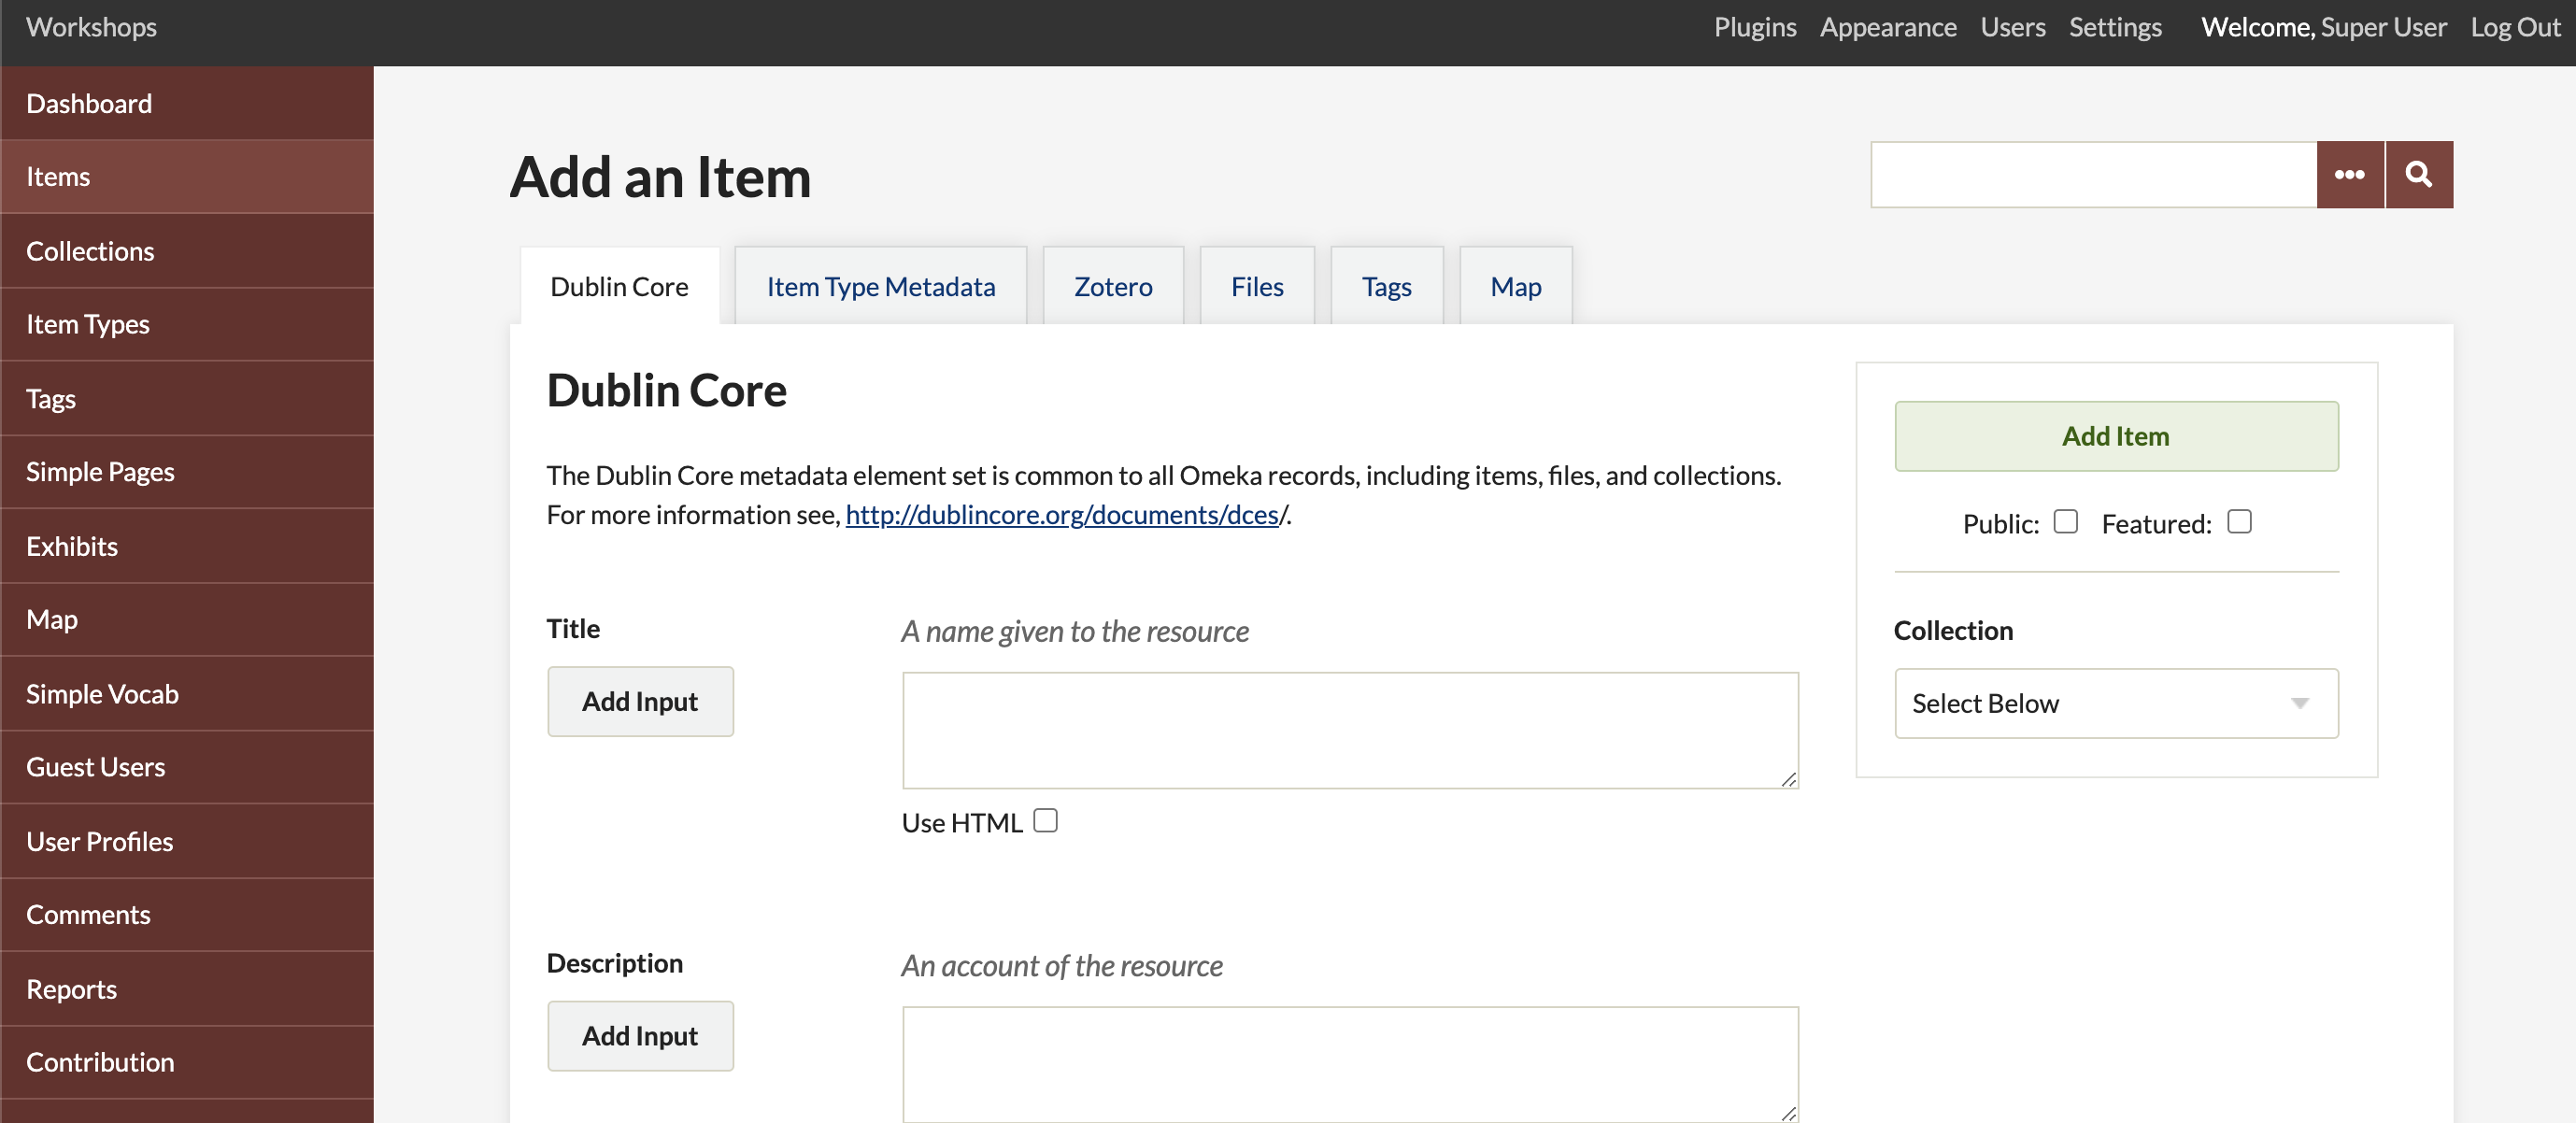
- The first tab displays Dublin Core fields. These are available for all items in the archive. Each field can have multiple values. You can add a new input field by clicking the "Add Input" button next to each field title.
- The "Item Type Metadata" tab allows you to select a specific item type for the object you are adding. When you select a type using the dropdown menu, the relevant metadata fields will appear. (For adding/editing item types, see Managing Item Types ( http://info.omeka.net/build-a-website/manage-item-types ).)
- The "Files" tab allows you to upload files to an item. Clicking the "Add Another File" link displays another field for adding files. You can associate any number of files with an item. For details, see Managing Files ( http://info.omeka.net/build-a-website/managing-files ).
- The "Tag" tab allows you to add keyword tags to items.
- Assigning an item to a collection: Below the "Add Item" button on the right side of the page, there is a dropdown menu that allows you to assign an item to a collection. Each item can only belong to one collection.
- To save your data, click the "Add Item" button.
Adding HTML Elements to Items
The text in each metadata field can be enhanced with basic HTML tags. To enable the HTML editor, check the HTML box below the text box. For details, see Using the HTML Editor - TinyMCE ( http://info.omeka.net/build-a-website/use-the-html-editor ).
Item Properties
-
Items: Each item contains Dublin Core and Item Type metadata. An item can belong to only one collection at a time and can have an unlimited number of tags. Items may or may not contain files.
-
Collections: Collections may consist of multiple items. An item belongs to only one collection.
-
Tags: Tags can be added to any item, and an item can have an unlimited number of tags.
Editing Items
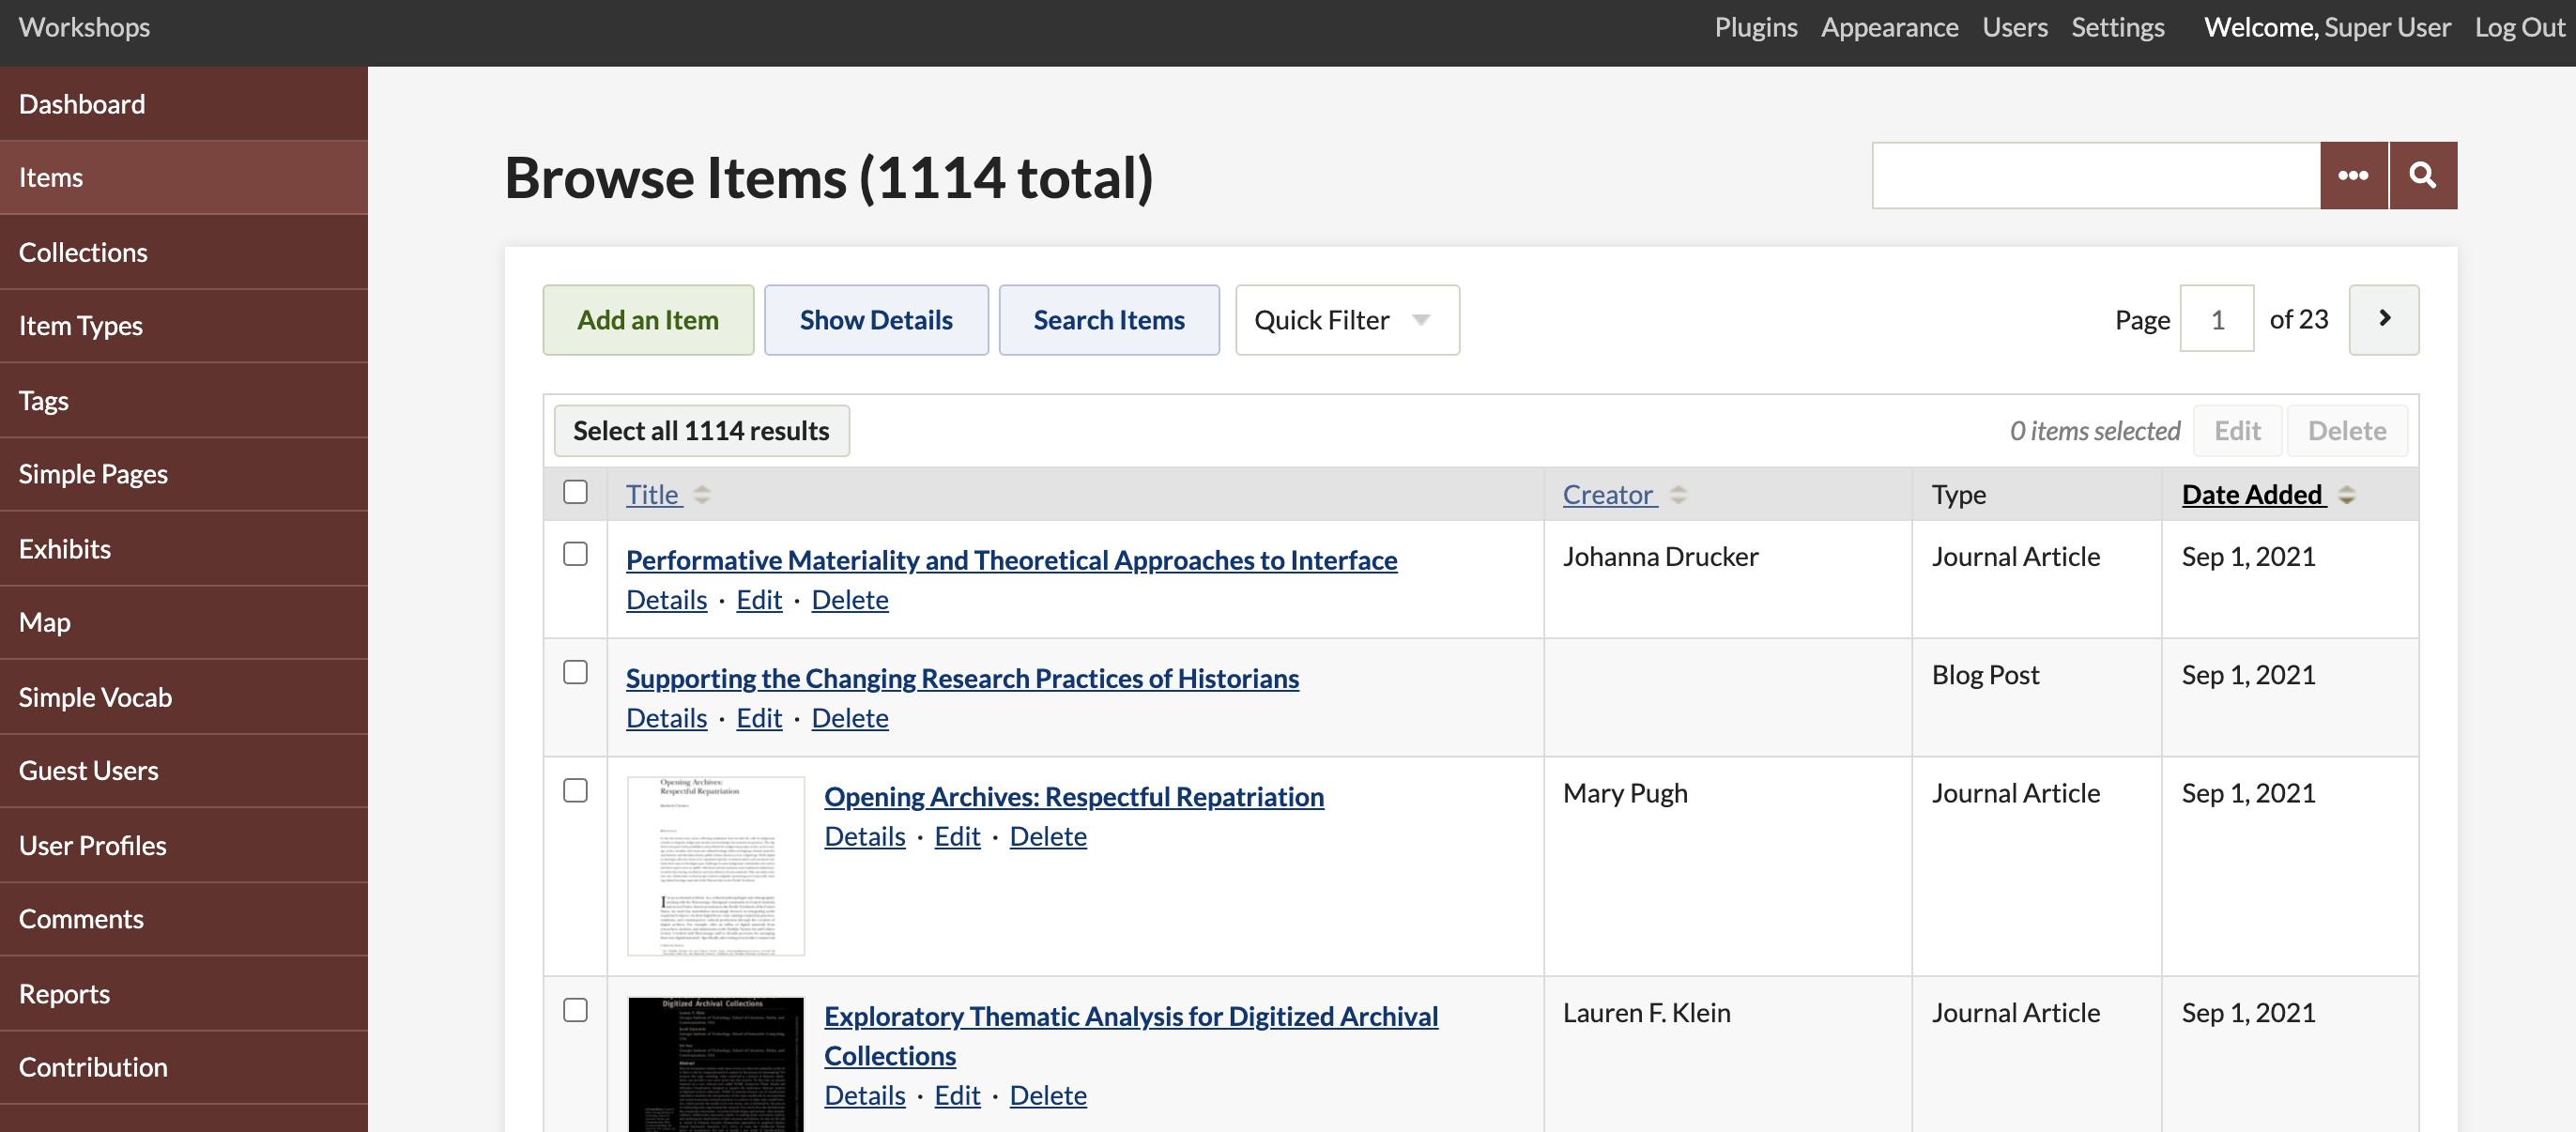
- Access "Items" from the tab in the left navigation bar of the dashboard, and go to the "Items Browse" page (/admin/items). Items are displayed with limited metadata such as "Title", "Creator", "Item Type", and "Date Created". To view other metadata associated with that item, use the "Details" link below the item's title. You can also use the blue "Show Details" tab to display details for all items on the page.
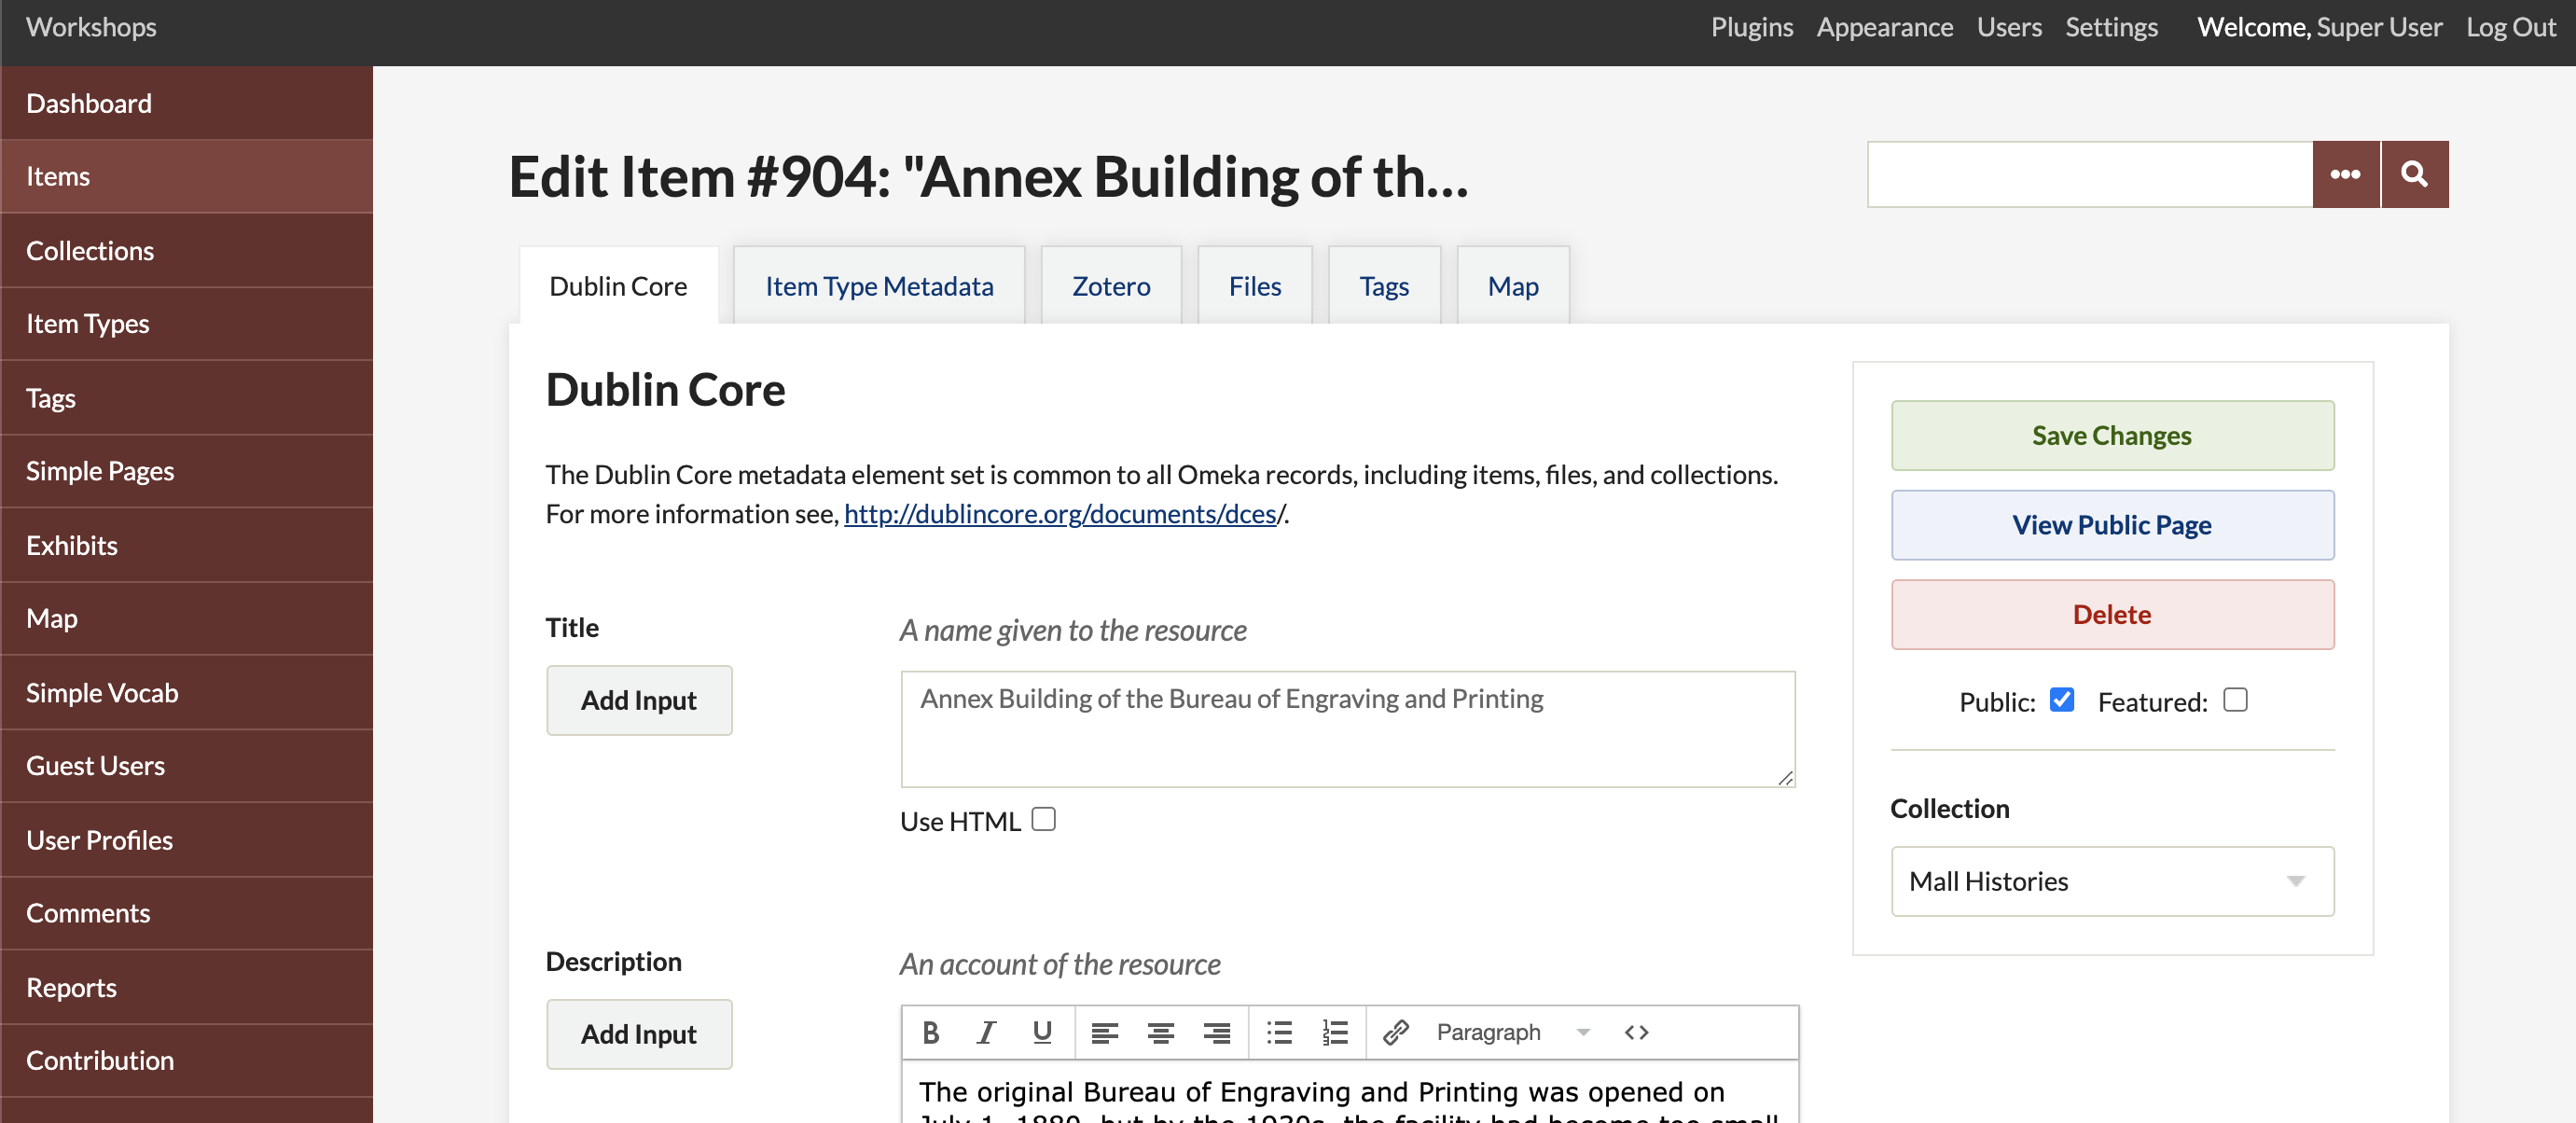
- Find the item you want to edit from the items list or by searching. To edit a single item, use the "Edit" link below the item's title. The edit page will open, allowing you to make changes. Click the "Save Changes" button to avoid losing your changes.
Deleting Items
To delete a single item, click the "Delete" link below the title on the admin/items page. You will be asked to confirm this action. You can also delete an item by editing it and clicking the "Delete" button below the "View Public Page" link on the right side of the page.
Batch Editing and Deleting
-
Click the "Items" tab from the dashboard or admin screen.
-
Find the items you want to edit or delete in batch by browsing, sorting, or searching.
-
Select items for batch editing using the checkboxes to the left of the item titles, or select the box to the left of the title heading to select all items on that page.
-
Once items are checked, click the "Edit" button. An edit page will open where you can make changes.

-
You can make the following changes for each batch of selected items:
-
Make public or private,
-
Set as featured or not featured,
-
Change the item type,
-
Switch or associate collections for selected items,
-
Add tags to all selected items,
-
Delete items
-
Review the list of items to be edited or deleted in the box on the right. If you selected an item by mistake, uncheck the checkbox to the left of the item.
-
Click "Save Changes" to edit all selected items.
Browse Items (Admin)
Clicking the Items tab from the Dashboard or /admin page displays a list of items sorted by most recently added by default. There are many ways to browse, sort, and search items.
-
To sort browse results, click the column headings such as Title, Creator, Item Type, or Date Added. To sort by public, private, or featured items, click the quick filter links at the top of the list.
-
Items that are not public display "(Private)" next to the title, and featured items have a star on the item title.
-
To view additional information about listed items, click the "Show Detail" button to display the collection, tags, description excerpts, and whether the item is private or featured. There are also quick links for editing or deleting items.
-
To search for items, click the "Search Items" button. An advanced search page will appear for searching all items.
Output Formats
Once items are registered on your site, you can share item data in various Output_Formats ( https://omeka.org/classic/docs/Technical/Output_Formats/ ).