This article explains how to use Omeka.net. From Chapter 3 onward, the instructions are common to Omeka Classic.
Creative Commons - BY -- 2014
Use Case: Scholars, Omeka.net, http://info.omeka.net/omeka-net-help/use-case-scholars/
(Translation & revision: Satoru Nakamura)
The "Users" section allows site administrators to control who can access the administrative section of the site and what each user can do. You can add, remove, and assign categories.

Manage users by clicking the "Settings" button at the far right of the dashboard, or by navigating to /admin/users.
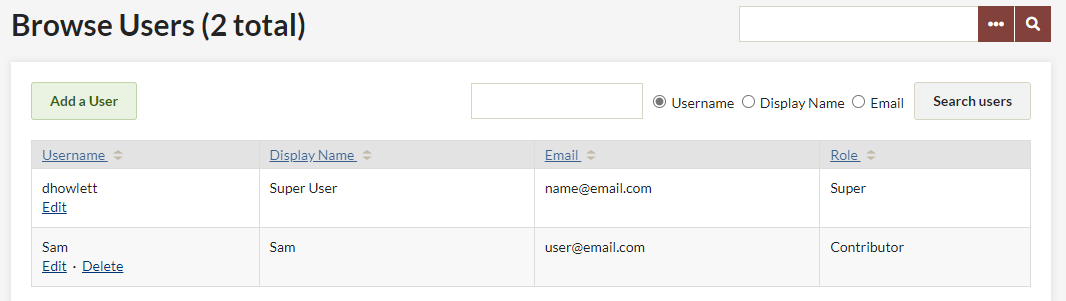
The "Browse Users" screen displays the number of users, usernames, display names, emails, and roles for each user. The table displaying users can be sorted by any of these values. From this page, you can edit user information, delete users, and search for existing users.
To sort users, click the column heading you want to sort by. If you want to sort in descending order rather than ascending, click the heading twice. The small pair of arrows next to the column heading indicates whether the sort is ascending (upper arrow is dark) or descending (lower arrow is dark).
You can search for users by username, real name, or email address. Username and real name searches can include complete words or partial strings. For example, you can search for usernames containing "ja." Email search only works with the full email address.
Adding a User
To add a user, enter the email address of your website collaborator, select the level of access you want to grant for this website, and invite them. Click "Invite" to complete the process.

If the invited user does not have an Omeka.net account, they will be directed to the sign-up page where they can get a free basic account to work on this website.
User Roles and Access
Users can be assigned different levels of access to the administrative interface.
-
"Super" users can access all available pages in the admin panel. "Super" users are the only users who can access the Settings panel to select and configure themes, add and edit users, and change general settings.
-
"Admin" users can access and edit items, collections, and tags.
-
"Contributor" users can add items and edit items they have created. They can also create exhibits using any item in the archive, and have permission to view public exhibits from the admin side.
-
"Researcher" users can view all pages for Items, Collections, and Item Types (public or private), but cannot edit content.
Editing/Deleting Users
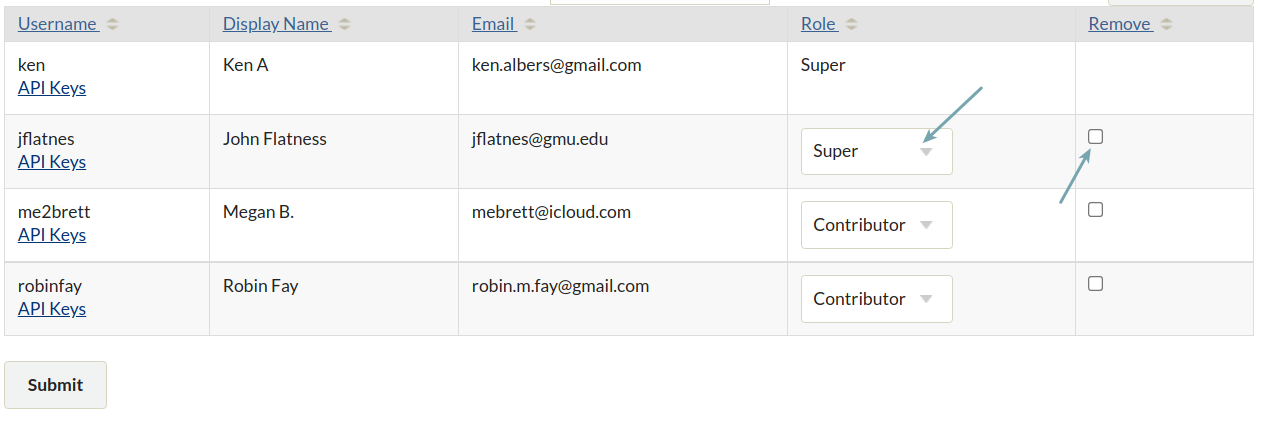
You can edit a user's role by selecting a new role from the dropdown in the user's row, or remove a user's access to the site by checking the Delete box in the row. Click the Submit button to complete either operation.
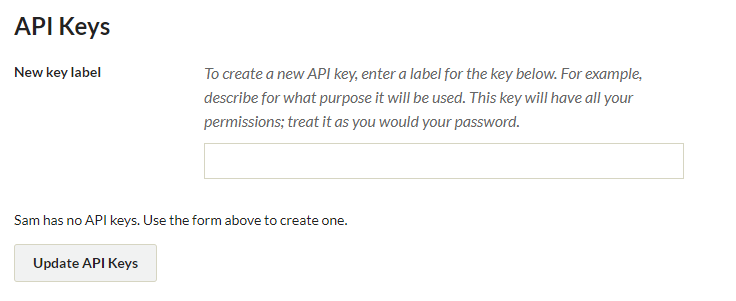
API Keys
To add an API key for a user, click the Api Key link below the username. Enter the label text for the key in the displayed field, and click "Update API Keys." The API key will be generated and added to the page. To delete a key, click the checkbox in the "Rescind" column for the key. Click "Update API Keys" again to apply the change.