ホーム 記事一覧 ブック DH週間トピックス 検索 このサイトについて
English
vttファイルからTEI/XMLを作成する

vttファイルからTEI/XMLを作成する

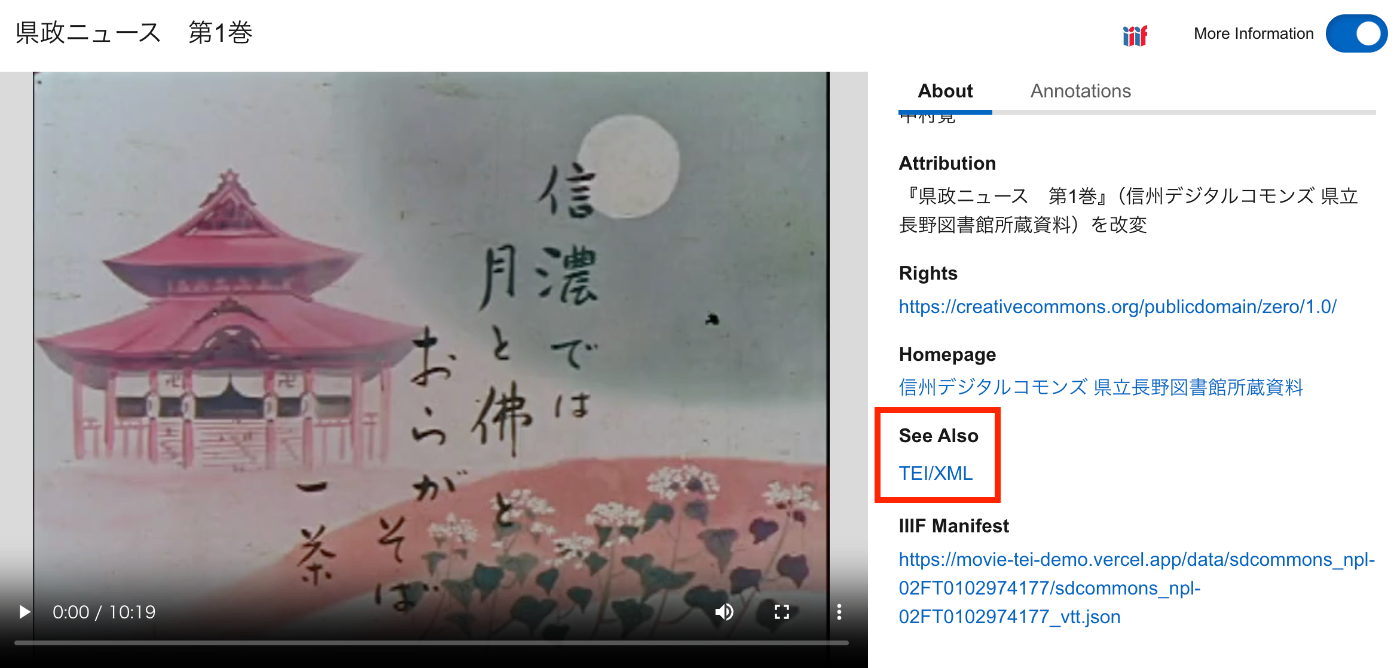
概要 vttファイルからTEI/XMLファイルを作成する方法の備忘録です。 さらに、IIIFマニフェストから、vttファイルおよびTEI/XMLファイルにアクセスできるようにしてみます。結果、以下のように、TEI/XMLファイルがSeeAlsoに関連づけられ、また「Annotations」タブから、vttファイルの内容にアクセスできます。 https://clover-iiif-demo.vercel.app/?manifest=https://movie-tei-demo.vercel.app/data/sdcommons_npl-02FT0102974177/sdcommons_npl-02FT0102974177_vtt.json 参考 以下の「The Ethiopian Language Archive」における取り組みを参考にしました。特に、TEI/XMLの構造化方法が特に参考になりました。 https://dev.jael.info/documentation/ 例 以下で作成したvttファイルを対象とします。 具体的には、以下の『県政ニュース 第1巻』(県立長野図書館)を使用します。 https://www.ro-da.jp/shinshu-dcommons/library/02FT0102974177 TEI/XMLの作成 作成したTEI/XMLファイルの例は以下です。 https://movie-tei-demo.vercel.app/data/sdcommons_npl-02FT0102974177/sdcommons_npl-02FT0102974177.xml 具体的には以下です。 <?xml-model href="http://www.tei-c.org/release/xml/tei/custom/schema/relaxng/tei_all.rng" type="application/xml" schematypens="http://relaxng.org/ns/structure/1.0"?> <?xml-model href="http://www.tei-c.org/release/xml/tei/custom/schema/relaxng/tei_all.rng" type="application/xml" schematypens="http://purl.oclc.org/dsdl/schematron"?> <teiCorpus xmlns="http://www.tei-c.org/ns/1.0"> <teiHeader> <fileDesc> <titleStmt> <title>県政ニュース 第1巻</title> </titleStmt> <publicationStmt> <distributor>中村覚</distributor> <availability> <licence target="http://creativecommons.org/licenses/by/4.0/">http://creativecommons.org/licenses/by/4.0/</licence> </availability> </publicationStmt> <notesStmt> <note>昭和30年に長野県が制作した記録映像。次の8タイトルを収録する。「地方選挙終る」、「地方選挙後初の県議会開かる」、「三十年度を賄う県のお台所」、「すすむ土木建設」、「明るく正しく健やかに」、「幕をとじた善光寺の御開帳」、「勇ましい水防訓練」、「お国じまん民謡大会」</note> </notesStmt> <sourceDesc> <biblStruct> <monogr> <title>県政ニュース 第1巻</title> <availability> <licence target="https://creativecommons.org/publicdomain/zero/1.0/">cc0</licence> </availability> <imprint> <publisher>信州デジタルコモンズ 県立長野図書館所蔵資料</publisher> </imprint> </monogr> <ref target="https://www.ro-da.jp/shinshu-dcommons/library/02FT0102974177">信州デジタルコモンズ 県立長野図書館所蔵資料</ref> </biblStruct> </sourceDesc> </fileDesc> </teiHeader> <TEI> <teiHeader> <fileDesc> <titleStmt> <title>県政ニュース 第1巻</title> </titleStmt> <publicationStmt> <p /> </publicationStmt> <notesStmt> <note /> </notesStmt> <sourceDesc> <p /> </sourceDesc> </fileDesc> <revisionDesc> <change when="2025-02-18"> 作成 </change> </revisionDesc> </teiHeader> <text> <body> <timeline unit="ms"> <when absolute="00:00:00.000" xml:id="t1" /> <when absolute="00:00:25.500" xml:id="t2" /> <when absolute="00:00:38.500" xml:id="t3" /> <when absolute="00:00:50.500" xml:id="t4" /> <when absolute="00:00:55.500" xml:id="t5" /> <when absolute="00:01:03.500" xml:id="t6" /> <when absolute="00:01:08.500" xml:id="t7" /> <when absolute="00:01:18.500" xml:id="t8" /> <when absolute="00:01:23.500" xml:id="t9" /> <when absolute="00:01:33.500" xml:id="t10" /> ... </timeline> <annotationBlock xml:id="ab1"> <u start="#t1" end="#t2">♪♪♪</u> </annotationBlock> <annotationBlock xml:id="ab2"> <u start="#t2" end="#t3">今年は選挙の当たり年。2月の総選挙に引き続いて、4月の県市町村と八木早の選挙で、長野県116万有権者の関心は非常な高まりようです。</u> </annotationBlock> <annotationBlock xml:id="ab3"> <u start="#t3" end="#t4">男女青年や婦人層はもちろんのこと、この老人も今年88を迎えたとはいえ、その慎重な投票ぶりが老いの表に一徹さを伺わせています。</u> </annotationBlock> <annotationBlock xml:id="ab4"> <u start="#t4" end="#t5">♪〜</u> </annotationBlock> <annotationBlock xml:id="ab5"> <u start="#t5" end="#t6">かくて県下における投票率、全国の上位を占める立派な成績を収めました。</u> </annotationBlock> <annotationBlock xml:id="ab6"> <u start="#t6" end="#t7">♪ ♪</u> </annotationBlock> <annotationBlock xml:id="ab7"> <u start="#t7" end="#t8">その日午後8時 きっかり、県下一斉に即日開票が行われました。</u> </annotationBlock> <annotationBlock xml:id="ab8"> <u start="#t8" end="#t9">その結果、長野県知事には、前知事の林寅氏が当選。</u> </annotationBlock> <annotationBlock xml:id="ab9"> <u start="#t9" end="#t10">またこれと同時に、県議会議員61名の当選も決定しました。</u> </annotationBlock> ... </body> </text> </TEI> </teiCorpus> IIIFマニフェストファイルの作成 上述したTEI/XMLファイルをseeAlsoに持つIIIFマニフェストファイルを作成しました。 ...

校異源氏物語に対する類似テキスト検索アプリを作成しました。

校異源氏物語に対する類似テキスト検索アプリを作成しました。

概要 校異源氏物語に対する類似テキスト検索アプリを作成しました。以下のURLからお試しいただけます。 https://huggingface.co/spaces/nakamura196/genji_predict 本アプリの使用方法などについて紹介します。 データ 以下の校異源氏物語DBで公開されているテキストデータを使用します。 https://kouigenjimonogatari.github.io/ アプリの内容 仕組みは単純で、校異源氏物語の巻毎・ページ毎のテキストを用意しておき、入力された文字列との編集距離を算出し、類似度が高いテキスト(+巻とページ)を返却します。 ソースコードは以下です。 https://huggingface.co/spaces/nakamura196/genji_predict/tree/main 応用例 例えば、以下の「[源氏物語] [4](東京大学総合図書館所蔵)」では、1つのIIIFマニフェスト内に複数の巻が含まれており、何コマ目から何コマ目までが何巻に属するのか、素人には判断が難しい場合があります。 https://da.dl.itc.u-tokyo.ac.jp/portal/assets/b90bbddc-509d-7c12-0fb9-af409a90a487 そこで、上記に資料に対してコマ毎のOCRテキストを取得し、今回作成したアプリに問い合わせることで、ページ毎に推定される巻数が提示され、巻の変わり目を知る手助けを行うことができます。 OCR OCRにあたっては、NDL古典籍OCR-Liteを使用します。 https://github.com/ndl-lab/ndlkotenocr-lite OCR結果を修正して、以下のようなTEI/XMLを作成しました。 <?xml version="1.0" encoding="UTF-8"?> <?xml-model href="http://www.tei-c.org/release/xml/tei/custom/schema/relaxng/tei_all.rng" type="application/xml" schematypens="http://relaxng.org/ns/structure/1.0"?> <?xml-model href="http://www.tei-c.org/release/xml/tei/custom/schema/relaxng/tei_all.rng" type="application/xml" schematypens="http://purl.oclc.org/dsdl/schematron"?> <TEI xmlns="http://www.tei-c.org/ns/1.0"> <teiHeader> <fileDesc> <titleStmt> <title>OCR結果: https://iiif.dl.itc.u-tokyo.ac.jp/repo/iiif/b90bbddc-509d-7c12-0fb9-af409a90a487/manifest</title> </titleStmt> <publicationStmt> <publisher>NDL古典籍OCR-Lite</publisher> <date>2025-01-29</date> </publicationStmt> <sourceDesc> <bibl> <ptr target="https://iiif.dl.itc.u-tokyo.ac.jp/repo/iiif/b90bbddc-509d-7c12-0fb9-af409a90a487/manifest"/> </bibl> </sourceDesc> </fileDesc> </teiHeader> <text> <body> <ab n="1" type="page" facs="https://iiif.dl.itc.u-tokyo.ac.jp/iiif/soto_ogai_202310/A05_4/004/A05_4_004_0001.tif/full/full/0/default.jpg"> <lb/> <seg type="本文" n="1" corresp="#zone-1-1">国外</seg> <lb/> <seg type="本文" n="3" corresp="#zone-1-3">紅葉のか</seg> <lb/> <seg type="本文" n="4" corresp="#zone-1-4">はなのえん</seg> <lb/> <seg type="本文" n="5" corresp="#zone-1-5">あふひ</seg> </ab> <ab n="2" type="page" facs="https://iiif.dl.itc.u-tokyo.ac.jp/iiif/soto_ogai_202310/A05_4/004/A05_4_004_0002.tif/full/full/0/default.jpg"> <lb/> <seg type="本文" n="1" corresp="#zone-2-1">OOO</seg> <lb/> <seg type="本文" n="2" corresp="#zone-2-2">□□□□□□□□</seg> <lb/> <seg type="本文" n="3" corresp="#zone-2-3">源氏十七才ノ十月より四年の十月迄有</seg> <lb/> <seg type="本文" n="4" corresp="#zone-2-4">/朱雀院の行幸ば。神無月の十日</seg> <lb/> <seg type="本文" n="5" corresp="#zone-2-5">あまりなり。よのつねならず。おもし</seg> <lb/> <seg type="本文" n="6" corresp="#zone-2-6">ろかるべきたびのこと成ければ。御</seg> <lb/> <seg type="本文" n="7" corresp="#zone-2-7">かた〴〵物見給はぬことを口おし</seg> <lb/> <seg type="本文" n="8" corresp="#zone-2-8">がり給。うへもなつぼの。み給はざらん</seg> <lb/> <seg type="本文" n="9" corresp="#zone-2-9">をあかずおぼさるれば。誠楽を御</seg> <lb/> <seg type="本文" n="10" corresp="#zone-2-10">前にてせさせ給ふ。源氏の中将は。</seg> <lb/> <seg type="本文" n="11" corresp="#zone-2-11">青海波をぞまひ給ける。かたてには。</seg> <lb/> <seg type="本文" n="12" corresp="#zone-2-12">火とのゝ頭中将がたちようい人にこ</seg> <lb/> <seg type="本文" n="13" corresp="#zone-2-13">となるを。立ならびては。花のかたはらの</seg> <lb/> <seg type="本文" n="14" corresp="#zone-2-14">みやまばなり。入がたの日かげさやか</seg> <lb/> <seg type="本文" n="15" corresp="#zone-2-15">にさしたるに。がくのこゑまさり。物の</seg> <lb/> <seg type="本文" n="16" corresp="#zone-2-16">おもしろきほどに。おなじまひのあ</seg> <lb/> <seg type="本文" n="17" corresp="#zone-2-17">しぶみおもゝち。よに見えぬさまなり。</seg> <lb/> <seg type="本文" n="18" corresp="#zone-2-18">詠などし給へるはこれや仏の御迦</seg> <lb/> <seg type="本文" n="19" corresp="#zone-2-19">一後順伽のこゑならんと聞ゆ。おもし</seg> </ab> <ab n="3" type="page" facs="https://iiif.dl.itc.u-tokyo.ac.jp/iiif/soto_ogai_202310/A05_4/004/A05_4_004_0003.tif/full/full/0/default.jpg"> <lb/> <seg type="本文" n="1" corresp="#zone-3-1">ろく哀なるに。みかと泪おとし給。</seg> <lb/> <seg type="本文" n="2" corresp="#zone-3-2">上達部みこたちもみななき給ぬ</seg> <lb/> <seg type="本文" n="3" corresp="#zone-3-3">詠はてゝ初うちなをし給へるにま</seg> <lb/> <seg type="本文" n="4" corresp="#zone-3-4">ちとりたるがくのにぎはゝしきに</seg> <lb/> <seg type="本文" n="5" corresp="#zone-3-5">かほの色あひまさりてつねよりも</seg> <lb/> <seg type="本文" n="6" corresp="#zone-3-6">ひかると見え給。春宮の女御。かく</seg> 推定 上記のXMLファイルを入力として、先に紹介したGradioアプリのAPIを利用します。 ...

Alfrescoのファイルに対して、Archivematicaを使ってAIPを作成する

Alfrescoのファイルに対して、Archivematicaを使ってAIPを作成する

概要 Alfrescoのファイルに対して、Archivematicaを使ってAIPを作成する方法の一例です。 以下が成果物のデモ動画です。 https://youtu.be/7WCO7JoMnWc システム構成 今回は以下のようなシステム構成とします。複数のクラウドサービスを利用していることに特に意味はありません。 Alfrescoは、以下の記事を参考に、Azure上に構築したものを使用します。 Archivematicaとオブジェクトストレージはmdx.jpを使用し、分析環境はGakuNin RDMを使用します。 オブジェクトストレージへのファイルアップロード Alfrescoからファイルをダウンロード Alfrescoからのファイルダウンロードにあたっては、REST APIを使用します。 https://docs.alfresco.com/content-services/6.0/develop/rest-api-guide/ OpenAPIに準拠しており、以下などを参考にしました。 https://api-explorer.alfresco.com/api-explorer/ 例えば以下により、Alfrescoのユーザ名とパスワード、およびホスト名を環境変数から読み込み、メタデータの取得やコンテンツのダウンロードを行うことができました。 # %% ../nbs/00_core.ipynb 3 from dotenv import load_dotenv import os import requests from base64 import b64encode # %% ../nbs/00_core.ipynb 4 class ApiClient: def __init__(self, verbose=False): """Alfresco API Client Args: verbose (bool): デバッグ情報を出力するかどうか """ self.verbose = verbose # .envの読み込み load_dotenv(override=True) # 環境変数の取得 self.user = os.getenv('ALF_USER') self.password = os.getenv('ALF_PASSWORD') self.target_host = os.getenv('ALF_TARGET_HOST') self._debug("環境変数の設定:", { "user": self.user, "password": "*" * len(self.password) if self.password else None, "target_host": self.target_host }) # Basic認証のヘッダーを作成 credentials = f"{self.user}:{self.password}" encoded_credentials = b64encode(credentials.encode()).decode() self.headers = { 'accept': 'application/json', 'authorization': f'Basic {encoded_credentials}' } self._debug("ヘッダーの設定:", { "accept": self.headers['accept'], "authorization": "Basic ***" }) def _debug(self, message: str, data: dict = None): """デバッグ情報を出力する Args: message (str): メッセージ data (dict, optional): 追加のデータ """ if self.verbose: print(f"🔍 {message}") if data: for key, value in data.items(): print(f" - {key}: {value}") def get_nodes_nodeId(self, node_id: str): """ノードIDでノード情報を取得する Args: node_id (str): ノードID Returns: dict: ノード情報 """ url = f"{self.target_host}/alfresco/api/-default-/public/alfresco/versions/1/nodes/{node_id}" self._debug("APIリクエスト:", {"url": url}) try: response = requests.get( url, headers=self.headers, timeout=float(30) ) response.raise_for_status() return response.json() except requests.exceptions.Timeout: self._debug("エラー:", {"type": "timeout", "message": "リクエストがタイムアウトしました"}) return None except requests.exceptions.RequestException as e: self._debug("エラー:", {"type": "request", "message": str(e)}) return None def get_nodes_nodeId_content(self, node_id: str, output_path: str): """ノードのコンテンツを取得する Args: node_id (str): ノードID output_path (str): 出力パス """ url = f"{self.target_host}/alfresco/api/-default-/public/alfresco/versions/1/nodes/{node_id}/content" self._debug("APIリクエスト:", { "url": url, "output_path": output_path }) response = requests.get(url, headers=self.headers) binary_data = response.content os.makedirs(os.path.dirname(output_path), exist_ok=True) with open(output_path, "wb") as file: file.write(binary_data) self._debug("ファイル保存完了:", { "size": len(binary_data), "path": output_path }) オブジェクトストレージにファイルをアップロード boto3と、オブジェクトストレージのENDPOINT_URL、ACCESS_KEY、SECRET_KEYおよびBUCKET_NAMEなどを使用して、ファイルのアップロード(とダウンロード)を行います。 ...

Pythonを使ってOmeka Sにメディアをアップロードする方法

Pythonを使ってOmeka Sにメディアをアップロードする方法

概要 Pythonを使ってOmeka Sにメディアをアップロードする方法の備忘録です。 準備 環境変数を用意します。 OMEKA_S_BASE_URL=https://dev.omeka.org/omeka-s-sandbox # 例 OMEKA_S_KEY_IDENTITY= OMEKA_S_KEY_CREDENTIAL= 初期化します。 import requests from dotenv import load_dotenv import os def __init__(self): load_dotenv(verbose=True, override=True) OMEKA_S_BASE_URL = os.environ.get("OMEKA_S_BASE_URL") self.omeka_s_base_url = OMEKA_S_BASE_URL self.items_url = f"{OMEKA_S_BASE_URL}/api/items" self.media_url = f"{OMEKA_S_BASE_URL}/api/media" self.params = { "key_identity": os.environ.get("OMEKA_S_KEY_IDENTITY"), "key_credential": os.environ.get("OMEKA_S_KEY_CREDENTIAL") } ローカルファイルをアップロードする def upload_media(self, path, item_id): files = {} payload = {} file_data = { 'o:ingester': 'upload', 'file_index': '0', 'o:source': path.name, 'o:item': {'o:id': item_id} } payload.update(file_data) params = self.params files = [ ('data', (None, json.dumps(payload), 'application/json')), ('file[0]', (path.name, open(path, 'rb'), 'image')) ] media_response = requests.post( self.media_url, params=params, files=files ) # レスポンスを確認 if media_response.status_code == 200: return media_response.json()["o:id"] else: return None IIIF画像をアップロードする 以下のようなIIIF画像のURLを指定して登録します。 https://dl.ndl.go.jp/api/iiif/1288277/R0000030/info.json def upload_media(self, iiif_url, item_id): payload = { 'o:ingester': 'iiif', 'file_index': '0', 'o:source': iiif_url, 'o:item': {'o:id': item_id}, } media_response = requests.post( self.media_url, params=self.params, headers={'Content-Type': 'application/json'}, data=json.dumps(payload) ) # レスポンスを確認 if media_response.status_code == 200: return media_response.json()["o:id"] else: return None まとめ Omeka Sへの画像登録にあたり、参考になりましたら幸いです。 ...

ジオコーディングのライブラリを試す

ジオコーディングのライブラリを試す

概要 ジオコーディングのライブラリを試す機会がありましたので、備忘録です。 対象 今回は、以下のような文字列を対象にしてみます。 岡山市旧御野郡金山寺村。現在の岡山市金山寺。市の中心部からは直線で北方約一〇キロを隔てた金山の中腹にある。 ツール1: Jageocoder - A Python Japanese geocoder まず以下の「Jageocoder」を試します。 https://t-sagara.github.io/jageocoder/ ソースコードの例は以下です。 import json import jageocoder jageocoder.init(url='https://jageocoder.info-proto.com/jsonrpc') results = jageocoder.search('岡山市旧御野郡金山寺村。現在の岡山市金山寺。市の中心部からは直線で北方約一〇キロを隔てた金山の中腹にある。') print(json.dumps(results, indent=2, ensure_ascii=False)) 以下の結果が得られました。 { "matched": "岡山市", "candidates": [ { "id": 197677508, "name": "岡山市", "x": 133.91957092285156, "y": 34.65510559082031, "level": 3, "priority": 1, "note": "geoshape_city_id:33100A2009/jisx0402:33100/jisx0402:33201", "fullname": [ "岡山県", "岡山市" ] } ] } 設定の問題かもしれませんが、岡山市までの情報が得られました。 なお、以下のページでウェブUI経由で試すこともできました。 https://jageocoder.info-proto.com/ ツール2: GeoNLP 以下のページでウェブUI経由で試すことができました。 https://geonlp.ex.nii.ac.jp/jageocoder/demo/ GeoNLPも内部的にはjageocoderを使用しているとのことで、同様の結果が得られました。 また、以下の「テキストジオタギング(GeoNLP)デモ」も試してみました。 https://geonlp.ex.nii.ac.jp/demo/ 入力テキストから複数の地名が抽出されました。 ツール3: Google Maps Platform API 最後に、Google Maps Platform APIを使用してみます。 https://developers.google.com/maps?hl=ja import requests import os from dotenv import load_dotenv load_dotenv(verbose=True) def geocode_address(address, api_key): url = "https://maps.googleapis.com/maps/api/geocode/json" params = { "address": address, "key": api_key, "language": "ja" # 日本語で返却されるように設定 } response = requests.get(url, params=params) if response.status_code == 200: data = response.json() if data['status'] == "OK": result = data['results'][0] location = result['geometry']['location'] print(f"Address: {result['formatted_address']}") print(f"Latitude: {location['lat']}, Longitude: {location['lng']}") else: print(f"Error: {data['status']}") else: print(f"HTTP Error: {response.status_code}") # 使用例 API_KEY = os.getenv("API_KEY") address = "岡山市旧御野郡金山寺村。現在の岡山市金山寺。市の中心部からは直線で北方約一〇キロを隔てた金山の中腹にある。" geocode_address(address, API_KEY) 結果、以下が得られました。 ...

LLMに関するメモ

LLMに関するメモ

概要 LLMに関するツールについて、備忘録です。 LangChain https://www.langchain.com/ 以下のように説明されていました。 LangChain is a composable framework to build with LLMs. LangGraph is the orchestration framework for controllable agentic workflows. LlamaIndex https://docs.llamaindex.ai/en/stable/ 以下のように説明されていました。 LlamaIndex is a framework for building context-augmented generative AI applications with LLMs including agents and workflows. LangChain と LlamaIndex gpt-4oの回答は以下でした。 LangChainとLlamaIndexはどちらも、LLMs(大規模言語モデル)を利用したアプリケーション開発を支援するフレームワーク 簡単に調べてみたところ、RAG(Retrieval-Augmented Generation)を行う際には、LlamaIndexがより簡単に使用できるようでした。 Ollama https://github.com/ollama/ollama 以下のように説明されていました。 Get up and running with Llama 3.2, Mistral, Gemma 2, and other large language models. ...

GakuNin RDMのAPIを使って、ファイルのアップロードなどを行う

GakuNin RDMのAPIを使って、ファイルのアップロードなどを行う

背景 GakuNin RDMのAPIを使って、ファイルのアップロードなどを行う方法の備忘録です。 参考 以下でPAT(パーソナルアクセストークン)の取得方法などを説明しています。 また以下では、OAuth (Open Authorization)を使った方法を紹介しています。Webアプリなどから使用される場合には、こちらが参考になりましたら幸いです。 方法 nbdevを使って、以下のリポジトリを作成しました。 https://github.com/nakamura196/grdm-tools 以下でドキュメントを確認できます。 https://nakamura196.github.io/grdm-tools/ プロバイダ(osfstorage)とフォルダのID(6735a92e6dc8e1001062ac08)は変更する必要がありますが、以下のようなスクリプトにより、特定のフォルダにファイルをアップロードできます。 from grdm_tools.api import GrdmClient import os client = GrdmClient( token=os.environ.get('GRDM_TOKEN') ) project_id = "ys86g" file_path = "./sample.png" url = f"https://files.rdm.nii.ac.jp/v1/resources/{project_id}/providers/osfstorage/6735a92e6dc8e1001062ac08/?kind=file" client.upload_file(file_path, url) ソースコードは以下からご確認いただけます。 https://nakamura196.github.io/grdm-tools/api.html#grdmclient.upload_file まとめ GakuNin RDMのAPI利用にあたり、参考になりましたら幸いです。

YOLOv11xと日本古典籍くずし字データセットを用いた文字の検出モデルの構築

YOLOv11xと日本古典籍くずし字データセットを用いた文字の検出モデルの構築

概要 YOLOv11xと日本古典籍くずし字データセットを用いた文字の検出モデルの構築を行う機会がありましたので、備忘録です。 http://codh.rois.ac.jp/char-shape/ 参考 過去に、YOLOv5を用いて同様のことを行いました。以下のspacesで動作デモや学習済みモデルをご確認いただけます。 https://huggingface.co/spaces/nakamura196/yolov5-char 以下は、「国宝 金沢文庫文書データベース」の公開画像に対する適用例です。 YOLOv11を用いることで、文字検出の精度向上を狙うことが目的です。 データセットの作成 「日本古典籍くずし字データセット」をダウンロードし、yoloで求められる形式に整形します。 形式は以下などで確認することができます。 https://github.com/ultralytics/hub/tree/main/example_datasets/coco8 画像のサイズを1280x1280に設定 以下のUltralytics HUBを使用しました。 https://hub.ultralytics.com/ 以下が学習結果です。 テストデータに対して適用したところ、良い精度がでる画像データ(例:「『源氏物語』(東京大学総合図書館所蔵)」)もあれば、 あまり良い精度がでない画像データ(例:「国宝 金沢文庫文書データベース」)もありました。 画像のサイズを640x640に設定 エポック数が10の場合 エポック数が10の場合は、エポック数が10の場合、学習が完全に収束していない可能性がありました。 一方、エポック数が少ないにも関わらず、テストデータに対しては、1280x1280のものより良い結果を示すようでした。 エポック数が100の場合 from ultralytics import YOLO # YOLOv8の分類モデルをロード model = YOLO('yolo11x.pt') # Nanoサイズの分類モデル # データセットとトレーニング設定 model.train( data='/home/mdxuser/yolo/chars_640_split/data.yaml', # データセットのパス epochs=100, # エポック数 # imgsz=224, # 入力画像サイズ batch=24 # バッチサイズ(オプション) ) バッチサイズが16(デフォルト)では、GPUメモリの使用率が低く、32に設定すると、OutOfMemoryErrorになってしまいました。 torch.OutOfMemoryError: CUDA out of memory. Tried to allocate 4.49 GiB. GPU 0 has a total capacity of 39.39 GiB of which 4.46 GiB is free. Including non-PyTorch memory, this process has 34.92 GiB memory in use. Of the allocated memory 31.86 GiB is allocated by PyTorch, and 2.49 GiB is reserved by PyTorch but unallocated. If reserved but unallocated memory is large try setting PYTORCH_CUDA_ALLOC_CONF=expandable_segments:True to avoid fragmentation. See documentation for Memory Management (https://pytorch.org/docs/stable/notes/cuda.html#environment-variables) バッチサイズが24 ...

mdx.jpを用いてYOLOv11のクラス分類(くずし字認識)の学習を試す

mdx.jpを用いてYOLOv11のクラス分類(くずし字認識)の学習を試す

概要 mdx.jpを用いてYOLOv11のクラス分類(くずし字認識)の学習を行う機会がありましたので、備忘録です。 データセット 以下の「くずし字データセット」を対象にします。 http://codh.rois.ac.jp/char-shape/book/ データセットの作成 yoloの形式に合致するようにデータセットを整形します。まず、書名ごとに分かれているデータをフラットにマージします。 #| export class Classification: def create_dataset(self, input_file_path, output_dir): # "../data/*/characters/*/*.jpg" files = glob(input_file_path) # output_dir = "../data/dataset" for file in tqdm(files): cls = file.split("/")[-2] output_file = f"{output_dir}/{cls}/{file.split('/')[-1]}" if os.path.exists(output_file): continue # print(f"Copying {file} to {output_file}") os.makedirs(f"{output_dir}/{cls}", exist_ok=True) shutil.copy(file, output_file) 次に、以下のようなスクリプトにより、データセットを分割します。 def split(self, input_dir, output_dir, train_ratio = 0.7, val_ratio = 0.15): if os.path.exists(output_dir): shutil.rmtree(output_dir) # クラスディレクトリの取得 classes = [d for d in os.listdir(input_dir) if os.path.isdir(os.path.join(input_dir, d))] # データを分割して保存 for cls in tqdm(classes): class_dir = os.path.join(input_dir, cls) files = [os.path.join(class_dir, f) for f in os.listdir(class_dir) if os.path.isfile(os.path.join(class_dir, f))] # シャッフルして分割 random.shuffle(files) train_end = int(len(files) * train_ratio) val_end = int(len(files) * (train_ratio + val_ratio)) train_files = files[:train_end] val_files = files[train_end:val_end] test_files = files[val_end:] # 保存ディレクトリを作成 for split, split_files in zip(["train", "val", "test"], [train_files, val_files, test_files]): split_dir = os.path.join(output_dir, split, cls) os.makedirs(split_dir, exist_ok=True) # ファイルをコピー for file in split_files: shutil.copy(file, os.path.join(split_dir, os.path.basename(file))) print("データの分割が完了しました。") 結果、1,086,326画像のデータセットが作成されました。 ...

Omeka Sの特定のvocabularyのプロパティ一覧を取得する

Omeka Sの特定のvocabularyのプロパティ一覧を取得する

概要 Omeka Sの特定のvocabularyのプロパティ一覧を取得する方法です。 方法 以下を対象にします。 https://uta.u-tokyo.ac.jp/uta/api/properties?vocabulary_id=5 次のプログラムにより、プロパティ一覧をMS Excelに書き込みます。 import pandas as pd import requests url = "https://uta.u-tokyo.ac.jp/uta/api/properties?vocabulary_id=5" page = 1 data_list = [] while 1: response = requests.get(url + "&page=" + str(page)) data = response.json() if len(data) == 0: break data_list.extend(data) page += 1 remove_keys = ["@context", "@id", "@type", "o:vocabulary", "o:id", "o:local_name"] for data in data_list: for key in remove_keys: if key in data: del data[key] # DataFrameに変換 df = pd.DataFrame(data_list) df.to_excel("archiveshub.xlsx", index=False) 結果 以下のようなMS Excelが得られます。 o:label o:comment o:term Maintenance Agency A repository responsible for the maintenance of the archival finding aid. archiveshub:maintenanceAgency Is Maintenance Agency Of An archival finding aid for which the repository is responsible for the maintenance. archiveshub:isMaintenanceAgencyOf Encoded As An EAD document that is an encoding of the archival finding aid. archiveshub:encodedAs Encoding Of An archival finding aid of which the EAD document is an encoding. archiveshub:encodingOf Administers A resource which the agent manages. archiveshub:administers Is Administered By An agent that manages the resource. archiveshub:isAdministeredBy Provides Access To A resource to which the agent provides access. archiveshub:providesAccessTo Access Provided By An agent that provides access to the resource. archiveshub:accessProvidedBy Is Publisher Of A resource which the agent makes available. archiveshub:isPublisherOf Level An indicator of the part of an archival collection constituted by an archival resource. archiveshub:level Is Represented By A resource which represents the archival resource, such as an image of a text page, a transcription of text, an audio or video clip, or an aggregation of such resources. archiveshub:isRepresentedBy Origination An agent responsible for the creation or accumulation of the archival resource. archiveshub:origination Is Origination Of An archival resource for which the agent is responsible for the creation or accumulation. archiveshub:isOriginationOf Has Biographical History A narrative or chronology that places archival materials in context by providing information about their creator(s). archiveshub:hasBiographicalHistory Is Biographical History For An archival resource that the narrative or chronology places in context by providing information about their creator(s). archiveshub:isBiographicalHistoryFor Associated With A concept adjudged by a cataloguer to have an association with an archival resource which they consider useful for the purposes of discovering that resource. archiveshub:associatedWith Members Members archiveshub:members Country Code The ISO 3166-1 code for the country of the repository. archiveshub:countryCode Maintenance Agency Code The ISO 15511 code for the repository. archiveshub:maintenanceAgencyCode Body A literal representation of the content of the document. archiveshub:body Date created or accumulated The date, represented as a string, of a time interval during which the archival resource was created or accumulated. archiveshub:dateCreatedAccumulatedString Date created or accumulated The date, represented as a typed literal, of a time interval during which the archival resource was created or accumulated. archiveshub:dateCreatedAccumulated Date created or accumulated (start) The start date, represented as a typed literal, of a time interval during which the archival resource was created or accumulated. archiveshub:dateCreatedAccumulatedStart Date created or accumulated (end) The end date, represented as a typed literal, of a time interval during which the archival resource was created or accumulated. archiveshub:dateCreatedAccumulatedEnd Date of Birth The date of birth of the person. archiveshub:dateBirth Date of Death The date of death of the person. archiveshub:dateDeath Extent The size of the archival resource. archiveshub:extent Custodial History Custodial History archiveshub:custodialHistory Acquisitions Acquisitions archiveshub:acquisitions Scope and Content Scope and Content archiveshub:scopecontent Appraisal Appraisal archiveshub:appraisal Accruals Accruals archiveshub:accruals Access Restrictions Access Restrictions archiveshub:accessRestrictions Use Restrictions Use Restrictions archiveshub:useRestrictions Physical and Technical Requirements Physical and Technical Requirements archiveshub:physicalTechnicalRequirements Other Finding Aids Other Finding Aids archiveshub:otherFindingAids Location of Originals Location of Originals archiveshub:locationOfOriginals Alternate Forms Available Alternate Forms Available archiveshub:alternateFormsAvailable Related Material Related Material archiveshub:relatedMaterial Bibliography Bibliography archiveshub:bibliography Note Note archiveshub:note Processing Processing archiveshub:processing Name Name archiveshub:name Dates Dates archiveshub:dates Location Location archiveshub:location Other Other archiveshub:other Surname The surname of a person who is the focus of the concept archiveshub:surname Forename The forename of a person who is the focus of the concept archiveshub:forename Title The title of a person who is the focus of the concept archiveshub:title Epithet Epithet archiveshub:epithet Archival Box A number of archival boxes archiveshub:archbox Metre A number of metres archiveshub:metre Cubic Metre A number of cubic metres archiveshub:cubicmetre Folder A number of folders archiveshub:folder Envelope A number of envelopes archiveshub:envelope Volume A number of volumes archiveshub:volume File A number of files archiveshub:file Item A number of items archiveshub:item Page A number of pages archiveshub:page Paper A number of papers archiveshub:paper まとめ Omeka Sの利用にあたり、参考になりましたら幸いです。 ...

Google Cloud Vision APIを用いて、単一ページから構成される透明テキスト付きPDFを作成する

Google Cloud Vision APIを用いて、単一ページから構成される透明テキスト付きPDFを作成する

概要 PDFを対象に、Google Cloud Vision APIを使って、透明テキスト付きPDFを作成する機会がありましたので、備忘録です。 以下、simpleで検索した例です。 背景 今回は単一ページから構成されるPDFを対象とします。 手順 画像の作成 OCRの対象とする画像を作成します。 デフォルトの設定だとボヤけた画像ができてしまったので、解像度を2倍に設定し、また後述するプロセスで、解像度を考慮した位置合わせを実施しています。 以下をインストールします。 PyMuPDF Pillow import fitz # PyMuPDF from PIL import Image import json from tqdm import tqdm import io # 入力PDFファイルと出力PDFファイル input_pdf_path = "./input.pdf" # 単一ページのPDFファイル output_pdf_path = "./output.pdf" # 入力PDFファイルを開き、単一ページを読み込み pdf_document = fitz.open(input_pdf_path) page = pdf_document[0] # 最初のページを選択 # ページを画像としてレンダリングし、OCRでテキストを抽出 # pix = page.get_pixmap() # 解像度300 DPIでレンダリング zoom = 2.0 # 解像度を上げるためにズーム設定 mat = fitz.Matrix(zoom, zoom) pix = page.get_pixmap(matrix=mat) img = Image.open(io.BytesIO(pix.tobytes("png"))) img.save("./image.png") Google Cloud Vision API 出力された画像を対象に、Google Cloud Vision APIを適用します。 { "textAnnotations": [ { "boundingPoly": { "vertices": [ { "x": 141, "y": 152 }, { "x": 1082, "y": 152 }, { "x": 1082, "y": 1410 }, { "x": 141, "y": 1410 } ] }, "description": "Sample PDF...", "locale": "la" }, { "boundingPoly": { "vertices": [ { "x": 141, "y": 159 }, { "x": 363, "y": 156 }, { "x": 364, "y": 216 }, { "x": 142, "y": 219 } ] }, "description": "Sample" }, { "boundingPoly": { "vertices": [ { "x": 382, "y": 156 }, { "x": 506, "y": 154 }, { "x": 507, "y": 213 }, { "x": 383, "y": 215 } ] }, "description": "PDF" }, ... 出力結果として得られるJSONファイルを./google_ocr.jsonといった名前で保存します。 ...

ArchivematicaのMETSファイルの内容を可視化するPythonライブラリ

ArchivematicaのMETSファイルの内容を可視化するPythonライブラリ

概要 ArchivematicaのMETSファイルの内容を可視化するPythonライブラリを作成しました。 例えば以下のように、AIPの作成過程で行われた処理(premis:event)の集計結果などを可視化します。 背景 以下の記事で、ArchivematicaのMETSファイルを人間に優しい方法で探索するためのウェブアプリケーションであるMETSFlaskを紹介しました。 今回作成したものは、このMETSFlaskで提供されている機能を、Flask以外からも利用しやすいようにライブラリ化したものです。 リポジトリ 以下で公開しています。README.mdファイルに使用方法を記載しています。 https://github.com/nakamura196/mets_tools GitHub Pagesでもドキュメントを公開しています。 https://nakamura196.github.io/mets_tools/ まとめ ArchivematicaおよびAIPの利用にあたり、参考になりましたら幸いです。

iiif-prezi3を使って、動画に関するIIIF v3マニフェストを作成する

iiif-prezi3を使って、動画に関するIIIF v3マニフェストを作成する

概要 iiif-prezi3を使って、動画に関するIIIF v3マニフェストを作成する機会がありましたので、備忘録です。 https://github.com/iiif-prezi/iiif-prezi3 参考 IIIFマニフェストファイルの例、およびiiif-prezi3を使った実装例は、IIIF Cookbookで公開されています。 以下、動画に関するIIIF v3マニフェストを作成する例です。 https://iiif.io/api/cookbook/recipe/0003-mvm-video/ iiif-prezi3を使った実装例は以下で公開されています。 https://iiif-prezi.github.io/iiif-prezi3/recipes/0003-mvm-video/ from iiif_prezi3 import Manifest, AnnotationPage, Annotation, ResourceItem, config config.configs['helpers.auto_fields.AutoLang'].auto_lang = "en" manifest = Manifest(id="https://iiif.io/api/cookbook/recipe/0003-mvm-video/manifest.json", label="Video Example 3") canvas = manifest.make_canvas(id="https://iiif.io/api/cookbook/recipe/0003-mvm-video/canvas") anno_body = ResourceItem(id="https://fixtures.iiif.io/video/indiana/lunchroom_manners/high/lunchroom_manners_1024kb.mp4", type="Video", format="video/mp4") anno_page = AnnotationPage(id="https://iiif.io/api/cookbook/recipe/0003-mvm-video/canvas/page") anno = Annotation(id="https://iiif.io/api/cookbook/recipe/0003-mvm-video/canvas/page/annotation", motivation="painting", body=anno_body, target=canvas.id) hwd = {"height": 360, "width": 480, "duration": 572.034} anno_body.set_hwd(**hwd) hwd["width"] = 640 canvas.set_hwd(**hwd) anno_page.add_item(anno) canvas.add_item(anno_page) print(manifest.json(indent=2)) まとめ 他にも多くのサンプルや実装例が公開されています。参考になりましたら幸いです。

pythonを使ってcvatのデータを操作する

pythonを使ってcvatのデータを操作する

概要 pythonを使ってcvatのデータを操作する機会がありましたので、備忘録です。 セットアップ 今回はDockerを使って起動します。 git clone https://github.com/cvat-ai/cvat --depth 1 cd cvat docker compose up -d アカウントの作成 http://localhost:8080にアクセスして、アカウントを作成します。 Pythonによる操作 まず、以下のライブラリをインストールします。 pip install cvat-sdk アカウントの情報を.envに記載します。 host=http://localhost:8080 username= password= インスタンスの作成 import os from dotenv import load_dotenv import json from cvat_sdk.api_client import Configuration, ApiClient, models, apis, exceptions from cvat_sdk.api_client.models import PatchedLabeledDataRequest import requests from io import BytesIO load_dotenv(verbose=True) host = os.environ.get("host") username = os.environ.get("username") password = os.environ.get("password") configuration = Configuration( host=host, username=username, password=password ) api_client = ApiClient(configuration) タスクの作成 task_spec = { 'name': '文字の検出', "labels": [{ "name": "文字", "color": "#ff00ff", "attributes": [ { "name": "score", "mutable": True, "input_type": "text", "values": [""] } ] }], } try: # Apis can be accessed as ApiClient class members # We use different models for input and output data. For input data, # models are typically called like "*Request". Output data models have # no suffix. (task, response) = api_client.tasks_api.create(task_spec) except exceptions.ApiException as e: # We can catch the basic exception type, or a derived type print("Exception when trying to create a task: %s\n" % e) print(task) 以下のような結果が得られます。 ...

GUIE(Google Universal Image Embedding)の学習済みモデルを使用して類似画像検索を行う

GUIE(Google Universal Image Embedding)の学習済みモデルを使用して類似画像検索を行う

概要 GUIE(Google Universal Image Embedding)の学習済みモデルを使用して類似画像検索を行うサンプルプログラムを作成しました。以下からノートブックにアクセスいただけます。 https://colab.research.google.com/github/nakamura196/000_tools/blob/main/guie_sample.ipynb 参考 以下のノートブックの出力ファイルであるモデルを利用しています。 https://www.kaggle.com/code/francischen1991/tf-baseline-v2-submission 使用上の注意 Kaggleのアカウント ノートブックの実行には、Kaggleのアカウントが必要です。Kaggle API Keyを取得して、それらをシークレットに登録します。 以下が表示された場合には、「アクセスを許可」を押してください。 また、Kaggleからモデルをダウンロードする部分で、一定時間待つ必要があります。 実行結果 以下のように、類似画像検索の結果が表示されます。 ジャパンサーチで公開されているギャラリー「祇園祭」の一部画像を利用しています。 https://jpsearch.go.jp/gallery/ndl-kbjG03kKgjp メモ torchvisionのバージョン Google Colabにデフォルトでインストールされているtorchvisionではうまく動作せず、バージョンを0.12.0あたりまで下げる必要がありました。 まとめ 今後、Elasticsearchの近似最近傍探索を使って、今回作成したベクトルに対する検索を行いたいと思います。 https://www.elastic.co/guide/en/elasticsearch/reference/current/knn-search.html 参考になりましたら幸いです。

画像ファイルに対してGoogle Cloud Visionを適用して、IIIFマニフェストおよびTEI/XMLファイルを作成する

画像ファイルに対してGoogle Cloud Visionを適用して、IIIFマニフェストおよびTEI/XMLファイルを作成する

概要 画像ファイルに対してGoogle Cloud Visionを適用して、IIIFマニフェストおよびTEI/XMLファイルを作成するライブラリを作成しました。 https://github.com/nakamura196/iiif_tei_py 本ライブラリの使用方法を説明します。 使用方法 以下で使い方などを確認できます。 https://nakamura196.github.io/iiif_tei_py/ ライブラリのインストール GitHubのリポジトリから、ライブラリをインストールします。 pip install https://github.com/nakamura196/iiif_tei_py GCのサービスアカウントの作成 以下の記事などを参考に、GC(Google Cloud)のサービスアカウントキー(JSONファイル)をダウンロードします。 https://book.st-hakky.com/data-science/data-science-gcp-vision-api-setting/ そして、以下のような.envファイルを作成します。 GOOGLE_APPLICATION_CREDENTIALS=your-google-credentials.json 実行 入力サンプル画像として、IIIF Cookbookでも使用されている以下の画像を使用します。 https://iiif.io/api/presentation/2.1/example/fixtures/resources/page1-full.png 以下のようなファイルを作成して実行します。 from iiif_tei_py.core import CoreClient cred_path = CoreClient.load_env() url = "https://iiif.io/api/presentation/2.1/example/fixtures/resources/page1-full.png" output_tei_xml_file_path = "./tmp/01/output.xml" CoreClient.create_tei_xml_with_gocr(url, output_tei_xml_file_path, cred_path, title="Sample") 上記の例では、IIIFマニフェストファイルが./tmp/01/output.jsonに、TEI/XMLファイルが./tmp/01/output.xmlに作成されます。 結果の確認 IIIF IIIFマニフェストファイルをMiradorで表示した例が以下です。 JSONファイルの内容は以下です。 { "@context": "http://iiif.io/api/presentation/3/context.json", "id": "http://example.org/iiif/abc/manifest", "label": { "none": [ "Sample" ] }, "type": "Manifest", "items": [ { "id": "http://example.org/iiif/abc/canvas/p1", "type": "Canvas", "label": { "none": [ "[1]" ] }, "height": 1800, "width": 1200, "items": [ { "id": "http://example.org/iiif/abc/annotation/p0001-image", "type": "AnnotationPage", "items": [ { "body": { "id": "https://iiif.io/api/presentation/2.1/example/fixtures/resources/page1-full.png", "type": "Image", "format": "image/jpeg", "height": 1800, "width": 1200 }, "id": "http://example.org/iiif/abc/annotation/p0001-image/anno", "type": "Annotation", "motivation": "painting", "target": "http://example.org/iiif/abc/canvas/p1" } ] } ], "annotations": [ { "id": "http://example.org/iiif/abc/canvas/p1/curation", "type": "AnnotationPage", "items": [ { "body": { "type": "TextualBody", "value": "[00001] Top", "format": "text/plain" }, "id": "http://example.org/iiif/abc/canvas/p1#xywh=245/69/94/52", "type": "Annotation", "motivation": "commenting", "target": "http://example.org/iiif/abc/canvas/p1#xywh=245,69,94,52" }, { "body": { "type": "TextualBody", "value": "[00002] of", "format": "text/plain" }, "id": "http://example.org/iiif/abc/canvas/p1#xywh=355/69/49/52", "type": "Annotation", "motivation": "commenting", "target": "http://example.org/iiif/abc/canvas/p1#xywh=355,69,49,52" }, { "body": { "type": "TextualBody", "value": "[00003] First", "format": "text/plain" }, "id": "http://example.org/iiif/abc/canvas/p1#xywh=420/69/112/54", "type": "Annotation", "motivation": "commenting", "target": "http://example.org/iiif/abc/canvas/p1#xywh=420,69,112,54" }, { "body": { "type": "TextualBody", "value": "[00004] Page", "format": "text/plain" }, "id": "http://example.org/iiif/abc/canvas/p1#xywh=547/70/134/53", "type": "Annotation", "motivation": "commenting", "target": "http://example.org/iiif/abc/canvas/p1#xywh=547,70,134,53" }, { "body": { "type": "TextualBody", "value": "[00005] to", "format": "text/plain" }, "id": "http://example.org/iiif/abc/canvas/p1#xywh=697/71/50/52", "type": "Annotation", "motivation": "commenting", "target": "http://example.org/iiif/abc/canvas/p1#xywh=697,71,50,52" }, { "body": { "type": "TextualBody", "value": "[00006] Display", "format": "text/plain" }, "id": "http://example.org/iiif/abc/canvas/p1#xywh=763/71/189/54", "type": "Annotation", "motivation": "commenting", "target": "http://example.org/iiif/abc/canvas/p1#xywh=763,71,189,54" }, { "body": { "type": "TextualBody", "value": "[00007] Middle", "format": "text/plain" }, "id": "http://example.org/iiif/abc/canvas/p1#xywh=296/593/163/164", "type": "Annotation", "motivation": "commenting", "target": "http://example.org/iiif/abc/canvas/p1#xywh=296,593,163,164" }, { "body": { "type": "TextualBody", "value": "[00008] of", "format": "text/plain" }, "id": "http://example.org/iiif/abc/canvas/p1#xywh=433/733/76/76", "type": "Annotation", "motivation": "commenting", "target": "http://example.org/iiif/abc/canvas/p1#xywh=433,733,76,76" }, { "body": { "type": "TextualBody", "value": "[00009] First", "format": "text/plain" }, "id": "http://example.org/iiif/abc/canvas/p1#xywh=484/786/123/124", "type": "Annotation", "motivation": "commenting", "target": "http://example.org/iiif/abc/canvas/p1#xywh=484,786,123,124" }, { "body": { "type": "TextualBody", "value": "[00010] Page", "format": "text/plain" }, "id": "http://example.org/iiif/abc/canvas/p1#xywh=584/889/128/129", "type": "Annotation", "motivation": "commenting", "target": "http://example.org/iiif/abc/canvas/p1#xywh=584,889,128,129" }, { "body": { "type": "TextualBody", "value": "[00011] on", "format": "text/plain" }, "id": "http://example.org/iiif/abc/canvas/p1#xywh=691/998/80/80", "type": "Annotation", "motivation": "commenting", "target": "http://example.org/iiif/abc/canvas/p1#xywh=691,998,80,80" }, { "body": { "type": "TextualBody", "value": "[00012] Angle", "format": "text/plain" }, "id": "http://example.org/iiif/abc/canvas/p1#xywh=749/1057/148/149", "type": "Annotation", "motivation": "commenting", "target": "http://example.org/iiif/abc/canvas/p1#xywh=749,1057,148,149" }, { "body": { "type": "TextualBody", "value": "[00013] Bottom", "format": "text/plain" }, "id": "http://example.org/iiif/abc/canvas/p1#xywh=203/1686/175/55", "type": "Annotation", "motivation": "commenting", "target": "http://example.org/iiif/abc/canvas/p1#xywh=203,1686,175,55" }, { "body": { "type": "TextualBody", "value": "[00014] of", "format": "text/plain" }, "id": "http://example.org/iiif/abc/canvas/p1#xywh=398/1689/51/53", "type": "Annotation", "motivation": "commenting", "target": "http://example.org/iiif/abc/canvas/p1#xywh=398,1689,51,53" }, { "body": { "type": "TextualBody", "value": "[00015] First", "format": "text/plain" }, "id": "http://example.org/iiif/abc/canvas/p1#xywh=466/1689/109/54", "type": "Annotation", "motivation": "commenting", "target": "http://example.org/iiif/abc/canvas/p1#xywh=466,1689,109,54" }, { "body": { "type": "TextualBody", "value": "[00016] Page", "format": "text/plain" }, "id": "http://example.org/iiif/abc/canvas/p1#xywh=593/1690/130/54", "type": "Annotation", "motivation": "commenting", "target": "http://example.org/iiif/abc/canvas/p1#xywh=593,1690,130,54" }, { "body": { "type": "TextualBody", "value": "[00017] to", "format": "text/plain" }, "id": "http://example.org/iiif/abc/canvas/p1#xywh=740/1692/51/54", "type": "Annotation", "motivation": "commenting", "target": "http://example.org/iiif/abc/canvas/p1#xywh=740,1692,51,54" }, { "body": { "type": "TextualBody", "value": "[00018] Display", "format": "text/plain" }, "id": "http://example.org/iiif/abc/canvas/p1#xywh=808/1693/190/54", "type": "Annotation", "motivation": "commenting", "target": "http://example.org/iiif/abc/canvas/p1#xywh=808,1693,190,54" } ] } ] } ] } TEI また、TEI/XMLファイルをOxygen XML Editorで表示した例が以下です。 ...

Pythonを使ってRDFデータをDydraに登録する

Pythonを使ってRDFデータをDydraに登録する

概要 Pythonを使ってRDFデータをDydraに登録するライブラリを作成しました。 https://github.com/nakamura196/dydra-py 中途半端な実装が含まれますが、お役に立つ場面があれば幸いです。 工夫 インポートは以下で行なっています。 https://github.com/nakamura196/dydra-py/blob/main/dydra_py/api.py#L55 以下のように、SPARQLのINSERT DATA オペレーションを使用しています。 def import_by_file(self, file_path, format, graph_uri=None, verbose=False): """ Imports RDF data from a file into the Dydra store. Args: file_path (str): The path to the RDF file to import. format (str): The format of the RDF file (e.g., 'xml', 'nt'). graph_uri (str, optional): URI of the graph where data will be inserted. Defaults to None. """ headers = { "Authorization": f"Bearer {self.api_key}", "Content-Type": "application/sparql-update" } files = self._chunk_rdf_file(file_path, format=format) print("Number of chunks: ", len(files)) for file in tqdm(files): # RDFファイルの読み込み graph = rdflib.Graph() graph.parse(file, format=format) # フォーマットはファイルに応じて変更 nt_data = graph.serialize(format='nt') if graph_uri is None: query = f""" INSERT DATA {{ {nt_data} }} """ else: query = f""" INSERT DATA {{ GRAPH <{graph_uri}> {{ {nt_data} }} }} """ if verbose: print(query) response = requests.post(self.endpoint, data=query, headers=headers) if response.status_code == 200: print("Data successfully inserted.") else: print(f"Error: {response.status_code} {response.text}") 工夫 工夫した点として、サイズが大きいRDFファイルを一度にアップロードした際、プロセスが途中で止まってしまうケースがありました。 ...

vsdxファイルからrdfファイルを作成するライブラリ

vsdxファイルからrdfファイルを作成するライブラリ

概要 vsdxファイルからrdfファイルを作成するライブラリを作成したので、備忘録です。 https://github.com/nakamura196/vsdx-rdf 背景 以下の記事などで、Microsoft Visioを使ってRDFデータを作成する方法を検討しています。 上記の記事で、「本ライブラリについては別の記事で紹介予定です。」に対応する記事となります。 使い方 以下を参考にしてください。 https://nakamura196.github.io/vsdx-rdf/ Google Colab 本ライブラリを試すためのノートブックを用意しました。 https://colab.research.google.com/github/nakamura196/000_tools/blob/main/vsdxファイルからrdfファイルを作成するプログラム.ipynb 実行後、/content/outputにttlファイルや、pngファイルが出力されます。 まとめ 未熟な点が多いかと思いますが、参考になりましたら幸いです。

OAI-PMHリポジトリからPythonでレコードを全件取得する

OAI-PMHリポジトリからPythonでレコードを全件取得する

OAI-PMHリポジトリからPythonでレコードを全件取得するスクリプトです。参考になりましたら幸いです。 import requests from requests import Request import xml.etree.ElementTree as ET # エンドポイントの定義 base_url = 'https://curation.library.t.u-tokyo.ac.jp/oai' # OAI-PMH リクエストの初回実行 params = { 'verb': 'ListRecords', 'metadataPrefix': 'curation', 'set': '97590' } response = requests.get(base_url, params=params) # 初回リクエストの準備 req = Request('GET', base_url,params=params) prepared_req = req.prepare() print("Sending request to:", prepared_req.url) # URLを出力 root = ET.fromstring(response.content) data = [] # 全データの取得 while True: # レコードの処理 for record in root.findall('.//{http://www.openarchives.org/OAI/2.0/}record'): identifier = record.find('.//{http://www.openarchives.org/OAI/2.0/}identifier').text print(f'Record ID: {identifier}') # 他のデータもここで処理可能 data.append(record) # resumptionTokenの取得と次のリクエストの実行 token_element = root.find('.//{http://www.openarchives.org/OAI/2.0/}resumptionToken') if token_element is None or not token_element.text: break # トークンがない場合、ループを終了 params = { 'verb': 'ListRecords', 'resumptionToken': token_element.text } response = requests.get(base_url, params=params) root = ET.fromstring(response.content) print("全件取得が完了しました。") print(len(data))

DrupalのREST APIを使って、複数のコンテンツを一括削除する

DrupalのREST APIを使って、複数のコンテンツを一括削除する

概要 DrupalのREST APIを使って、複数のコンテンツを一括削除する機会がありましたので、備忘録です。 参考 REST APIを使用せずにコンテンツを一括削除する方法として、以下も参考にしてください。 準備 まず、HTTP Basic AuthenticationモジュールとJSON:APIモジュールを有効化します。 さらに、REST resourcesにおいて、DELETEを有効化します。 /admin/config/services/rest 実行例 以下の自作ライブラリを使用します。 https://github.com/nakamura196/drupal_tools 以下でも処理内容をご確認いただけます。 https://nakamura196.github.io/drupal_tools/ インストール pip install git+https://github.com/nakamura196/drupal_tools .envの準備 DRUPAL_URL=http://example.org/drupal DRUPAL_USERNAME=username DRUPAL_PASSWORD=password 実行 以下のように実行します。 item_idsは、field_name(ここでは、field_item_id)に対応する一意の値のリストです。 from drupal_tools.api import DrupalAPIClient import pandas as pd def get_item_ids(): # Load a CSV file containing item ids into a DataFrame. df = pd.read_csv("./uuids.csv") item_ids = [row["asset_uuid"] for _, row in df.iterrows()] return item_ids # Call the function to get the list of item ids. item_ids = get_item_ids() # Load Drupal credentials from a .env file using the DrupalAPIClient. DRUPAL_URL, DRUPAL_USERNAME, DRUPAL_PASSWORD = DrupalAPIClient.load_credentials("../.env") # Create an instance of the DrupalAPIClient with the loaded credentials. drupal = DrupalAPIClient(DRUPAL_URL, DRUPAL_USERNAME, DRUPAL_PASSWORD) field_name = "field_item_id" nids = drupal.get_nids(item_ids, field_name) results = drupal.delete_from_nids(nids) まとめ 不具合等が含まれる可能性がありますので、使用される際は十分にご注意ください。 ...