ホーム 記事一覧 ブック DH週間トピックス 検索 このサイトについて
English
縦書きに対応したText Overlay pluginを導入済みのMiradorのリポジトリ

縦書きに対応したText Overlay pluginを導入済みのMiradorのリポジトリ

概要 縦書きに対応したText Overlay pluginを導入済みのMiradorのリポジトリを更新しました。 https://github.com/nakamura196/mirador-integration-textoverlay 参考 変更元のText Overlay pluginのリポジトリは以下です。 https://github.com/dbmdz/mirador-textoverlay デモ 以下のページで動作内容をご確認いただけます。 https://nakamura196.github.io/mirador-integration-textoverlay/ 画面右上の「Text visible」ボタンを押すと、テキストが表示されます。ロード中のままとなってしまう場合には、ページの再読み込みをしてください。 参考 以下の記事で紹介した方法を使い、Text Overlay pluginをMirador 3に追加しています。 使用例 Text Overlay pluginの使用方法などについては、以下の記事を参考にしてください。 まとめ 今後、テキスト表示にあたり、ロードしたままになってしまう不具合を解消したいと思います。 IIIF画像とテキストの応用にあたり、参考になりましたら幸いです。

URLの引数で指定したIIIFマニフェストに対して、Mirador 3のannotationsプラグインを試す

URLの引数で指定したIIIFマニフェストに対して、Mirador 3のannotationsプラグインを試す

概要 URLの引数で指定したIIIFマニフェストに対して、Mirador 3のannotationsプラグインを試すことができるデモページを用意しました。 https://mirador-annotations.vercel.app/ iiif-contentまたはmanifest引数を使用することで、指定したIIIFマニフェストを対象にすることができます。 https://mirador-annotations.vercel.app/?iiif-content=https://dl.ndl.go.jp/api/iiif/1301543/manifest.json 本記事は、このデモページの作成に関する備忘録です。 背景 Mirador 3向けのアノテーション付与プラグインとして、mirador-annotationsがあります。 https://github.com/ProjectMirador/mirador-annotations 以下の記事で使い方の例を紹介しています。 そして、以下のデモページがすでに用意されていますが、URLの引数にIIIFマニフェストファイルを指定する機能は提供されていません。 https://mirador-annotations.netlify.app/ フォークと修正 URLの引数にIIIFマニフェストファイルを指定する機能の追加にあたり、上記のリポジトリをクローンしました。 https://github.com/nakamura196/mirador-annotations そして、以下の修正を加えました。 https://github.com/nakamura196/mirador-annotations/commit/18848ccb1fa51df821335ed76e7b9f4e974527d0 特に、以下の修正を加えています。 ... var params = new URL(document.location).searchParams; var manifest = params.get('iiif-content') || params.get('manifest') || 'https://iiif.harvardartmuseums.org/manifests/object/299843' var windows = []; if (manifest) { windows.push({ manifestId: manifest }); } ... これは、以下の実装を参考にしています。iiif-contentまたはmanifest引数でIIIFマニフェストファイルを参照するようでした。 https://projectmirador.org/embed/?iiif-content=https://iiif.io/api/cookbook/recipe/0001-mvm-image/manifest.json Vercelへのデプロイ設定 フォークしたリポジトリのソースコードをビルドした結果を、Vercelにデプロイしています。 デプロイにあたり、以下のような修正を加えました。 Output Directory、Install CommandおよびNode.jsのVersionを16.xに変更しています。 まとめ Mirador 3の利用にあたり、参考になりましたら幸いです。

Mirador 3でScroll Viewを使う

Mirador 3でScroll Viewを使う

概要 Mirador 3でScroll Viewを使う方法についての備忘録です。 以下、「鹿児嶋征討記之内 高瀬口河通ノ戦争野津公聯隊旗を取返ス図(国立国会図書館所蔵)」を例としています。 このIIIFマニフェストは3つのキャンバス(画像)から構成されており、通常の表示方法(Single, 単一モード)では、画像ごとに表示されます。 これを3つ繋げて表示することを目指します。 デモ 以下からお試しいただけます。 https://nakamura196.github.io/mirador-multi-image/ IIIFマニフェストファイルについては、国立国会図書館で公開されているIIIFマニフェストファイルを一部変更しています。 変更前 https://dl.ndl.go.jp/api/iiif/1301543/manifest.json 変更後 https://nakamura196.github.io/mirador-multi-image/manifest.json 変更箇所として、今回の記事の目的であるScroll表示と直接関係がありませんが、画像が右から左に表示されるように、"viewingDirection": "right-to-left"を追加しています。 Miradorの設定 Mirador 2では事前設定なしにScroll Viewが使えましたが、Mirador 3のデフォルト設定では、Scroll Viewは無効化されているようでした。 https://projectmirador.org/embed/?iiif-content=https://nakamura196.github.io/mirador-multi-image/manifest.json そこで、Mirador 3の初期設定を以下のように修正します。 https://github.com/nakamura196/mirador-multi-image/blob/main/docs/index.html const config = { id: "mirador", windows: [ { manifestId: "./manifest.json", }, ], language: "ja", window: { sideBarOpenByDefault: true, defaultSideBarPanel: "info", defaultView: "scroll", views: [{ key: "single" }, { key: "gallery" }, { key: "scroll" }], }, }; Mirador.viewer(config); ポイントは、views: [{ key: "single" }, { key: "gallery" }, { key: "scroll" }]です。ここで、Scroll Viewを追加することで、以下のように選択肢として表示されるようになりました。 参考 defaultView未指定時のバグ デフォルト表示を未指定の場合、上記の例ではSingle(単一)表示が使用されますが、その状態からScroll Viewボタンを押すと、表示がうまく切り替わらないケースがありました。 この問題について、上記のように、defaultView: "scroll"を設定しておくことで回避できました。根本的な解決方法は改めて調査したいと思います。 ...

mirador-sync-windowsのMirador 4版のリポジトリを公開しました。

mirador-sync-windowsのMirador 4版のリポジトリを公開しました。

概要 以下の記事で、mirador-sync-windowsのMirador 4(3)版を作成したことを紹介しました。 今回は、本プラグインのリポジトリを公開したので、備忘録です。 リポジトリ 以下で公開しています。 https://github.com/nakamura196/mirador-sync-windows デモページ 以下からお試しいただけます。 https://nakamura196.github.io/mirador-sync-windows/ GitHub Pagesでの公開に向けて、設定した内容は以下です。 webpack 以下のファイルを一部変更しました。 https://github.com/nakamura196/mirador-sync-windows/blob/main/webpack.config.js 具体的には、以下です。publicPathについて、developmentの場合は、相対パスにしました。これにより、basePathによる問題に対処しました。 return { ...config, output: { filename: 'demo.js', path: path.join(__dirname, 'demo/dist'), // publicPath: '/' publicPath: options.mode === "development" ? './' : '/', }, devServer: { hot: true, port: 4444, static: [ './demo/dist/', ], }, devtool: 'eval-source-map', mode: 'development', entry: ['./demo/src/index.js'], plugins: [ ...(config.plugins || []), new HtmlWebpackPlugin({ template: path.join(__dirname, 'demo/src/index.html') }), new ReactRefreshWebpackPlugin(), ], }; GitHub Actions GitHub Actionsを使ったGitHub Pagesの利用にあたり、以下のようなymlファイルを用意しました。 テストがうまくいかず、その部分はコメントアウトしていますが、今後修正したいと思います。 https://github.com/nakamura196/mirador-sync-windows/blob/main/.github/workflows/node.js.yml まとめ 不完全な部分も多いですが、参考になりましたら幸いです。

Mirador 4プラグイン開発:任意の角度で画像を回転する

Mirador 4プラグイン開発:任意の角度で画像を回転する

概要 Mirador 4において、任意の角度で画像を回転するプラグインを作成しました。 https://github.com/nakamura196/mirador-rotation-plugin 以下で挙動をご確認いただけます。 https://nakamura196.github.io/mirador-rotation-plugin/ 背景 Mirador 3向けに本プラグインを開発していましたが、2024/3/15にMirador 4がプレリリースされました。 https://github.com/ProjectMirador/mirador/releases/tag/v4.0.0.alpha-1 Mirador 3の最新版であるv3.3.0は2021年のリリースだったため、使用されているライブラリ等も古くなっていましたが、今回の更新で、開発がしやすくなりました。 工夫 任意の角度で画像を回転するにあたり、Mirador 4をそのまま使うと、以下のように、角度の変更に対して、画像の回転が追いつかないケースがありました。 https://www.youtube.com/watch?v=zJKWCTA9rjw そこで以下の記事で述べたように、画像の回転や拡大・縮小を遅延なく行うための機能を追加したMiradorを使用しています。 具体的には、openseadragonのsetRotationなどで用意されているimmediatelyパラメータをMiradorから設定できるようにしました。 https://openseadragon.github.io/docs/OpenSeadragon.Viewport.html#setRotation ! 今回はMirador本体にも手を加えましたが、プラグイン側でこのような設定がすでにできるかもしれません。引き続き調査したいと思います。 参考 90度単位で画像を回転させるプラグインとしては、以下もあります。 https://github.com/ProjectMirador/mirador-image-tools こちらは回転だけでなく、さまざまな画像を操作を可能にします。 まとめ Miradorの利用にあたり、参考になりましたら幸いです。

カスタマイズしたMirador 4をnpmパッケージとして公開する

カスタマイズしたMirador 4をnpmパッケージとして公開する

概要 カスタマイズしたMirador 4をnpmパッケージとして公開する機会がありましたので、備忘録です。 Fork 以下の公式サイトからリポジトリをForkします。 https://github.com/projectmirador/mirador 以下のようになります。 ブランチを作成する クローンし、ブランチを作成します。 git clone https://github.com/nakamura196/mirador cd mirador git checkout -b feature-add-immediately-property 以下のように出力されます。 Switched to a new branch 'feature-add-immediately-property' 開発 以下で紹介したような改修を加えます。 テスト テストして、問題がないか確認します。 pnpm test コミット git add . git commit -a -m "feat: add immediately property" マージ masterブランチに戻って、feature-add-immediately-propertyの内容をマージする git checkout master git merge feature-add-immediately-property push masterブランチの変更内容をpushしておきます。 git push publish 以下のコマンドにより、ローカルの変更を一時的に無視するようにします。(他に良い方法がありそうです…) git update-index --assume-unchanged package.json パッケージ名を別名に変更します。 { "name": "@nakamura196/mirador", "version": "4.0.0-alpha.3", "description": "An open-source, web-based 'multi-up' viewer that supports zoom-pan-rotate functionality, ability to display/compare simple images, and images with annotations.", "main": "dist/cjs/src/index.js", "module": "dist/es/src/index.js", "files": [ "dist" ], "sideEffects": false, ... publishします。 ...

Mirador 4の拡大・縮小・回転の挙動を確認する

Mirador 4の拡大・縮小・回転の挙動を確認する

概要 Mirador 4の拡大・縮小・回転の挙動を変更する必要があり、その変更方法に関する備忘録です。 セットアップ 以下により、ローカルでMirador 4を起動します。 git clone https://github.com/projectmirador/mirador cd mirador pnpm i pnpm start ポート4444で起動します。 zoomIn時の処理のカスタマイズ 一例ですが、zoomInボタンをクリックした際の処理を以下のように変更してみます。 ... handleZoomInClick() { const { windowId, updateViewport, viewer } = this.props; updateViewport(windowId, { // zoom: viewer.zoom * 2, zoom: viewer.zoom * 1.1, // 追加 rotation: viewer.rotation + 5, // 追加 x: viewer.x * 1.1, // 追加 y: viewer.y * 1.1, // 追加 }); } ... 結果、zoomInボタンを押した際に、中心が少しずれながら、拡大・回転が行われることがわかります。 https://youtu.be/wn1WxpTVpS4 これを応用することで、Mirador 3の拡大・縮小・回転等のカスタマイズを行うことができます。 immediateの設定 上記の例では、拡大や回転が完了するまで少し時間がかかっていました。これを即座に行いたい場合、以下のOpenSeadragonViewer.jsのcomponentDidUpdateをカスタマイズします。 viewerConfigオブジェクトのimmediatelyプロパティに基づき、拡大縮小や回転を即座に実施するかを設定できるようにします。 ... componentDidUpdate(prevProps, prevState) { const { viewerConfig, canvasWorld, } = this.props; const { viewer } = this.state; this.apiRef.current = viewer; if (prevState.viewer === undefined) { if (viewerConfig) { viewer.viewport.panTo(viewerConfig, true); viewer.viewport.zoomTo(viewerConfig.zoom, viewerConfig, true); viewerConfig.degrees !== undefined && viewer.viewport.setRotation(viewerConfig.degrees); viewerConfig.flip !== undefined && viewer.viewport.setFlip(viewerConfig.flip); } this.addAllImageSources(!(viewerConfig)); return; } if (!this.infoResponsesMatch(prevProps.infoResponses) || !this.nonTiledImagedMatch(prevProps.nonTiledImages) ) { viewer.close(); const canvasesChanged = !(isEqual(canvasWorld.canvasIds, prevProps.canvasWorld.canvasIds)); this.addAllImageSources((canvasesChanged || !viewerConfig)); } else if (!isEqual(canvasWorld.layers, prevProps.canvasWorld.layers)) { this.refreshTileProperties(); } else if (viewerConfig && !this.osdUpdating) { const { viewport } = viewer; const immediately = viewerConfig.immediately || false; if (viewerConfig.x !== viewport.centerSpringX.target.value || viewerConfig.y !== viewport.centerSpringY.target.value) { viewport.panTo(viewerConfig, immediately); } if (viewerConfig.zoom !== viewport.zoomSpring.target.value) { viewport.zoomTo(viewerConfig.zoom, viewerConfig, immediately); } if (viewerConfig.rotation !== viewport.getRotation()) { viewport.setRotation(viewerConfig.rotation, immediately); } if (viewerConfig.flip !== viewport.getFlip()) { viewport.setFlip(viewerConfig.flip); } } } ... そして、先のZoomControls.jsにおいて、immediately: trueを追加します。 ...

Mirador 2のプラグインの挙動を確認する

Mirador 2のプラグインの挙動を確認する

概要 Mirador 2のプラグインの挙動を確認するリポジトリを作成しました。 https://github.com/nakamura196/mirador2-plugins-demo 以下のURLからお試しいただけます。 https://nakamura196.github.io/mirador2-plugins-demo/ サンプルデータを含む動作例は以下です。 https://nakamura196.github.io/mirador2-plugins-demo/?manifest=https://nakamura196.github.io/mirador2-sync-windows/data/examples/org.json;https://nakamura196.github.io/mirador2-sync-windows/data/examples/inf.json 本リポジトリを作成した目的は、Mirador 2向けに開発されたプラグインをMirador 3向けに改修するための挙動確認です。 プラグイン mirador-sync-windows 以下の記事で紹介したmirador-sync-windowsを有効にしています。 こちらについては、以下の記事でM3版を試作しています。 mirador-disable-plugin UCLA LibraryによってMirador 2向けに作成された以下のプラグインを有効にしています。 https://github.com/UCLALibrary/mirador-disable-zoom こちらについても、以下の記事でM3版を作成しています。 https://youtu.be/RN2V4b7IYoI まとめ Mirador 2のプラグインの挙動確認にあたり、参考になりましたら幸いです。引き続き、プラグインの追加などを行いたいと思います。

ズーム操作を無効化するMirador 3(4)向けプラグインの開発

ズーム操作を無効化するMirador 3(4)向けプラグインの開発

概要 Mirador 3(実際には、Mirador 4)向けに、ズーム操作を無効化するプラグインを作成しました。 https://github.com/nakamura196/mirador-disable-zoom/ 以下が動作デモです。 https://youtu.be/RN2V4b7IYoI 以下のURLからお試しいただけます。 https://nakamura196.github.io/mirador-disable-zoom/ 本プラグインは、UCLA LibraryによってMirador 2向けに作成された以下のプラグインを参考にしています。 https://github.com/UCLALibrary/mirador-disable-zoom 今回は、本プラグインの開発によって気がついた点をメモします。 targetの指定 targetによって、プラグインのボタンを設置する場所を指定することができました。今回は、WindowTopBarPluginAreaを指定することで、ウインドウ毎のバーに直接アイコンを表示することができました。 import * as actions from 'mirador/dist/es/src/state/actions'; import { getWindowConfig } from 'mirador/dist/es/src/state/selectors'; import MiradorDisableZoom from './plugins/MiradorDisableZoom'; import MiradorDisableZoomMenuItem from './plugins/MiradorDisableZoomMenuItem'; import translations from './translations'; export const miradorDisableZoomPlugin = [ { target: 'OpenSeadragonViewer', mode: 'add', component: MiradorDisableZoom, mapStateToProps: (state, { windowId }) => ({ enabled: getWindowConfig(state, { windowId }).disableZoomEnabled || false, }) }, { target: 'WindowTopBarPluginArea', component: MiradorDisableZoomMenuItem, mode: 'add', mapDispatchToProps: { updateWindow: actions.updateWindow, }, mapStateToProps: (state, { windowId }) => ({ enabled: getWindowConfig(state, { windowId }).disableZoomEnabled || false, }), config: { translations, }, }, ]; https://github.com/nakamura196/mirador-disable-zoom/blob/main/src/index.js 一方、以下の記事で紹介したプラグインでは、WindowTopBarPluginMenuを指定しています。 この場合には、以下のように、3点ドットのメニューが表示され、その中にプラグイン毎のアイコンなどを表示できました。 用途に応じて、targetを使い分けることができそうです。 これらのtargetは以下で指定されているコンポーネントを使用できるようでした。 https://github.com/ProjectMirador/mirador/tree/master/src/containers translations 上記のコードにおいて、config属性のtranslationsを指定しています。 { target: 'WindowTopBarPluginArea', component: MiradorDisableZoomMenuItem, mode: 'add', mapDispatchToProps: { updateWindow: actions.updateWindow, }, mapStateToProps: (state, { windowId }) => ({ enabled: getWindowConfig(state, { windowId }).disableZoomEnabled || false, }), config: { translations, }, }, 上記を指定しないと、同フォルダ内のtranslations.jsで指定した翻訳データが反映されませんでした。 ...

mirador-sync-windowsのM3版を作成しました。

mirador-sync-windowsのM3版を作成しました。

概要 以下の記事で、mirador-sync-windowsというMirador 2向けのプラグインを紹介しました。 今回は上記の機能をMirador 3(実際には、Mirador 4)向けに改修しました。 まだ挙動が不安定なところがありますが、以下からお試しいただけます。 https://mirador-sync-windows.vercel.app/ Vercelへのデプロイ 以下のmirador-image-toolsプラグインのmirador4向けのブランチをベースに開発を行いました。 https://github.com/ProjectMirador/mirador-image-tools/tree/mirador4-compat-clean 上記では、以下のようなコマンドが用意されています。 { ... "scripts": { "build": "npm run build:umd", "build:demo": "NODE_ENV=development webpack --mode=development", "build:umd": "NODE_ENV=production webpack --mode=production", "build:es": "mkdir -p es && cp -r src/* es && NODE_ENV=production MODULE_FORMAT=es npx babel es -d es", "build:cjs": "mkdir -p lib && cp -r src/* lib && NODE_ENV=production MODULE_FORMAT=cjs npx babel lib -d lib", "clean": "rm -rf ./umd && rm -rf ./es && rm -rf ./lib && rm -rf ./demo/dist", "lint": "eslint ./src ./__tests__", "prepublishOnly": "npm run clean && npm run build:es && npm run build:cjs && npm run build", "start": "NODE_ENV=development webpack serve --open", "test": "npm run lint && jest", "test:coverage": "jest --coverage", "test:watch": "jest --watch" }, ... } 上記のコマンドを踏まえて、vercelのデプロイ設定を以下のように修正しました。 ...

mirador-sync-windowsを試す

mirador-sync-windowsを試す

概要 mirador-sync-windowsは、以下のように説明されています。 https://github.com/UCLALibrary/mirador-sync-windows (機械翻訳)同じオブジェクトの異なるスペクトル画像など、ほぼ同一の画像を複数比較する際に、複数のウィンドウで同時にアクションを適用することが役立ちます。 使用イメージは以下です。 https://youtu.be/Ls2zvJpSRlc 注意点として、Mirador 2向けのプラグインとなっており、またリポジトリもアーカイブされています。 今回は、このmirador-sync-windowsを試すリポジトリを作成したので、紹介します。 リポジトリ https://github.com/nakamura196/mirador2-sync-windows/ 使い方 以下のように、manifestパラメータに、比較したいマニフェストファイルを;で区切って指定します。 https://nakamura196.github.io/mirador2-sync-windows/?manifest=https://nakamura196.github.io/mirador2-sync-windows/data/examples/org.json;https://nakamura196.github.io/mirador2-sync-windows/data/examples/inf.json GUIの使用方法については、上記の動画をご参照ください。 上記の例は、以下の「シェリー書簡の透過光画像を使ったIIIFアプリケーション」のデータを利用しています。 https://utda.github.io/shelley/ まとめ 今後、本機能をMirador 3のプラグインとして開発したいと思います。 また本モジュールはほぼ同一の画像を複数比較することを目的としていますが、対応点の計算などにより、ほぼ同一でない画像の比較も行えるような機能開発を行いたいと思います。 mirador-sync-windowsについて、参考になりましたら幸いです。

Mirador2のPhysical Document Rulerを試す

Mirador2のPhysical Document Rulerを試す

概要 IIIFのLinking to External ServicesにPhysical Dimensionsがあります。 https://iiif.io/api/annex/services/#physical-dimensions 以下のように説明されています。 For digitized objects, it is often useful to know the physical dimensions of the object. When available, they allow a client to present a ruler, or other rendition of physical scale, to the user. (機械翻訳)デジタル化された物体の場合、その物体の物理的な寸法を知ることはしばしば有用である。利用可能な場合、クライアントが定規やその他の物理的な縮尺をユーザーに提示することができます。 Mirador ver.2とver.3では、それぞれ以下のプラグインが存在します。 ver.2 https://github.com/dbmdz/mirador-plugins#physical-document-ruler ver.3 https://github.com/ubleipzig/mirador-ruler-plugin 残念ながらver.3のプラグインをうまく導入することができませんでした。そこで、Mirador2を対象に、Physical Document Rulerを使用する方法を説明します。 結果、例えば東京大学史料編纂所所蔵の大型絵図である正保琉球国絵図写(請求記号:S島津 76-2-4、法量:354.1×731.0cm)を対象にした場合、以下のように定規を表示させることができます。 ソースコードの準備 以下のリポジトリからソースコードを取得できます。 https://github.com/nakamura196/mirador2 Mirador2のプラグインを格納する以下のフォルダmirador/pluginsに対して、以下で公開されているPhysicalRulerのソースコードをコピーしています。 https://github.com/dbmdz/mirador-plugins/tree/main/PhysicalRuler そして、index.htmlで以下のように参照しています。 ... <body> <div id="viewer"></div> <script src="mirador/mirador.min.js"></script></script> <script src="mirador/plugins/PhysicalRuler/physicalRuler.js"></script> <script type="text/javascript"> ... </script> </body> データ マニフェストファイルの各Canvasに対して、serviceを追記します。physicalScaleは実寸(cm)をピクセル数で割った値を用いています。 ...

Mirador3プラグイン開発: Text Overlay pluginで縦書き対応を行う

Mirador3プラグイン開発: Text Overlay pluginで縦書き対応を行う

概要 Text Overlay plugin for Mirador 3は、OCRまたはトランスクリプションに基づいて選択可能なテキストオーバーレイを表示するMirador3のプラグインです。 https://github.com/dbmdz/mirador-textoverlay 以下でデモページが公開されています。 https://mirador-textoverlay.netlify.app/ 
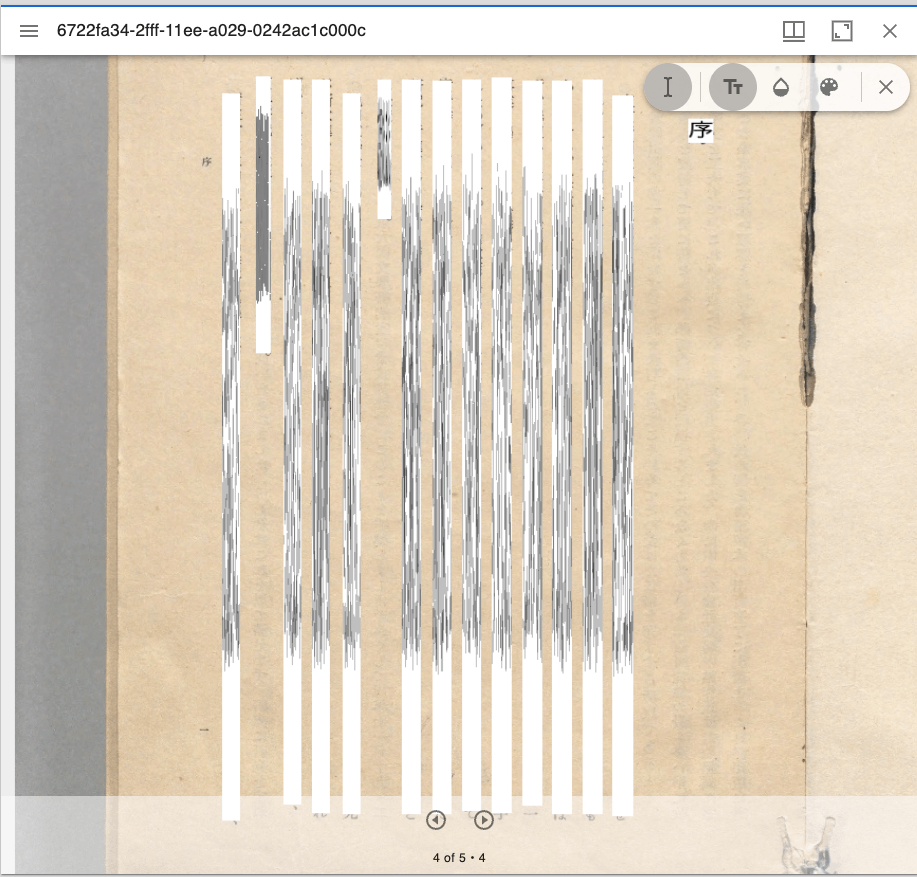
一方、日本語などの縦書きテキストを表示してみると、以下のようにうまく表示ができませんでした。 
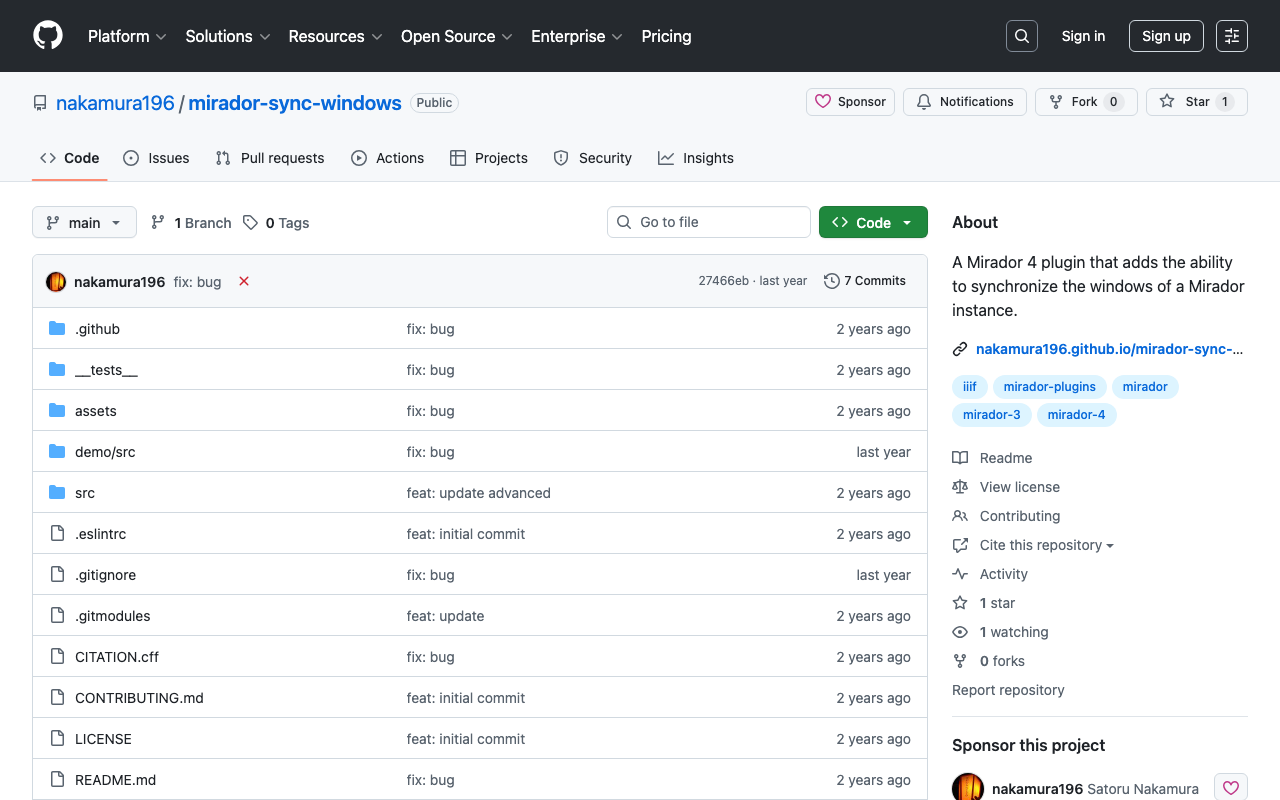
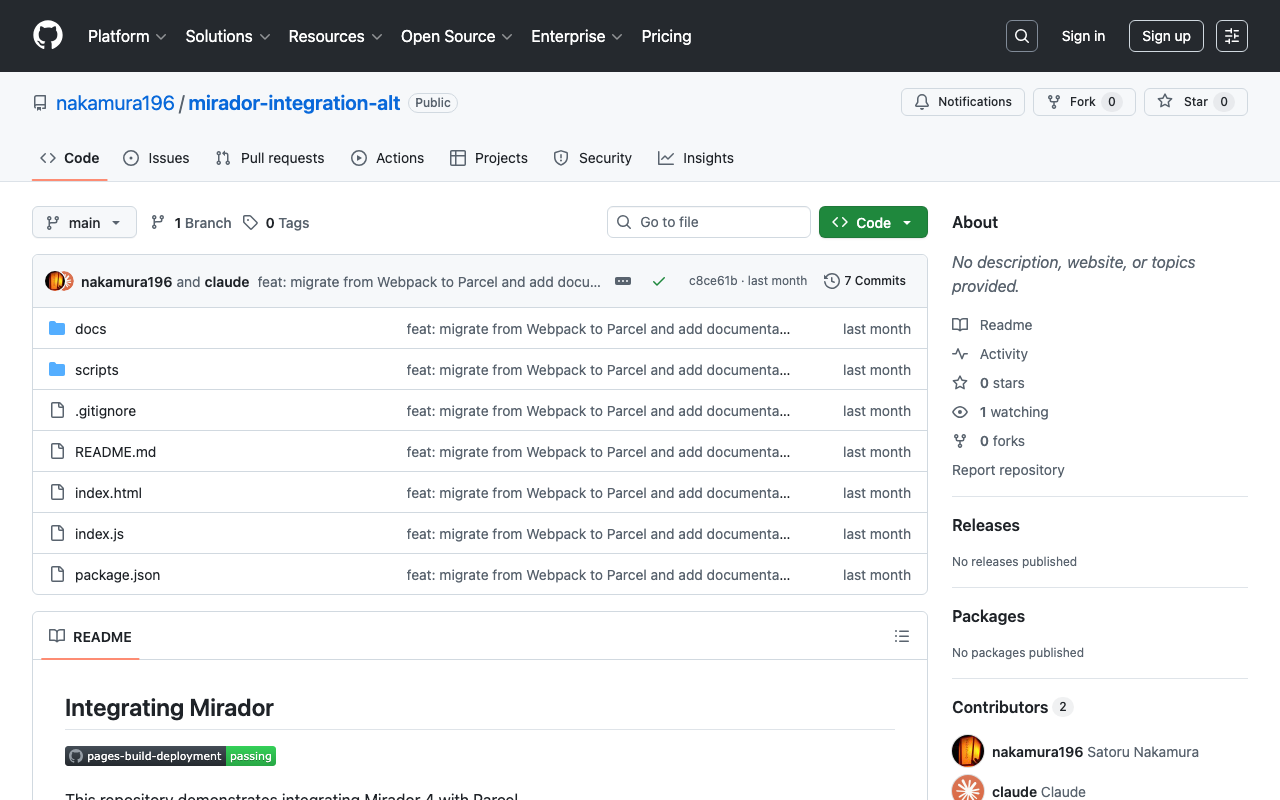
そこで、上記のリポジトリをフォークして、縦書きテキストも表示できるようにしました。以下のリポジトリでソースコードを公開しています。(いずれプルリクエストも検討したいと思います。) https://github.com/nakamura196/mirador-textoverlay 
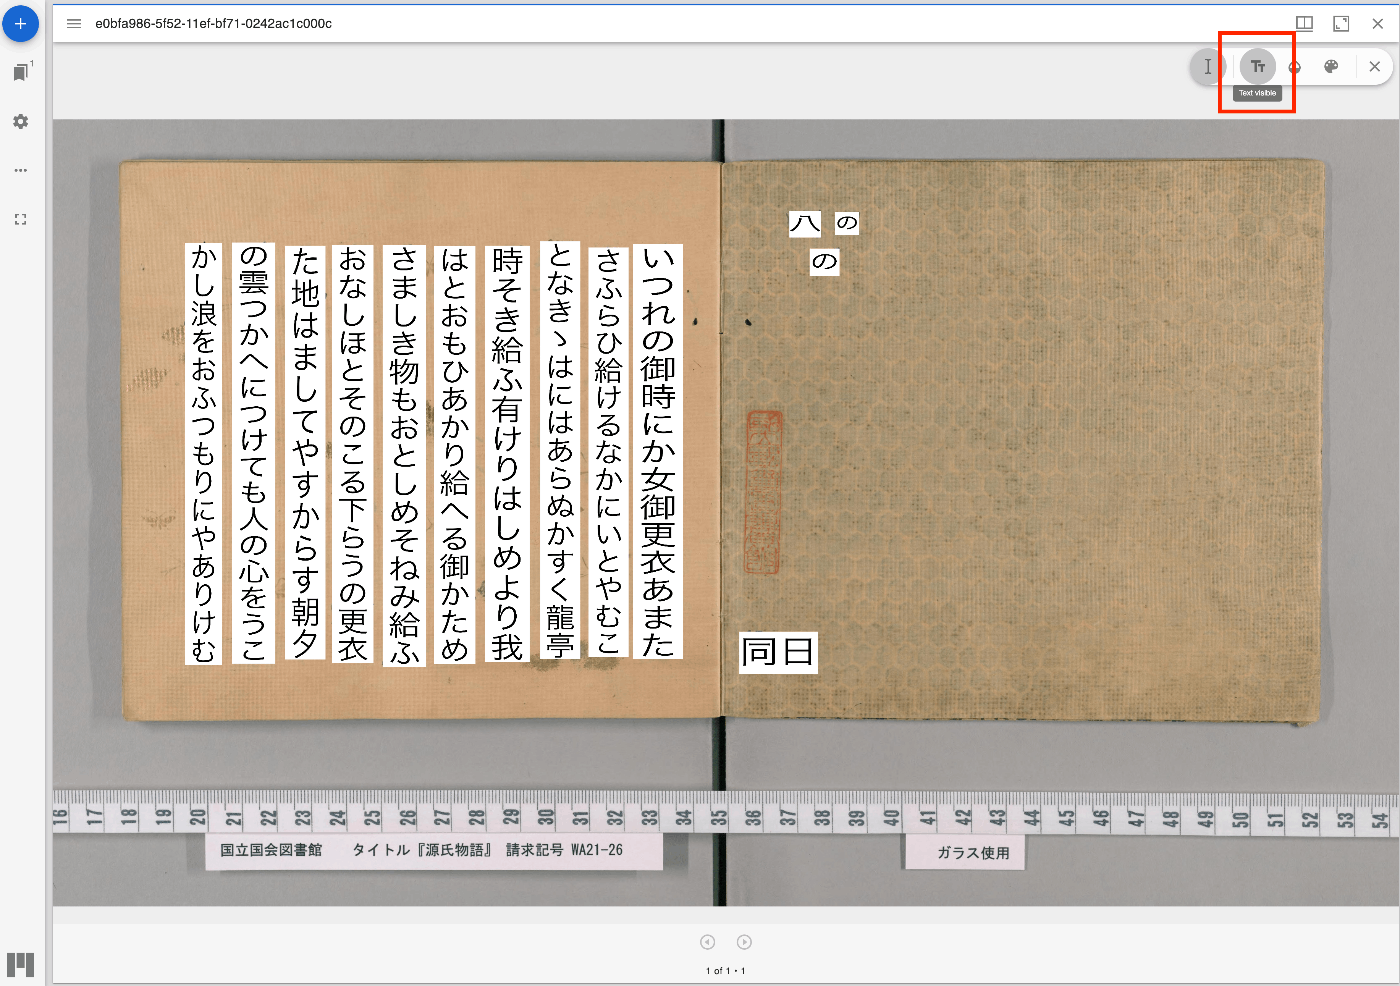
結果、以下のように縦書きテキストも表示できるようになりました。 デモページは以下です。 https://nakamura196.github.io/mirador-integration-textoverlay/?manifest=https://nakamura196.github.io/static/iiif/6722fa34-2fff-11ee-a029-0242ac1c000c/manifest_o.json&annotationState=1&canvasIndex=3 以下、本モジュール開発に関連する事項をメモします。 マニフェストファイルの構造 本モジュールでは、以下の要件を満たすIIIFマニフェストが必要とのことでした。 https://github.com/dbmdz/mirador-textoverlay#requirements-for-supported-iiif-manifests いくつかのオプションがありますが、以下のwellcome collectionのマニフェストを参考にしました。 https://iiif.wellcomecollection.org/presentation/v2/b18035723 Canvas毎にseeAlsoでALTO XMLファイルへのURLが指定されています。 { "@id": "https://iiif.wellcomecollection.org/presentation/b18035723/canvases/b18035723_0003.JP2", "@type": "sc:Canvas", "label": "-", "thumbnail": { "@id": "https://iiif.wellcomecollection.org/thumbs/b18035723_0003.JP2/full/72,100/0/default.jpg", "@type": "dctypes:Image", "service": { "@context": "http://iiif.io/api/image/2/context.json", "@id": "https://iiif.wellcomecollection.org/thumbs/b18035723_0003.JP2", "profile": "http://iiif.io/api/image/2/level0.json", "protocol": "http://iiif.io/api/image", "width": 732, "height": 1024, "sizes": [ { "width": 72, "height": 100 }, { "width": 143, "height": 200 }, { "width": 286, "height": 400 }, { "width": 732, "height": 1024 } ] } }, "seeAlso": { "@id": "https://api.wellcomecollection.org/text/alto/b18035723/b18035723_0003.JP2", "profile": "http://www.loc.gov/standards/alto/v3/alto.xsd", "format": "text/xml", "label": "METS-ALTO XML" }, "height": 3372, "width": 2411, "images": [ { "@id": "https://iiif.wellcomecollection.org/presentation/b18035723/canvases/b18035723_0003.JP2/painting/anno", "@type": "oa:Annotation", "motivation": "sc:painting", "resource": { "@id": "https://iiif.wellcomecollection.org/image/b18035723_0003.JP2/full/732,1024/0/default.jpg", "@type": "dctypes:Image", "format": "image/jpeg", "height": 1024, "width": 732, "service": { "@context": "http://iiif.io/api/image/2/context.json", "@id": "https://iiif.wellcomecollection.org/image/b18035723_0003.JP2", "profile": "http://iiif.io/api/image/2/level1.json", "protocol": "http://iiif.io/api/image", "width": 2411, "height": 3372 } }, "on": "https://iiif.wellcomecollection.org/presentation/b18035723/canvases/b18035723_0003.JP2" } ], "otherContent": [ { "@id": "https://iiif.wellcomecollection.org/annotations/v2/b18035723/b18035723_0003.JP2/line", "@type": "sc:AnnotationList", "label": "Text of page -" } ], "within": "" } まとめ 開発したプラグインについて、xmlファイルのロードが完了しない時があるなど、引き続き改善が必要ですが、Mirador3のプラグイン開発やIIIF、OCR結果の活用にあたり、参考になりましたら幸いです。 ...

Mirador 3のmirador-annotationsプラグインとSimpleAnnotationServerを試す

Mirador 3のmirador-annotationsプラグインとSimpleAnnotationServerを試す

概要 mirador-annotationsはアノテーションの作成ツールを追加するMirador 3のプラグインです。 https://github.com/ProjectMirador/mirador-annotations 今回、以下のSimpleAnnotationServerとの組み合わせを試してみましたので、その備忘録です。 https://github.com/glenrobson/SimpleAnnotationServer SimpleAnnotationServerの準備 以下のGetting Startedの通りに進めます。 https://github.com/glenrobson/SimpleAnnotationServer#getting-started http://localhost:8888/index.html にアクセスすると、以下の画面が表示されます。 エンドポイントは http://localhost:8888/annotation/ のようで、登録済みのアノテーションの一覧(はじめは空)が表示されます。 このエンドポイントをMirador 3から利用することになります。 Mirador 3の準備 ソースコードから 以下のサイトからソースコードをクローンして立ち上げます。 https://github.com/ProjectMirador/mirador-annotations git clone https://github.com/ProjectMirador/mirador-annotations cd mirador-annotations npm i # npm i --force が必要かもしれません npm run start http://localhost:3000/ にアクセスすると、以下の画面が表示されます。 アダプタの設定 demo/src/index.jsについて、SimpleAnnotationServerV2Adapterをインポートし、さらにエンドポイント(ここでは、endpointUrlV2)に先ほど起動したSimpleAnnotationServerを指定します。 import mirador from 'mirador/dist/es/src/index'; import annotationPlugins from '../../src'; import LocalStorageAdapter from '../../src/LocalStorageAdapter'; import AnnototAdapter from '../../src/AnnototAdapter'; // 以下を追加 import SimpleAnnotationServerV2Adapter from '../../src/SimpleAnnotationServerV2Adapter'; const endpointUrl = 'http://127.0.0.1:3000/annotations'; // 以下を追加 const endpointUrlV2 = 'http://0.0.0.0:8888/annotation'; const config = { annotation: { // 以下をコメントアウト // adapter: (canvasId) => new LocalStorageAdapter(`localStorage://?canvasId=${canvasId}`), // adapter: (canvasId) => new AnnototAdapter(canvasId, endpointUrl), // 以下を追加 adapter: (canvasId) => new SimpleAnnotationServerV2Adapter(canvasId, endpointUrlV2), exportLocalStorageAnnotations: false, // display annotation JSON export button }, id: 'demo', window: { defaultSideBarPanel: 'annotations', sideBarOpenByDefault: true, }, windows: [{ loadedManifest: 'https://iiif.harvardartmuseums.org/manifests/object/299843', }], }; mirador.viewer(config, [...annotationPlugins]); アダプタの修正 以下のプルリクエストでも指摘されていますが、アダプタの一部修正が必要です。 ...

Mirador3プラグイン開発: レイヤーのスライドショーを行う

Mirador3プラグイン開発: レイヤーのスライドショーを行う

概要 レイヤーのスライドショーを行うMirador3プラグインを開発しました。 https://youtu.be/r1ShHGqCs24 以下の記事にある通り、以前、Mirador2のカスタマイズにより実現しました。以下では「起絵図」のIIIF実装を試みています。 https://nakamura196.hatenablog.com/entry/2020/08/14/073700 今回はMirador3のプラグインとして開発を試みました。 リポジトリ https://github.com/nakamura196/mirador-layer-slideshow-plugin デモサイト https://nakamura196.github.io/mirador-layer-slideshow-plugin/ まとめ 改善の余地が多々ありますが、参考になりましたら幸いです。

Mirador3プラグイン開発: ウインドウをコピーする

Mirador3プラグイン開発: ウインドウをコピーする

概要 Mirador3のプラグインとして、ウインドウをコピーするプラグインを作成しました。 なお本機能は以下のプラグインですでに提供されているものです。 https://github.com/ProjectMirador/mirador-plugin-demos そのため、本プラグインはプラグインの開発手順を学ぶために作成しています。そのような観点で、本プラグインが参考になりましたら幸いです。 画面例は以下です。 ソースコードは以下です。 https://github.com/nakamura196/mirador-copy-window-plugin デモサイトは以下です。 https://nakamura196.github.io/mirador-copy-window-plugin/ 開発メモ 本プラグインの開発にあたり、まず以下のリポジトリをcloneし、変更を加えていきました。 https://github.com/ProjectMirador/mirador-dl-plugin src/index.js まず以下のファイルについて、miradorDownloadをMiradorCopyWindowに書き換えました。 https://github.com/nakamura196/mirador-copy-window-plugin/blob/main/src/index.js src/MiradorCopyWindow.js 以下のファイルが主に編集するファイルです。 https://github.com/nakamura196/mirador-copy-window-plugin/blob/main/src/MiradorCopyWindow.js 本ファイルは、まず以下のファイルの内容をコピーしました。 https://github.com/ProjectMirador/mirador-plugin-demos/blob/master/src/plugins/copy-window.js まず末尾の以下の記述から説明します。 export default { target: 'WindowTopMenu', mode: 'add', component: CopyWindowComponent, mapDispatchToProps: mapDispatchToProps, mapStateToProps: mapStateToProps, } targetとmode targetはコンポーネントを設置する場所を指定します。またmodeはコンポーネントの追加方法を指定します。modeについては、addやwrapという選択肢があるようでした。 以下、targetの値の例です。 WindowTopMenu 各ウインドウ上部のメニューの部分です。 WorkspaceControlPanelButtons ワークスペースのパネル部分です。 AnnotationSettings アノテーションの設定画面です。 最後のAnnotationSettingsおよびmodeにwrapが指定されているプラグインとして、以下のMiradorのアノテーション付与モジュールがありました。 https://github.com/ProjectMirador/mirador-annotations/blob/master/src/plugins/miradorAnnotationPlugin.js mapDispatchToPropsとmapStateToProps これがはじめ理解しづらかった(そしてまだ適切に説明できるほど理解できていない)のですが、propsに渡すdispathとstateを定めた変数を指定します。 dispatchについては、以下の変数を与えてます。 const mapDispatchToProps = (dispatch, { windowId }) => ({ copyWindow: () => dispatch(copyWindowAction(windowId)), }); copyWindowActionの具体的な内容は以下です。既存のwindowを取得して(1)、不要な変数を削除した上でwindowをコピーして(2)、それをaddWindow(3)しています。 const copyWindowAction = (windowId) => (dispatch, getState) => { const window = getState().windows[windowId]; // 1 const cleanedWindow = omit(window, [ 'id', 'companionWindowIds', 'thumbnailNavigationId', ]); // 2 dispatch(mirador.actions.addWindow(cleanedWindow)); // 3 }; stateについては、以下の変数を与えています。以下の例は少し特殊で、stateをすべてpropsに渡す設定となっています。他のプラグインでは、必要な値のみをstateから抽出して、propsに渡しているようでした。 const mapStateToProps = (state) => ({ state: state, }); 実際、本プラグインでは、mapStateToPropsでpropsに渡された値は使用されていないため、この記述はなくてもよいはずです。そのため、以下でもmapStateToPropsの記述は省略しています。 https://github.com/nakamura196/mirador-copy-window-plugin/blob/main/src/MiradorCopyWindow.js component 最後にcomponentです。以下のように、コンポーネントで表示する内容を記述しています。 ...

Mirador 3でビューポートが設定した制約を満たすようにズームを行う

Mirador 3でビューポートが設定した制約を満たすようにズームを行う

概要 Mirador 3で特定の領域にズームにするには、以下に記載があるような方法で行います。 https://github.com/ProjectMirador/mirador/wiki/M3---Mirador-3-Frequently-Asked-Questions#q-how-do-i-change-the-view-of-an-image-to-zoom-to-a-certain-area 具体的には以下です。 // Box to zoom to const boxToZoom = { x: 1420, y: 1831, width: 800, height: 1195 }; const zoomCenter = { x: boxToZoom.x + boxToZoom.width / 2, y: boxToZoom.y + boxToZoom.height / 2 }; var action = Mirador.actions.updateViewport(windowId, { x: zoomCenter.x, y: zoomCenter.y, zoom: 1 / boxToZoom.width }); miradorInstance.store.dispatch(action); 内部的にはOpenSeadragonのpanToとzoomToが使用されているようでした。 この時の課題として、zoomToは以下の記事にあるように、constraintsを無視して拡大するようでした。 https://github.com/openseadragon/openseadragon/issues/881 これに対して、以下の記事で示したように、viewer.viewport.applyConstraints();の処理を追加することで、constraintsを守った拡大ができるようになりました。 以下、強引ではありますが、npmでインストールしたMiradorに対して、上記の設定を行う方法を紹介します。 Miradorの編集 以下でMiradorをインストールします。 npm install mirador node_modules以下にmiradorフォルダが作成されます。 その中にある以下のファイルに対して、viewport.applyConstraints();を追加する例を示します。 ... { key: "componentDidUpdate", value: function componentDidUpdate(prevProps, prevState) { var _this$props2 = this.props, viewerConfig = _this$props2.viewerConfig, canvasWorld = _this$props2.canvasWorld; var viewer = this.state.viewer; this.apiRef.current = viewer; if (prevState.viewer === undefined) { if (viewerConfig) { viewer.viewport.panTo(viewerConfig, true); viewer.viewport.zoomTo(viewerConfig.zoom, viewerConfig, true); viewerConfig.degrees !== undefined && viewer.viewport.setRotation(viewerConfig.degrees); viewerConfig.flip !== undefined && viewer.viewport.setFlip(viewerConfig.flip); } this.addAllImageSources(!viewerConfig); return; } if (!this.infoResponsesMatch(prevProps.infoResponses) || !this.nonTiledImagedMatch(prevProps.nonTiledImages)) { viewer.close(); var canvasesChanged = !isEqual(canvasWorld.canvasIds, prevProps.canvasWorld.canvasIds); this.addAllImageSources(canvasesChanged || !viewerConfig); } else if (!isEqual(canvasWorld.layers, prevProps.canvasWorld.layers)) { this.refreshTileProperties(); } else if (viewerConfig && !this.osdUpdating) { var viewport = viewer.viewport; if (viewerConfig.x !== viewport.centerSpringX.target.value || viewerConfig.y !== viewport.centerSpringY.target.value) { viewport.panTo(viewerConfig, false); } if (viewerConfig.zoom !== viewport.zoomSpring.target.value) { viewport.zoomTo(viewerConfig.zoom, viewerConfig, false); viewport.applyConstraints(); // ここを追加 } if (viewerConfig.rotation !== viewport.getRotation()) { viewport.setRotation(viewerConfig.rotation); } if (viewerConfig.flip !== viewport.getFlip()) { viewport.setFlip(viewerConfig.flip); } } } ... 上記の設定により、Mirador.actions.updateViewportでズームした際に、constraintsを守った拡大ができるようになりました。 ...

IIIF Mirador2のアノテーション画面の説明

IIIF Mirador2のアノテーション画面の説明

概要 IIIF Mirador2のアノテーション画面の使い方(の一部)を説明します。 四角形アノテーションの作成 https://www.youtube.com/watch?v=jny09nLZvLU パス(多角形)アノテーションの作成 アノテーションを終了する場合には、ダブルクリックします。 https://www.youtube.com/watch?v=4cM-6-rXL9M 既存のアノテーションの修正 https://www.youtube.com/watch?v=HlE36inbgq4 既存のアノテーションの削除 https://www.youtube.com/watch?v=STk2vjLc_-k まとめ IIIF Mirador2を用いたアノテーション付与の際の参考になりましたら幸いです。

Mirador 3 による画像比較ツールを作成しました。

Mirador 3 による画像比較ツールを作成しました。

Mirador 3 による画像比較ツールを作成しました。URLは以下です。 https://ldas-jp.github.io/viewer/input/ またGitHubリポジトリのURLは以下です。 https://github.com/ldas-jp/viewer 以下が入力フォームです。比較する画像のIIIFマニフェストファイルのURLとCanvasのURIを指定します。「例」にあるボタンをクリックすることで、入力例をご確認いただけます。 「開く」ボタンをクリックすると、以下のようにMirador 3が起動します。入力情報に基づく画像比較を行うことができます。 Mirador 3を用いた画像比較にあたり、ご活用いただけますと幸いです。

Mirador 3にmirador-image-toolsプラグインを追加して、1つのjsファイルにまとめて配布する方法

Mirador 3にmirador-image-toolsプラグインを追加して、1つのjsファイルにまとめて配布する方法

概要 表題の通り、Mirador 3にmirador-image-toolsなどのプラグインを追加して、1つのjsファイルにまとめて配布する方法を記述します。 JavaScriptに関する知識不足により、誤った記述があるかもしれません。間違っている点などがありましたらご指摘いただけますと幸いです。 ゴール 以下に示すようなHTMLファイルを記述することにより、以下のURLから確認できるアプリを作成することが目的です。mirador-image-toolsプラグインが有効化されているMirador 3を使用しています。 https://nakamura196.github.io/mirador-integration-alt/ <!DOCTYPE html> <html> <head> <meta charset="utf-8" /> <title>Basic Mirador</title> </head> <body> <div id="demo"></div> <!-- ポイント --> <script src="https://nakamura196.github.io/mirador-integration-alt/dist/main.js"></script> <script> // 注意点 const {Mirador, miradorImageToolsPlugin} = integration const config = { id: "demo", windows: [ { imageToolsEnabled: true, imageToolsOpen: true, manifestId: "https://iiif.dl.itc.u-tokyo.ac.jp/repo/iiif/fbd0479b-dbb4-4eaa-95b8-f27e1c423e4b/manifest", }, ] }; Mirador.viewer(config, [...miradorImageToolsPlugin]); </script> </body> </html> ポイントは、上記のソースコードで「<!-- ポイント -->」としている点です。1つのjsファイルを読み込むことで、Mirador 3とmirador-image-toolsプラグインを使用しています。 ...