ホーム 記事一覧 ブック DH週間トピックス 検索 このサイトについて
English
TEI/XMLファイルをS3互換のオブジェクトストレージでホストする

TEI/XMLファイルをS3互換のオブジェクトストレージでホストする

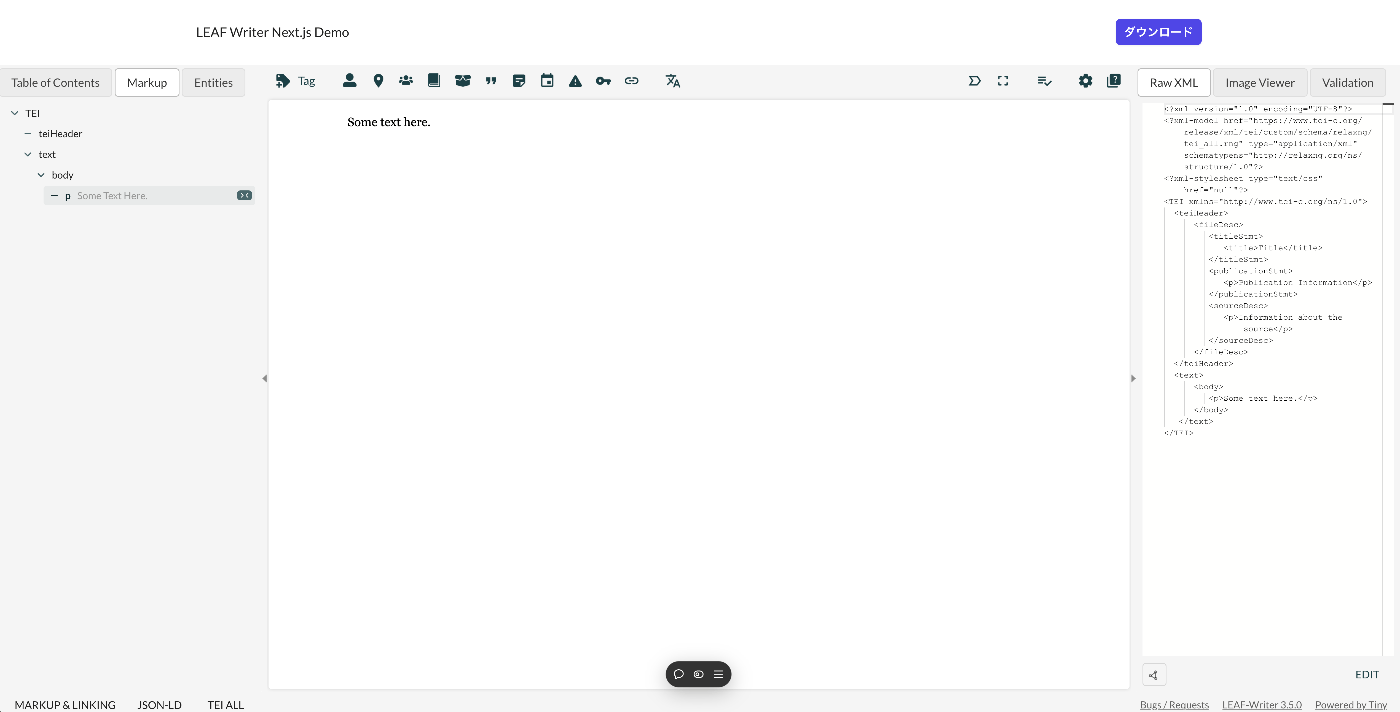
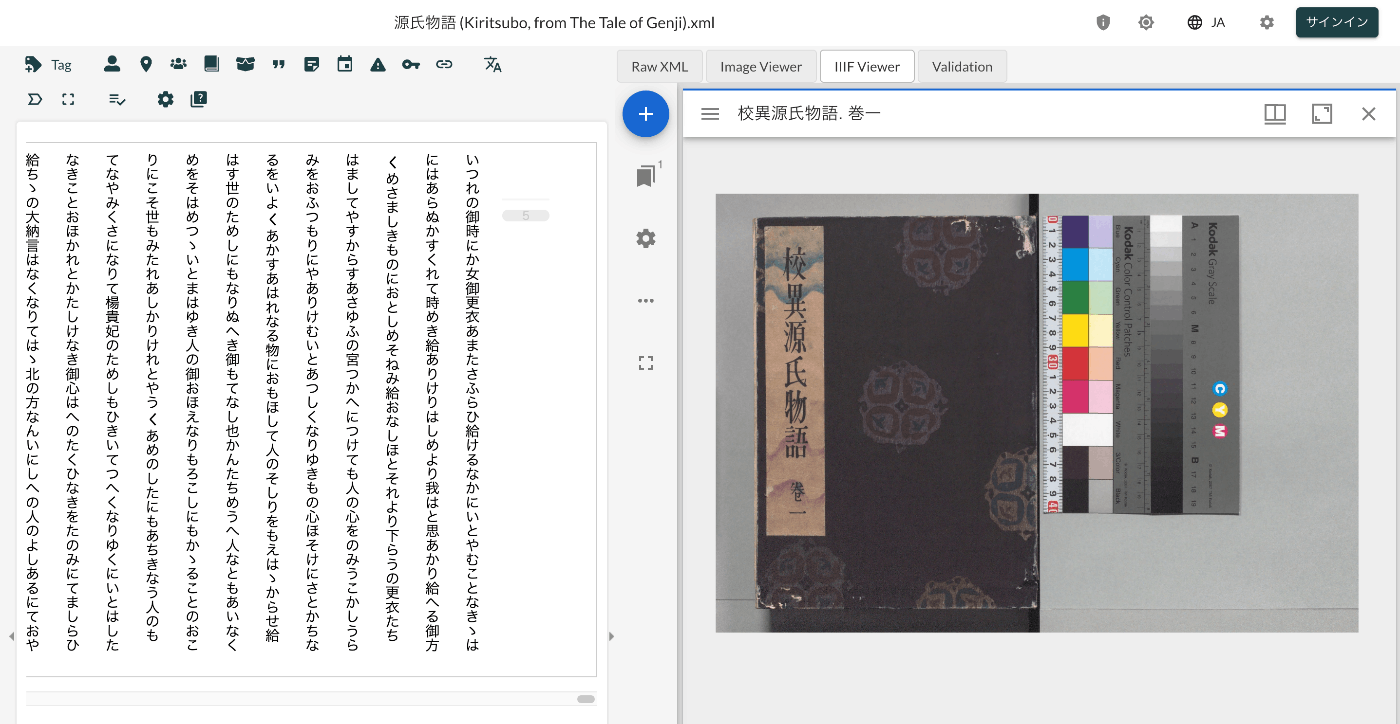
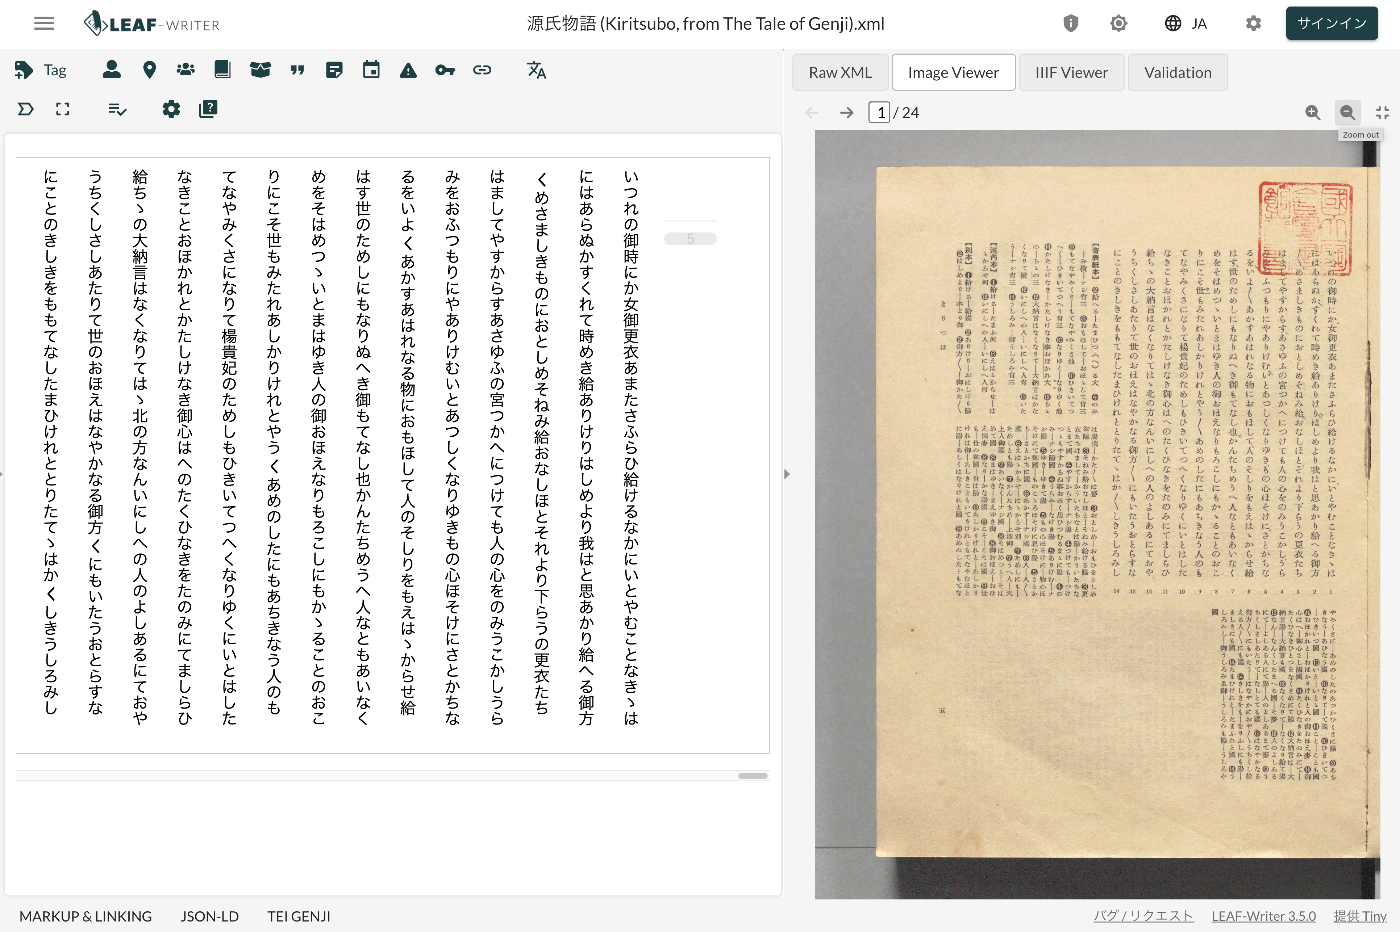
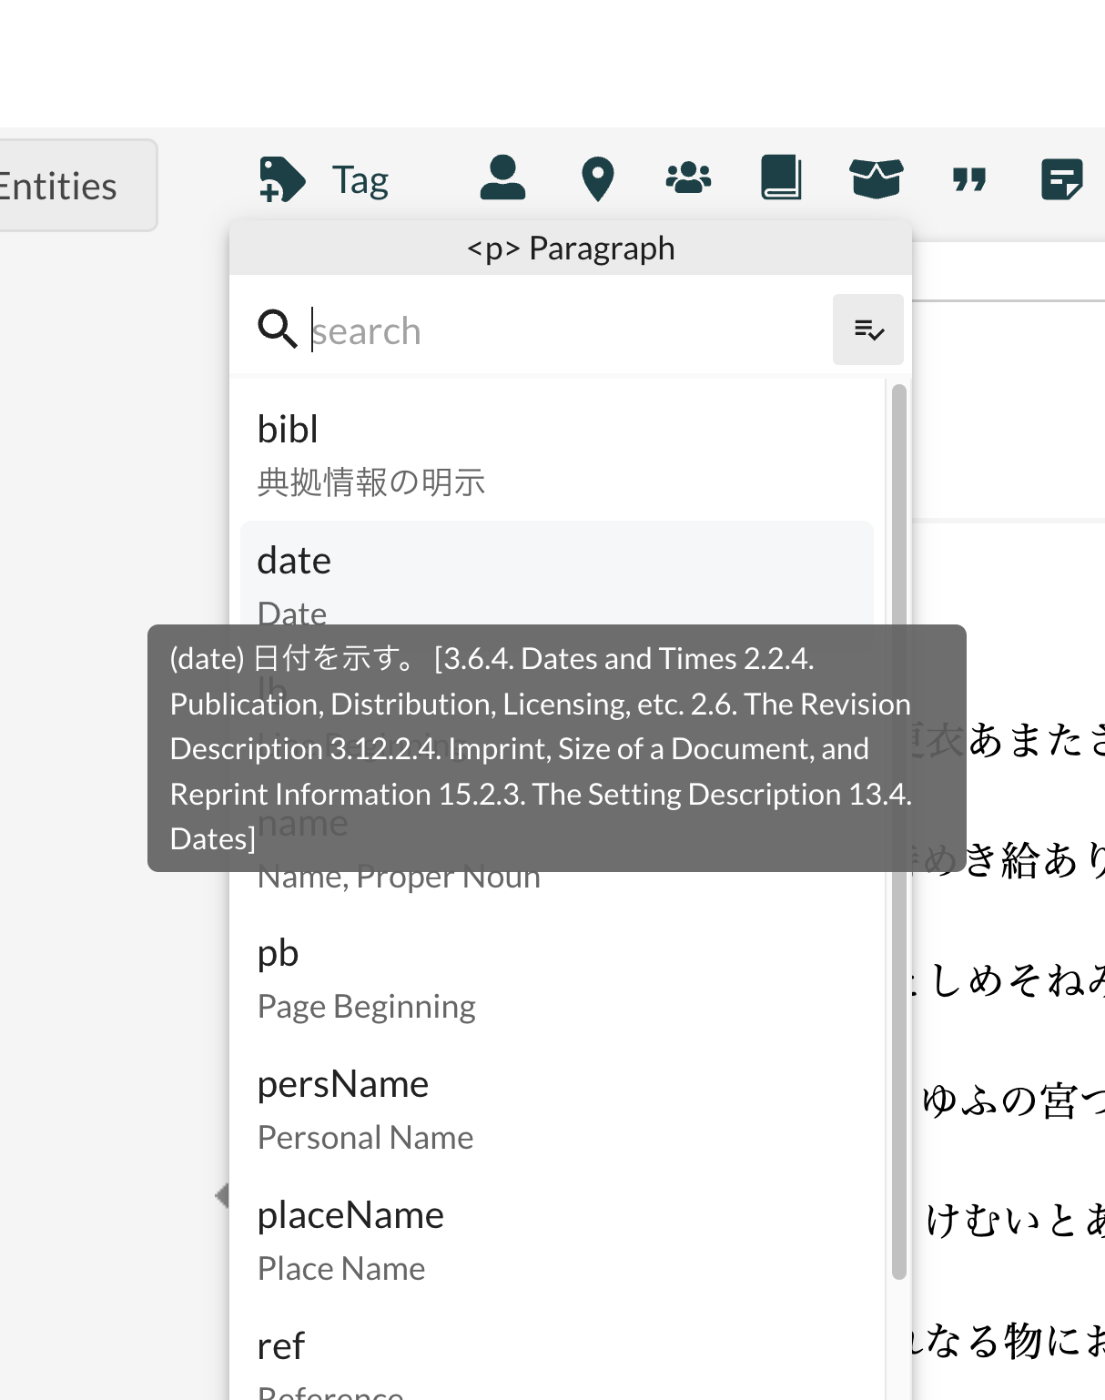
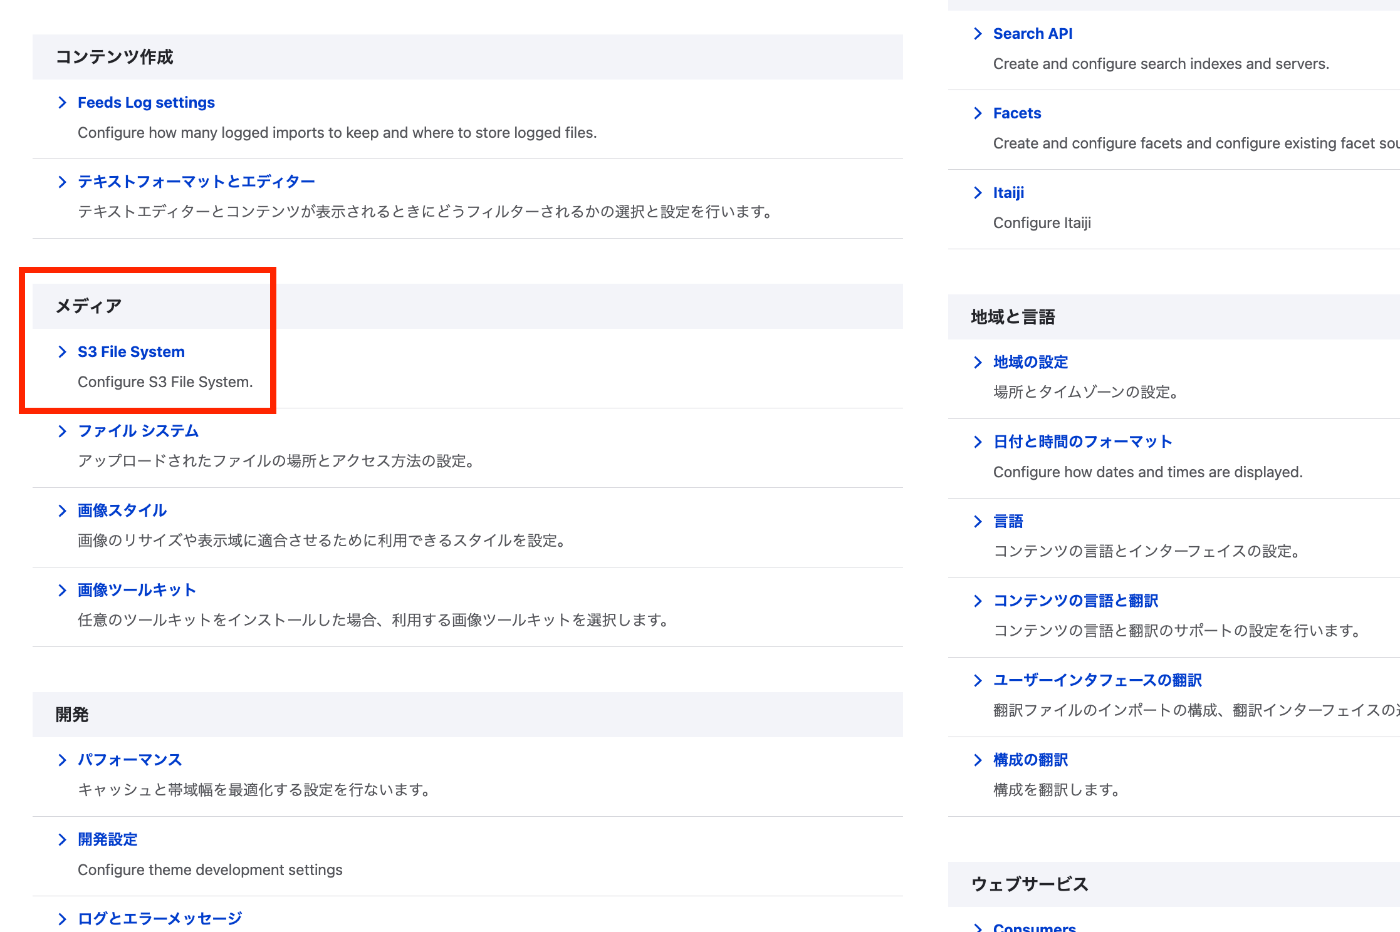
概要 TEI/XMLファイルをS3互換のオブジェクトストレージでホストする機会がありましたので、備忘録です。具体的には、mdx Iのオブジェクトストレージを対象にします。 https://mdx.jp/mdx1/p/about/system 背景 TEI/XMLファイルを読み込み、その内容を可視化するウェブアプリケーション(Next.js)を構築します。この時、ファイル数やサイズが小さい場合は、publicフォルダに格納していましたが、これらが大きくなった場合、別の場所でホストすることを考えました。 場所の選択肢は多々ありますが、今回はS3互換であるmdx Iのオブジェクトストレージを対象にします。 GUIを用いたオブジェクトストレージへのファイルアップロード オブジェクトストレージへTEI/XMLファイルをGUI経由でアップロードする方法も多々あります。その中で、これまではCyberduckを使用する方法や、GakunNin RDMを使用する方法などを紹介しました。 一方、今回の事例では、TEI/XML以外のコンテンツをDrupalで管理していました。そこで、Drupalとオブジェクトストレージを接続し、ユーザはDrupalの操作で完結できるようにしました。 Drupalとオブジェクトストレージの接続 以下のモジュールを使用します。 https://www.drupal.org/project/s3fs インストール後、環境設定のページ/admin/configから、S3 File Systemを選択します。 そして、アクセスキーや秘密鍵を登録し、さらにS3のバケット名を登録します。 またAdvanced Configuration OptionsのCustom Host Settingsにおいて、https://s3ds.mdx.jpを入力します。 これでオブジェクトストレージとの接続設定は完了です。 その後、各コンテンツタイプのフィード設定において、アップロード先として「S3 File System」を選択します。 また、今回はTEI/XMLファイルがアップロード対象となるため、「許可されている拡張子」として、xmlを入力します。 この結果、DrupalのGUIを介してアップロードしたTEI/XMLファイルが、mdx Iのオブジェクトストレージに格納されるようになりました。 (参考)DrupalのJSON:APIを用いたファイルの一括アップロード TEI/XMLの初期登録にあたり、Pythonを用いた一括登録を行いました。JSON:APIを用いたファイルの一括アップロードの方法は、以下の記事などが参考になりました。 https://www.drupal.org/node/3024331 一例ですが、以下のようなスクリプトで実現できました。 import requests import json import os from dotenv import load_dotenv from glob import glob from tqdm import tqdm class ApiClient: def __init__(self): load_dotenv(override=True) # DrupalサイトのURL(例) self.DRUPAL_BASE_URL = os.getenv("DRUPAL_BASE_URL") # エンドポイント(JSON:API) # self.JSONAPI_ENDPOINT = f"{self.DRUPAL_BASE_URL}/jsonapi/node/article" # 認証情報(Basic認証) self.USERNAME = os.getenv("DRUPAL_USERNAME") self.PASSWORD = os.getenv("DRUPAL_PASSWORD") def login(self): # ログインリクエスト login_url = f"{self.DRUPAL_BASE_URL}/user/login?_format=json" login_response = requests.post( login_url, json={"name": self.USERNAME, "pass": self.PASSWORD}, headers={"Content-Type": "application/json"} ) if login_response.status_code == 200: self.session_cookies = login_response.cookies def get_csrf_token(self): # CSRFトークンを取得 csrf_token_response = requests.get( f"{self.DRUPAL_BASE_URL}/session/token", cookies=self.session_cookies # ここでログインセッションを渡す ) if csrf_token_response.status_code == 200: # return csrf_token_response.text # self.csrf_token = csrf_token_response.text self.headers = { "Content-Type": "application/vnd.api+json", "Accept": "application/vnd.api+json", "X-CSRF-Token": csrf_token_response.text, } else: # raise Exception(f"CSRFトークン取得失敗: {csrf_token_response.status_code} {csrf_token_response.text}") self.csrf_token = None def upload_file(self, type, uuid, field, file_path, verbose=False): url = f"{self.DRUPAL_BASE_URL}/jsonapi/node/{type}/{uuid}/{field}" # ファイル名を取得 filename = os.path.basename(file_path) # ファイルをバイナリモードで読み込む with open(file_path, 'rb') as f: file_data = f.read() headers = self.headers.copy() headers['Content-Type'] = 'application/octet-stream' headers['Content-Disposition'] = f'attachment; filename="{filename}"' # ファイルをアップロード response = requests.post(url, headers=headers, cookies=self.session_cookies, data=file_data) if response.status_code == 200: if verbose: print(f"ファイルアップロード成功: {filename}") else: print(f"ファイルアップロード失敗: {response.status_code} {response.text}") すでに対象コンテンツが作成済みで、例えばfield_fileといったフィールドにファイルをアップロードする目的で使用することができます。 ...

GakuNin RDMのAPIを用いて、連携したストレージのファイルを検索する

GakuNin RDMのAPIを用いて、連携したストレージのファイルを検索する

概要 以下の記事で、GakuNin RDMのAPIを用いたアプリケーション構築について紹介しました。 本記事では、GakuNin RDMのAPIを用いて、連携したストレージのファイルを検索する方法を紹介します。 実装例 次のような形で、検索APIを実装しました。なお、https://rdm.nii.ac.jp/api/v1/search/file/にクライアントから直接アクセスした際には、CORSによるエラーが発生したため、Next.jsのAPI Routesとして実装しています。 import { NextResponse } from "next/server"; import { authOptions } from "@/app/api/auth/[...nextauth]/authOptions"; import { getServerSession } from "next-auth"; export async function GET(req: Request) { const session = await getServerSession(authOptions); // URLからクエリパラメータを取得 const url = new URL(req.url); const query = url.searchParams.get("filter[fulltext]") || ""; const offset = parseInt(url.searchParams.get("page[offset]") || "0", 10); const size = parseInt(url.searchParams.get("page[limit]") || "20", 10); const accessToken = session?.accessToken; const apiUrl = "https://rdm.nii.ac.jp/api/v1/search/file/"; const params = { api_version: { vendor: "grdm", version: 2 }, sort: "created_desc", highlight: "title:30,name:30,user:30,text:124,comments.*:124", elasticsearch_dsl: { query: { filtered: { query: { query_string: { default_field: "_all", fields: [ "_all", "title^4", "description^1.2", "job^1", "school^1", "all_jobs^0.125", "all_schools^0.125", ], query, analyze_wildcard: true, lenient: true, }, }, }, }, from: offset, size, }, }; const res = await fetch(apiUrl, { method: "POST", headers: { "Content-Type": "application/json", Authorization: `Bearer ${accessToken}`, }, body: JSON.stringify(params), }); const data = await res.json(); return NextResponse.json(data); } 利用例 以下のURLからお試しいただけます。(利用にあたっては、GakuNin RDMへのログインが必要です。) ...

LEAF WriterとGakuNin RDMを用いたTEI/XMLファイルの編集環境の試作

LEAF WriterとGakuNin RDMを用いたTEI/XMLファイルの編集環境の試作

概要 LEAF WriterとGakuNin RDMを用いたTEI/XMLファイルの編集環境の試作を行いましたので、備忘録です。 参考 以下の記事で、LEAF WriterをNext.jsから使用する方法を紹介しました。 特に、以下のnpmパッケージを使用しています。 https://www.npmjs.com/package/@cwrc/leafwriter 上記で編集対象とするTEI/XMLファイルの入出力にあたり、GakuNin RDMを使用してみます。GakuNin RDMのAPIをJavaScriptから使用する方法について、以下も参考になりましたら幸いです。 使い方 以下がプロトタイプシステムのURLです。(色々と不具合が含まれる点にご注意ください。) https://rdm-leaf-editor.vercel.app/ UIはClaude 3.7 Sonnetに作成してもらっています。 「サインイン」ボタンを押すと、認証画面に進むので、ログインします。 ログイン後、リダイレクトされ、プロジェクトの一覧が表示されます。 TEI/XMLファイルが含まれるディレクトリまで移動します。ファイル名に「.xml」が含まれる場合、「Leaf Writer」の列に「編集」ボタンが表示されます。 LEAF Writerの編集画面に遷移するので、テキストを編集します。作業が完了したら、画面右上の「保存」ボタンを押します。 GakuNin RDMのUIから確認してみると、バージョンごとに保存されていることが確認できます。 実装 GakuNin RDMからのファイルの取得および更新は以下で行っています。 /** * ファイルの内容を取得する */ export async function fetchFileContent( url: string, accessToken: string ): Promise<string> { const response = await fetch(url, { method: "GET", headers: { Authorization: `Bearer ${accessToken}`, }, }); if (!response.ok) { throw new Error( `ファイルの取得に失敗しました。ステータスコード: ${response.status}` ); } return await response.text(); } /** * ファイルの内容を更新する */ export async function updateFileContent( url: string, content: string, accessToken: string, contentType: string = "application/xml" ): Promise<void> { const blob = new Blob([content], { type: contentType }); const response = await fetch(url, { method: "PUT", headers: { Authorization: `Bearer ${accessToken}`, }, body: blob, }); if (!response.ok) { const errorText = await response.text(); console.error("保存に失敗しました。ステータスコード:", response.status); console.error("レスポンス:", errorText); throw new Error(`保存に失敗しました。ステータスコード: ${response.status}`); } } 上記で使用するURLは以下です。 ...

LEAF WriterのEditor Toolbarをカスタマイズする

LEAF WriterのEditor Toolbarをカスタマイズする

概要 LEAF Writerでは、画面上部にタグの挿入をサポートするボタンが提供されています。本記事では、その編集方法について紹介します。 結果、以下のように、<app><lem>あああ</lem><rdg>いいい</rdg></app>を挿入する機能を追加しました。 https://youtu.be/XMnRP7s2atw 編集 以下のファイルを編集します。 packages/cwrc-leafwriter/src/components/editorToolbar/index.tsx 以下のように、人名や地名のタグをサポートする機能が設定されています。例えば、以下では、organizationに関する記述をコメントアウトしています。 ... const items: (MenuItem | Item)[] = [ { group: 'action', hide: isReadonly, icon: 'insertTag', onClick: () => { if (!container.current) return; const rect = container.current.getBoundingClientRect(); const posX = rect.left; const posY = rect.top + 34; showContextMenu({ // anchorEl: container.current, eventSource: 'ribbon', position: { posX, posY }, useSelection: true, }); }, title: 'Tag', tooltip: 'Add Tag', type: 'button', }, { group: 'action', type: 'divider', hide: isReadonly }, { color: entity.person.color.main, group: 'action', disabled: !isSupported('person'), hide: isReadonly, icon: entity.person.icon, onClick: () => window.writer.tagger.addEntityDialog('person'), title: 'Tag Person', type: 'iconButton', }, { color: entity.place.color.main, group: 'action', disabled: !isSupported('place'), hide: isReadonly, icon: entity.place.icon, onClick: () => window.writer.tagger.addEntityDialog('place'), title: 'Tag Place', type: 'iconButton', }, /* { color: entity.organization.color.main, group: 'action', disabled: !isSupported('organization'), hide: isReadonly, icon: entity.organization.icon, onClick: () => window.writer.tagger.addEntityDialog('organization'), title: 'Tag Organization', type: 'iconButton', }, ... 結果、以下のように選択肢が限定されます。 ...

LEAF WriterをNext.jsから使用する

LEAF WriterをNext.jsから使用する

概要 LEAF WriterをNext.jsから使用する方法について紹介します。 デモ 以下のURLからお試しいただけます。 https://leaf-writer-nextjs.vercel.app/ 以下が画面例です。ヘッダー部分がNext.jsを用いて追加した部分です。エディタ部分はLEAF Writerを使用しています。 ソースコードは以下でご確認いただけます。 https://github.com/nakamura196/leaf-writer-nextjs 使用方法 以下に記載があります。 https://gitlab.com/calincs/cwrc/leaf-writer/leaf-writer/-/tree/main/packages/cwrc-leafwriter?ref_type=heads 注意点として、div containerのidをleaf-writer-containerにする必要があります。これを行わない場合、スタイルが崩れることがわかりました。この点は、今後プルリクエストを送りたいと思います。 # const container = document.getElementById('#leaf-writer'); const container = document.getElementById('#leaf-writer-container'); まとめ LEAF Writerの応用にあたり、参考になりましたら幸いです。

LEAF Writer: Miradorを追加する

LEAF Writer: Miradorを追加する

概要 LEAF Writerのカスタマイズ方法に関する調査記録です。 https://gitlab.com/calincs/cwrc/leaf-writer/leaf-writer 今回は以下のように、Miradorを追加します。 方法 以下を参考にしてください。 https://gitlab.com/nakamura196/leaf-writer/-/commit/377438739cdeb0a7b770ee9d4b9fea86081179d8 修正が必要なファイルは以下です。 import $ from 'jquery'; import 'jquery-ui'; import Writer from '../../../Writer'; // @ts-ignore import Mirador from 'mirador'; interface IiifViewerProps { attribute?: string; parentId: string; tag?: string; writer: Writer; } class IiifViewer { readonly writer: Writer; readonly id: string; readonly tagName: string; readonly attrName: string; // eslint-disable-next-line @typescript-eslint/no-explicit-any, @typescript-eslint/no-redundant-type-constituents miradorInstance: any | null; $pageBreaks: unknown; currentIndex = -1; ignoreScroll = false; constructor({ attribute, parentId, tag, writer }: IiifViewerProps) { this.writer = writer; this.id = `${parentId}_iiifViewer`; this.tagName = tag ?? 'pb'; // page break element name this.attrName = attribute ?? 'facs'; // attribute that stores the image URL $(`#${parentId}`).append(` <div id="${this.id}" style="position: absolute; top: 0; bottom: 0; left: 0; right: 0"></div> `); this.writer.event('loadingDocument').subscribe(() => this.reset()); this.writer.event('documentLoaded').subscribe((success: boolean, body: HTMLElement) => { console.log('documentLoaded', success, body); if (!success) return; this.processDocument(body); }); this.writer.event('writerInitialized').subscribe(() => { if (!this.writer.editor) return; }); } private processDocument(doc: HTMLElement) { // (doc).find const $facsimile = $(doc).find(`*[_tag="facsimile"]`); const manifestUri = $facsimile.attr('sameas'); const config = { id: this.id, windows: [ { loadedManifest: manifestUri, }, ], window: { sideBarOpen: false, }, }; // eslint-disable-next-line @typescript-eslint/no-unsafe-assignment, @typescript-eslint/no-unsafe-call, @typescript-eslint/no-unsafe-member-access this.miradorInstance = Mirador.viewer(config); } reset() { this.$pageBreaks = null; this.currentIndex = -1; } } export default IiifViewer; 以下の箇所で、<facsimile sameAs="https://dl.ndl.go.jp/api/iiif/3437686/manifest.json">の情報を取得しています。 ...

LEAF Writer: サンプルデータの追加方法

LEAF Writer: サンプルデータの追加方法

概要 LEAF Writerのカスタマイズ方法に関する調査記録です。 https://gitlab.com/calincs/cwrc/leaf-writer/leaf-writer 今回はサンプルデータの追加方法に関する備忘録です。以下のように、独自のサンプルデータを追加します。 方法 以下を参考にしてください。 https://gitlab.com/nakamura196/leaf-writer/-/commit/c4e98090c94874037980819c9672eea10814eedb samples.jsonの更新に加えて、必須ではありませんが、アイコンを追加するため、apps/commons/src/icons/index.tsxも更新する必要がありました。 結果 以下のように、サンプルデータからエディタ環境を開くことができました。 まとめ LEAF Writerの理解にあたり、参考になりましたら幸いです。

LEAF Writer: Image Viewerの使い方

LEAF Writer: Image Viewerの使い方

概要 LEAF Writerでは、以下のように、テキストと画像を並列表示する機能を提供します。画像のページをおくると、テキストも連動して動作する機能も提供されています。 このImage Viewer部分に画像を表示するための、TEI/XMLの記述例を紹介します。 方法 以下のように、pbタグを指定します。 https://github.com/kouigenjimonogatari/kouigenjimonogatari.github.io/blob/master/xml/lw/01.xml 具体的には、以下です。 ... <pb corresp="#zone_0005" facs="https://dl.ndl.go.jp/api/iiif/3437686/R0000022/0,0,3445,4706/full/0/default.jpg" n="5"/> ... pb要素のfacs属性に指定された画像が、Image Viewer部分に表示されるようでした。 まとめ 近年、TEIとIIIFを組み合わせて利用するケースも多いです。 https://github.com/TEI-EAJ/jp_guidelines/wiki/IIIF画像とのリンク 上記のような記法に基づき、IIIF Image APIと連動するようなLEAF WriterのImage Viewerの開発にも取り組みたいと思います。 またその延長として、Oxygen XML Editorのアノテーション機能のようなツールも用意できればと思います。 LEAF Writerの利用にあたり、参考になりましたら幸いです。

LEAF Writer:スキーマのカスタマイズ

LEAF Writer:スキーマのカスタマイズ

概要 LEAF Writerのカスタマイズ方法に関する調査記録です。 https://gitlab.com/calincs/cwrc/leaf-writer/leaf-writer 今回はスキーマのカスタマイズ方法に関する備忘録です。以下のように、日本語訳などを表示することを目指します。 以下は、カスタマイズ前の表示です。以下のスキーマに基づき、多くの要素が英語の説明とともに表示されます。 https://www.tei-c.org/release/xml/tei/custom/schema/relaxng/tei_all.rng 方法 以下のように、スキーマファイルを指定します。 https://github.com/kouigenjimonogatari/kouigenjimonogatari.github.io/blob/master/xml/lw/01.xml 具体的には、以下です。 <?xml-model href="https://kouigenjimonogatari.github.io/lw/tei_genji.rng" type="application/xml" schematypens="http://relaxng.org/ns/structure/1.0"?> LEAF Writerはこのスキーマファイルを読み込み、validationや使用可能な要素の提示を行うようでした。 これはLEAF Writerに特化した機能ではなく、Oxygen XML Editorのような一般的なXMLエディタにおいても同じように動作することが多いようです。 (参考)LEAF Writerのカスタマイズ 上述したように、LEAF Writerでは、ロードしたXMLファイルで指定されたスキーマを参照するため、エディタとスキーマは疎結合な構成になっています。 しかし、LEAF Writer側で事前に定義したスキーマ以外を参照する場合、以下のようなダイアログが表示され、「ADD SCHEMA」ボタンから、独自に定義したスキーマの情報をLEAF Writerに教える必要があります。 上記の登録処理を行えば問題ありませんが、LEAF Writer側に事前に定義を追加しておきたい場合には、LEAF Writerをカスタマイズする必要があります。 具体的には、以下のように修正を加えることで、LEAF Writer側に指定したスキーマおよびCSSを事前登録できました。 https://gitlab.com/nakamura196/leaf-writer/-/commit/dc5108978bc3013a80965913d74e729daf6941f2 packages/cwrc-leafwriter/src/config/schemas.tsファイルに以下を追加しました。 ... { id: 'teiGenji', name: 'TEI Genji', mapping: 'tei', rng: ['https://kouigenjimonogatari.github.io/lw/tei_genji.rng'], css: ['https://kouigenjimonogatari.github.io/lw/tei_genji.css'], }, ... これにより、指定したスキーマがLEAF Writerに事前登録され、以後、同じスキーマを参照する際には、上記の追加設定は不要になりました。 まとめ TEIおよびLEAF Writerなどのツールにおけるスキーマの取り扱いについて、参考になりましたら幸いです。

校異源氏物語・本文テキストデータリポジトリで公開しているTEI/XMLを一部更新しました。

校異源氏物語・本文テキストデータリポジトリで公開しているTEI/XMLを一部更新しました。

概要 以下のリポジトリで校異源氏物語のTEI/XMLファイルを公開しています。 https://github.com/kouigenjimonogatari ここで公開しているTEI/XMLに対して、一部変更を加えましたので、備忘録です。 フォルダ構成 修正前のファイルは以下に格納しています。これまでから変更はありません。 https://github.com/kouigenjimonogatari/kouigenjimonogatari.github.io/tree/master/tei 更新したファイルは以下に格納しました。 https://github.com/kouigenjimonogatari/kouigenjimonogatari.github.io/tree/master/xml/lw 後述する修正を加えたXMLファイルが格納されています。 修正内容 スキーマの追加 以下のrngファイルを追加しました。 <?xml-model href="https://kouigenjimonogatari.github.io/lw/tei_genji.rng" type="application/xml" schematypens="http://relaxng.org/ns/structure/1.0"?> このrngファイルは、使用するタグを限定し、かつ日本語訳を追加したものです。Romaで作成しており、rngファイルへの変換前のoddファイルもリポジトリに格納しています。 https://github.com/kouigenjimonogatari/kouigenjimonogatari.github.io/blob/master/lw/tei_genji.odd Romaの使い方等については、以下を参考にしてください。 これにより、例えばOxygen XML EditorやLEAF Writerなどにおいて、候補として表示されるタグが限定され、一部日本語訳が表示されるようになります。 LEAF Writerでの表示例は以下をご確認ください。 https://leaf-writer.leaf-vre.org/edit?provider=github&owner=kouigenjimonogatari&ownerType=organization&repo=kouigenjimonogatari.github.io&path=xml%2Flw&filename=01.xml CSSの追加 以下のcssファイルを追加しました。 <?xml-stylesheet type="text/css" href="https://kouigenjimonogatari.github.io/lw/tei_genji.css"?> 上記のスキーマの追加と同様、Oxygen XML EditorやLEAF Writerなどにおいて、追加したcssファイルに基づく表示に変更されました。 revisionDescの追加 revisionDesc要素を追加しました。今後の修正内容を記録していく予定です。 <revisionDesc status="published"> <change when="2024-06-28" who="#snakamura">pb要素のfacs属性を修正しました。facsimile要素を修正しました。</change> </revisionDesc> pb要素の変更 pb要素の記述方法を以下のように修正しました。 <pb corresp="#zone_0005" facs="https://dl.ndl.go.jp/api/iiif/3437686/R0000022/0,0,3445,4706/full/0/default.jpg" n="5"/> facs属性に対して、画像のURLを与えることで、LEAF Writerなどにおいて、Image Viewerの利用が可能になりました。 facsimile要素の記述方法の変更 IIIFマニフェストやキャンバスとの対応付の方法について、以下のガイドラインを参考に、修正しました。 https://github.com/TEI-EAJ/jp_guidelines/wiki/IIIF画像とのリンク#2024-年度版 以下に、変更前と変更後を示します。 変更前 <facsimile> <surfaceGrp facs="https://dl.ndl.go.jp/api/iiif/3437686/manifest.json"> <surface> <graphic n="https://dl.ndl.go.jp/api/iiif/3437686/canvas/22" url="https://dl.ndl.go.jp/api/iiif/3437686/R0000022/full/full/0/default.jpg" /> <zone xml:id="zone_0005" lrx="3445" lry="4706" ulx="0" uly="0" /> </surface> 変更後 <facsimile sameAs="https://dl.ndl.go.jp/api/iiif/3437686/manifest.json"> <surface lrx="6890" lry="4706" sameAs="https://dl.ndl.go.jp/api/iiif/3437686/canvas/22" ulx="0" uly="0" xml:id="f001"> <graphic height="4706px" sameAs="https://dl.ndl.go.jp/api/iiif/3437686/R0000022" url="https://dl.ndl.go.jp/api/iiif/3437686/R0000022/full/full/0/default.jpg" width="6890px"/> <zone lrx="3445" lry="4706" ulx="0" uly="0" xml:id="zone_0005"/> </surface> IIIF Image APIの情報や画像のサイズに関する情報が追加され、より機械的に利用しやすい形になったかと思います。 ...

LEAF Writer:Japan Searchに対するEntity Lookup

LEAF Writer:Japan Searchに対するEntity Lookup

概要 LEAF Writerのカスタマイズ方法に関する調査記録です。 https://gitlab.com/calincs/cwrc/leaf-writer/leaf-writer 今回はEntity Lookupの追加方法に関する備忘録です。具体的には、以下のように、Japan Searchの利活用スキーマに対する問い合わせを行う機能を追加します。 方法 フォークしたリポジトリに対して、以下の変更を加えました。 https://gitlab.com/nakamura196/leaf-writer/-/commit/69e10e2ddd17f6cd01501fbf29f0dd86d1e86a3a 利用 以下のリポジトリを使用することで、UIの一部が日本語化されたバージョンをお試しいただけます。 https://gitlab.com/nakamura196/leaf-writer 起動方法は以下を参考にしてください。 まとめ この方法を応用することで、任意のAPIの追加ができそうです。 LEAF Writerの応用にあたり、参考になりましたら幸いです。

LEAF Writer:日本語UIの追加

LEAF Writer:日本語UIの追加

概要 LEAF Writerのカスタマイズ方法に関する調査記録です。 https://gitlab.com/calincs/cwrc/leaf-writer/leaf-writer 今回は日本語UIの追加方法に関する備忘録です。 方法 フォークしたリポジトリに対して、以下の変更を加えました。 https://gitlab.com/nakamura196/leaf-writer/-/commit/c9b7053814fc1e5a27a1847f20076096832dd68b 利用 以下のリポジトリを使用することで、UIの一部が日本語化されたバージョンをお試しいただけます。 https://gitlab.com/nakamura196/leaf-writer 起動方法は以下を参考にしてください。 まとめ LEAF Writerの応用にあたり、参考になりましたら幸いです。

LEAF-Writerをローカル環境で動かす

LEAF-Writerをローカル環境で動かす

概要 LEAF-Writerをローカル環境で動作する機会がありましたので、備忘録です。 リポジトリ 以下を使用します。 https://gitlab.com/calincs/cwrc/leaf-writer/leaf-writer 方法 git clone https://gitlab.com/calincs/cwrc/leaf-writer/leaf-writer cd leaf-writer npm i npm run dev 3000ポートでLEAF-Writerが起動します。 まとめ Dockerを用いる方法もあるようなので、方法がわかりましたら共有したいと思います。