ホーム 記事一覧 ブック DH週間トピックス 検索 このサイトについて
English
CantaloupeのAccess Controlを試す

CantaloupeのAccess Controlを試す

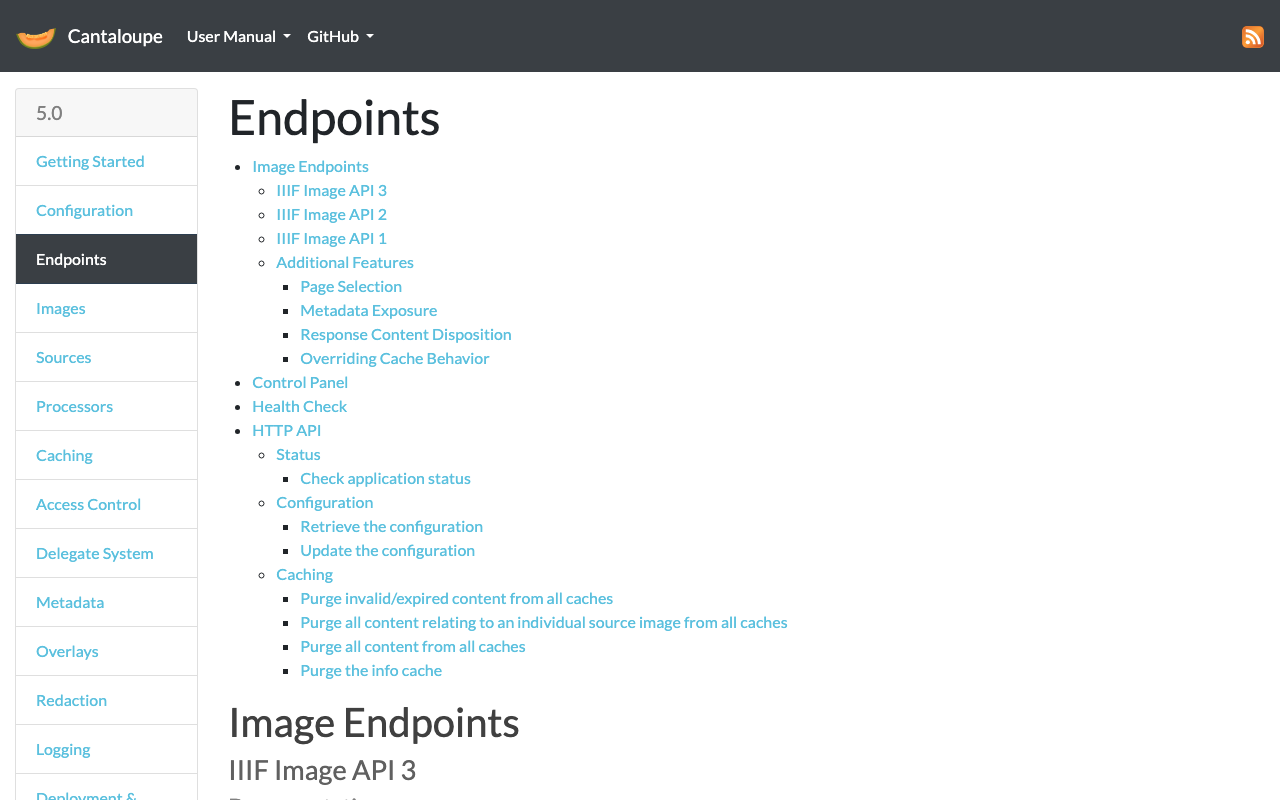
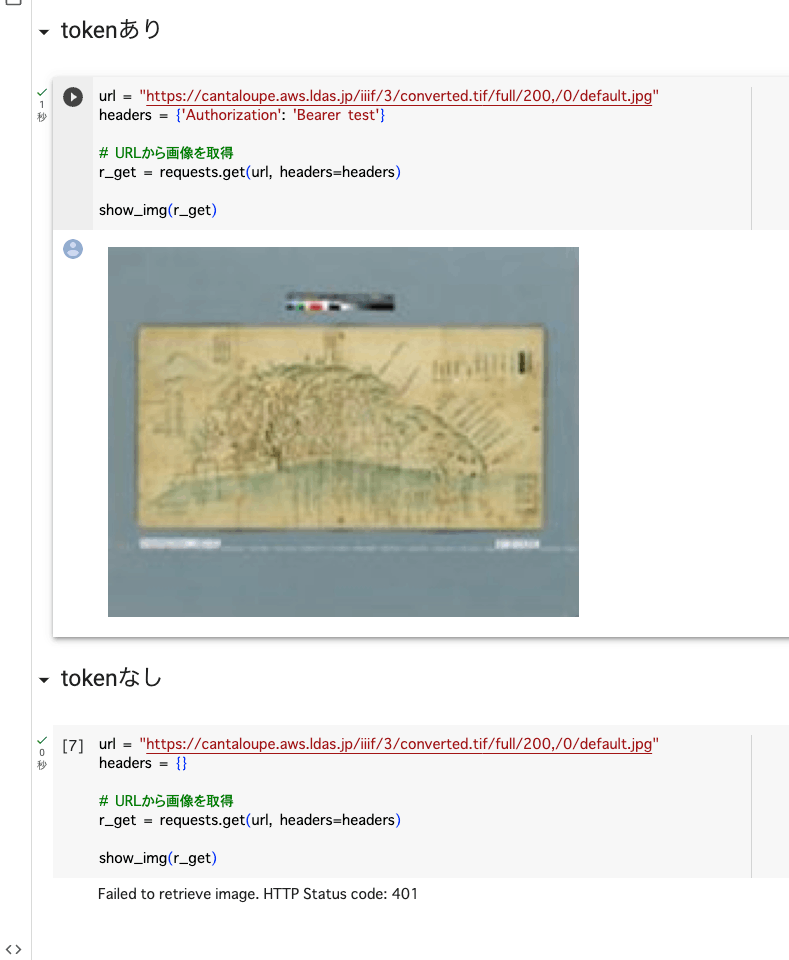
概要 CantaloupeのAccess Controlを試しましたので、備忘録です。 https://cantaloupe-project.github.io/manual/5.0/access-control.html Bearer認証 以下を参考にしました。 https://cantaloupe-project.github.io/manual/5.0/access-control.html#Tiered Access All or Nothing Access 認証情報が間違っている場合には、エラーを返却するものです。 以下のように、tokenがtestの場合は返却するようにしました。 def authorize(options = {}) header = context['request_headers'] .select{ |name, value| name.downcase == 'authorization' } .values.first if header&.start_with?('Bearer ') token = header[7..header.length - 1] if token == "test" return true end end return { 'status_code' => 401, 'challenge' => 'Bearer charset="UTF-8"' } end 上記の挙動を確認するGoogle Colabを作成しました。 https://colab.research.google.com/github/nakamura196/000_tools/blob/main/Cantaloupeのaccess_controlのテスト.ipynb 実行した結果、以下のように、tokenが正しい場合は画像を取得でき、間違っている、または提供されていない場合には画像を取得できません。 Login with degraded access for unauthed users iiif-auth-serverでは、未認証ユーザ向けに権限を制限したログイン、という例が提供されており、それをCantaloupeで再現してみます。 https://github.com/digirati-co-uk/iiif-auth-server 具体的には、認証情報が間違っている場合には、グレースケールの画像を返却します。誤っている点もあるかもしれませんが、以下のようなスクリプトを用意しました。 def authorize(options = {}) header = context['request_headers'].find { |name, value| name.downcase == 'authorization' }&.last request_uri = context['request_uri'] filename, extension = extract_filename_and_extension(request_uri) return true if filename == "gray" if header&.start_with?('Bearer ') token = header[7..-1] return true if token == "test" end { 'status_code' => 302, 'location' => "#{request_uri.sub(filename + extension, "gray#{extension}")}" } end def extract_filename_and_extension(uri_str) uri = URI.parse(uri_str) filename_with_extension = uri.path.split("/").last filename = File.basename(filename_with_extension, ".*") # Use ".*" to remove any extension extension = File.extname(filename_with_extension) [filename, extension] end Google Colabの実行結果は以下です。未認証ユーザにはグレースケールの画像が返却され、認証ユーザにはカラー画像が返却されます。 ...

Cantaloupeでinfo.jsonに値を追加する

Cantaloupeでinfo.jsonに値を追加する

概要 以下を参考に、Cantaloupeが返却するinfo.jsonに値を追加してみました。 https://cantaloupe-project.github.io/manual/5.0/endpoints.html 方法 上記のページを参考に、extra_iiif3_information_response_keysを以下のように修正してみました。 def extra_iiif3_information_response_keys(options = {}) { 'rights' => 'http://example.org/license.html', 'service' => [ { '@id': 'https://example.org/auth/login', '@type': 'AuthCookieService1', 'profile': 'http://iiif.io/api/auth/1/login', 'label': 'Log In' } ], 'exif' => context.dig('metadata', 'exif'), 'iptc' => context.dig('metadata', 'iptc'), 'xmp' => context.dig('metadata', 'xmp_string') } end 結果、以下のようなinfo.jsonを取得できました。 { "@context": "http://iiif.io/api/image/3/context.json", "id": "https://cantaloupe.aws.ldas.jp/iiif/3/converted.tif", ... "rights": "http://example.org/license.html", "service": [ { "@id": "https://example.org/auth/login", "@type": "AuthCookieService1", "profile": "http://iiif.io/api/auth/1/login", "label": "Log In" } ], "exif": { "tagSet": "Baseline TIFF", "fields": { "ImageWidth": 13300, "ImageLength": 10400, "BitsPerSample": 8, "Compression": 7, "PhotometricInterpretation": 6, ... ライセンス表示やIIIF Auth APIとの組み合わせに使用できるものかと思われます。 IIIF Auth APIについては、以下の記事も参考にしてください。 まとめ CantaloupeのマニュアルのEndpointsの一部を試してみました。 他の方の参考になりましたら幸いです。

Cantaloupeのoverlayを試す

Cantaloupeのoverlayを試す

概要 Cantaloupeが提供するoverlayの機能を試します。 https://cantaloupe-project.github.io/manual/5.0/overlays.html BasicStrategy BasicStrategyでは、cantaloupe.propertiesの設定に基づき、重ね合わせを行うようです。 以下のように、画像に画像を重ねることができます。以下のいらすとやさんの画像を使わせていただきました。 https://www.irasutoya.com/2020/12/blog-post_279.html 後述する設定ファイルでpositionにbottom rightを設定したため、以下のように、右下に指定した画像が表示されました。 cantaloupe.propertiesのoverlays.BasicStrategy.enabledとoverlays.BasicStrategy.imageを修正しました。 ########################################################################### # OVERLAYS ########################################################################### # Controls how overlays are configured. `BasicStrategy` will use the # `overlays.BasicStrategy.*` keys in this section. `ScriptStrategy` will # use a delegate method. (See the user manual.) overlays.strategy = BasicStrategy # Whether to enable overlays using the BasicStrategy. overlays.BasicStrategy.enabled = true # false # `image` or `string`. overlays.BasicStrategy.type = image # Absolute path or URL of the overlay image. Must be a PNG file. overlays.BasicStrategy.image = https://1.bp.blogspot.com/-8FUEz6vBnoQ/X7zMVAuhQMI/AAAAAAABcZ0/VI1Z9eN76pIj2rfHshveNbFoMKubXYTpACNcBGAsYHQ/s400/baby_role_towel_utsubuse.png ScriptStrategy ScriptStrategyでは、cantaloupe.propertiesのdelegate_script.pathnameに設定したスクリプトのoverlay関数に基づき、重ね合わせを行うようです。 ...

Cantaloupeの管理画面を有効化する

Cantaloupeの管理画面を有効化する

概要 Cantaloupeの管理画面を有効化する方法です。以下のようなサーバ情報を閲覧できました。 設定方法 cantaloupe.propertiesの以下の箇所を編集します。 # Enables the Control Panel, at /admin. endpoint.admin.enabled = true # false endpoint.admin.username = admin endpoint.admin.secret = <パスワード> 結果、以下のようなURLにアクセスして、Basic認証画面が表示されればOKです。 https://cantaloupe.aws.ldas.jp/admin まとめ Cantaloupeの利用にあたり、参考になりましたら幸いです。

EC2に立てたCantaloupeをHTTPS対応する

EC2に立てたCantaloupeをHTTPS対応する

はじめに 以下の記事で、EC2にCantaloupeを立てる方法を記載しました。 今回は、独自ドメインの設定とHTTPS対応を行います。 独自ドメインの設定 今回、cantaloupe.aws.ldas.jpというドメインを54.172.71.20に割り当てます。Route 53を使う場合、以下のように設定できます。 SSL証明書の取得 sudo su apt install certbot certbot certonly --standalone -d cantaloupe.aws.ldas.jp root@ip-172-31-62-61:/home/ubuntu# certbot certonly --standalone -d cantaloupe.aws.ldas.jp Saving debug log to /var/log/letsencrypt/letsencrypt.log Enter email address (used for urgent renewal and security notices) (Enter 'c' to cancel): xxx@gmail.com - - - - - - - - - - - - - - - - - - - - - - - - - - - - - - - - - - - - - - - - Please read the Terms of Service at https://letsencrypt.org/documents/LE-SA-v1.3-September-21-2022.pdf. You must agree in order to register with the ACME server. Do you agree? - - - - - - - - - - - - - - - - - - - - - - - - - - - - - - - - - - - - - - - - (Y)es/(N)o: Y - - - - - - - - - - - - - - - - - - - - - - - - - - - - - - - - - - - - - - - - Would you be willing, once your first certificate is successfully issued, to share your email address with the Electronic Frontier Foundation, a founding partner of the Let's Encrypt project and the non-profit organization that develops Certbot? We'd like to send you email about our work encrypting the web, EFF news, campaigns, and ways to support digital freedom. - - - - - - - - - - - - - - - - - - - - - - - - - - - - - - - - - - - - - - - - (Y)es/(N)o: Y Account registered. Requesting a certificate for cantaloupe.aws.ldas.jp Successfully received certificate. Certificate is saved at: /etc/letsencrypt/live/cantaloupe.aws.ldas.jp/fullchain.pem Key is saved at: /etc/letsencrypt/live/cantaloupe.aws.ldas.jp/privkey.pem This certificate expires on 2023-12-19. These files will be updated when the certificate renews. Certbot has set up a scheduled task to automatically renew this certificate in the background. - - - - - - - - - - - - - - - - - - - - - - - - - - - - - - - - - - - - - - - - If you like Certbot, please consider supporting our work by: * Donating to ISRG / Let's Encrypt: https://letsencrypt.org/donate * Donating to EFF: https://eff.org/donate-le - - - - - - - - - - - - - - - - - - - - - - - - - - - - - - - - - - - - - - - - Webサーバの設定: Nginxのインストール apt install nginx vi /etc/nginx/sites-available/cantaloupe.aws.ldas.jp 設定 ...

NDLOCRおよびNDL古典籍OCRのver.2を用いたノートブックを作成しました。

NDLOCRおよびNDL古典籍OCRのver.2を用いたノートブックを作成しました。

お知らせ 2026-02-24 ! 本ページで提供しているノートブックは今後更新されません。 NDLOCRについては、デスクトップアプリケーションおよびコマンドラインツールとして簡易に利用可能な「NDLOCR-Lite」が公開されました。今後は、こちらをお使いいただけますと幸いです。 https://github.com/ndl-lab/ndlocr-lite 2025-04-02 現在、不具合が発生しています。修正が完了するまで、ご使用をお控えください。 不具合を修正しました。 2025-03-21 NDL古典籍OCRについては、デスクトップアプリケーションとして簡易に利用可能な「NDL古典籍OCR-Lite」が公開されました。今後は、こちらをお使いいただけますと幸いです。 https://github.com/ndl-lab/ndlkotenocr-lite 概要 NDLOCRおよびNDL古典籍OCRのver.2を用いたノートブックを作成しました。 それぞれ以下のリンクからお試しいただけます。 NDL OCR https://colab.research.google.com/github/nakamura196/000_tools/blob/main/NDLOCR_v2の実行例.ipynb NDL古典籍OCR https://colab.research.google.com/github/nakamura196/000_tools/blob/main/NDL古典籍OCR_v2の実行例.ipynb 最新のノートブックとは異なりますが、ノートブックの使い方については以下の動画をご確認ください。 https://youtu.be/46p7ZZSul0o 以下、詳細について説明します。 背景 NDLOCRとNDL古典籍OCRについて、2023年にver.2が公開されました。ver.1とver.2の違いについては、以下のサイトを参考にしていただきたいですが、特に行単位で認識した文字列の読み順の付与性能が向上しています。 https://lab.ndl.go.jp/data_set/r4ocr/r4_software/ https://lab.ndl.go.jp/data_set/r4_koten/ 今回作成したノートブックでは、これらver.2のOCR処理プログラムを採用しています。 入力方法 これまでのノートブックと同様、以下のオプションを提供します。 画像 単一の画像ファイルのURLを指定する場合 単一の画像ファイルをアップロードする場合 複数の既にダウンロード済みの画像ファイルを対象にする場合 PDF 単一のPDFファイルのURLを指定する場合 単一のPDFファイルをアップロードする場合 単一の既にダウンロード済みのPDFファイルを対象にする場合 IIIF IIIFマニフェストファイルのURLを指定する場合(本記事執筆時点ではPresentation API v2のみ) 実行結果 上記の各オプションを実行後、以下のような画面が表示されます。 具体的には、以下の2種類です。 Googleドライブへのリンク(「以下に出力しました。」の部分) 認識結果を確認するビューアへのリンク(「認識結果は以下です。」の部分) それぞれについて説明します。 Googleドライブへのリンク 以下のように、4つのフォルダが作成されます。 txtおよびxmlはNDLOCRおよびNDL古典籍OCRの一部で出力されるデータです。 pdfは認識結果を透明テキスト付きPDFで出力します。末尾に_textがあるものとないものの2種類が出力されます。_textがついているPDFは、以下のように、確認用にテキストを赤字で表示します。 iiifは後述するビューアで使用するデータです。jsonやxmlファイルが格納されていますが、主に開発者向けの情報になります。 認識結果を確認するビューアへのリンク 以下のようなビューアが表示されます。認識結果のテキストを画像に重ね合わせることで、OCRの精度などを確認できます。 本ビューアについて、技術的な情報については別の記事で紹介できればと思います。 まとめ ノートブックについて、不具合や不足機能があるかと思いますので、随時ご連絡いただけますと幸いです。 NDLOCRおよびNDL古典籍OCRの活用にあたり、お役に立ちましたら幸いです。

IIIFイメージサーバの一つであるCantaloupeをEC2で起動する

IIIFイメージサーバの一つであるCantaloupeをEC2で起動する

概要 IIIFイメージサーバの一つであるCantaloupeをEC2で起動する方法の備忘録です。 https://cantaloupe-project.github.io/ 加えて、画像のダウンロードサイズに制限を加えるDelegate Methodsの一例についても紹介します。具体的には、フルサイズの画像を/full/full/で取得しようとした際、エラーが出てしまうケースへの対応を行います。 https://cantaloupe-project.github.io/manual/5.0/access-control.html Cantaloupeのセットアップ EC2インスタンスの作成 プラットフォームをUbuntu、インスタンスタイプをt2.medium、ストレージを8GB、に設定したEC2インスタンスを作成しました。 結果、以下の「パブリック IPv4 アドレス」を持つEC2インスタンスが作成されました。 54.172.71.20 ssh 起動したEC2インスタンスにsshで接続します。接続後、以下のコマンドにより、rootユーザのパスワードを設定します。 sudo su passwd javaのインストール 以下のコマンドなどにより、javaをインストールします。 apt-get update apt install default-jre cantaloupeのダウンロード 以下のコマンドなどにより、cantaloupeをダウンロードします。 apt install unzip wget https://github.com/cantaloupe-project/cantaloupe/releases/download/v5.0.5/cantaloupe-5.0.5.zip unzip cantaloupe-5.0.5.zip 設定 以下のコマンドなどにより、設定ファイル「cantaloupe.properties」を編集します。 cd cantaloupe-5.0.5 # 設定例ファイルから設定ファイルをコピー cp cantaloupe.properties.sample cantaloupe.properties vi cantaloupe.propertiesなどのコマンドにより、画像を格納するフォルダを指定します。 cantaloupe.properties FilesystemSource.BasicLookupStrategy.path_prefix = /home/ubuntu/images/ cantaloupeの起動 java -Dcantaloupe.config=cantaloupe.properties -Xmx2g -jar cantaloupe-5.0.5.jar 以下のようなURLでcantaloupeが起動します。 http://54.172.71.20:8182/ 画像の配置 サーバ上での作業 ubuntuユーザで/home/ubuntu/imagesに画像を格納するフォルダを作成します。 su ubuntu mkdir /home/ubuntu/images ローカルでの作業 以下のノートブックなどを使って、pyramid tiled tifをローカルにダウンロードします。 https://zenn.dev/nakamura196/articles/ef6b0937e4e887 ...

Mirador2のPhysical Document Rulerを試す

Mirador2のPhysical Document Rulerを試す

概要 IIIFのLinking to External ServicesにPhysical Dimensionsがあります。 https://iiif.io/api/annex/services/#physical-dimensions 以下のように説明されています。 For digitized objects, it is often useful to know the physical dimensions of the object. When available, they allow a client to present a ruler, or other rendition of physical scale, to the user. (機械翻訳)デジタル化された物体の場合、その物体の物理的な寸法を知ることはしばしば有用である。利用可能な場合、クライアントが定規やその他の物理的な縮尺をユーザーに提示することができます。 Mirador ver.2とver.3では、それぞれ以下のプラグインが存在します。 ver.2 https://github.com/dbmdz/mirador-plugins#physical-document-ruler ver.3 https://github.com/ubleipzig/mirador-ruler-plugin 残念ながらver.3のプラグインをうまく導入することができませんでした。そこで、Mirador2を対象に、Physical Document Rulerを使用する方法を説明します。 結果、例えば東京大学史料編纂所所蔵の大型絵図である正保琉球国絵図写(請求記号:S島津 76-2-4、法量:354.1×731.0cm)を対象にした場合、以下のように定規を表示させることができます。 ソースコードの準備 以下のリポジトリからソースコードを取得できます。 https://github.com/nakamura196/mirador2 Mirador2のプラグインを格納する以下のフォルダmirador/pluginsに対して、以下で公開されているPhysicalRulerのソースコードをコピーしています。 https://github.com/dbmdz/mirador-plugins/tree/main/PhysicalRuler そして、index.htmlで以下のように参照しています。 ... <body> <div id="viewer"></div> <script src="mirador/mirador.min.js"></script></script> <script src="mirador/plugins/PhysicalRuler/physicalRuler.js"></script> <script type="text/javascript"> ... </script> </body> データ マニフェストファイルの各Canvasに対して、serviceを追記します。physicalScaleは実寸(cm)をピクセル数で割った値を用いています。 ...

Mirador3プラグイン開発: Text Overlay pluginで縦書き対応を行う

Mirador3プラグイン開発: Text Overlay pluginで縦書き対応を行う

概要 Text Overlay plugin for Mirador 3は、OCRまたはトランスクリプションに基づいて選択可能なテキストオーバーレイを表示するMirador3のプラグインです。 https://github.com/dbmdz/mirador-textoverlay 以下でデモページが公開されています。 https://mirador-textoverlay.netlify.app/ 一方、日本語などの縦書きテキストを表示してみると、以下のようにうまく表示ができませんでした。 そこで、上記のリポジトリをフォークして、縦書きテキストも表示できるようにしました。以下のリポジトリでソースコードを公開しています。(いずれプルリクエストも検討したいと思います。) https://github.com/nakamura196/mirador-textoverlay 結果、以下のように縦書きテキストも表示できるようになりました。 デモページは以下です。 https://nakamura196.github.io/mirador-integration-textoverlay/?manifest=https://nakamura196.github.io/static/iiif/6722fa34-2fff-11ee-a029-0242ac1c000c/manifest_o.json&annotationState=1&canvasIndex=3 以下、本モジュール開発に関連する事項をメモします。 マニフェストファイルの構造 本モジュールでは、以下の要件を満たすIIIFマニフェストが必要とのことでした。 https://github.com/dbmdz/mirador-textoverlay#requirements-for-supported-iiif-manifests いくつかのオプションがありますが、以下のwellcome collectionのマニフェストを参考にしました。 https://iiif.wellcomecollection.org/presentation/v2/b18035723 Canvas毎にseeAlsoでALTO XMLファイルへのURLが指定されています。 { "@id": "https://iiif.wellcomecollection.org/presentation/b18035723/canvases/b18035723_0003.JP2", "@type": "sc:Canvas", "label": "-", "thumbnail": { "@id": "https://iiif.wellcomecollection.org/thumbs/b18035723_0003.JP2/full/72,100/0/default.jpg", "@type": "dctypes:Image", "service": { "@context": "http://iiif.io/api/image/2/context.json", "@id": "https://iiif.wellcomecollection.org/thumbs/b18035723_0003.JP2", "profile": "http://iiif.io/api/image/2/level0.json", "protocol": "http://iiif.io/api/image", "width": 732, "height": 1024, "sizes": [ { "width": 72, "height": 100 }, { "width": 143, "height": 200 }, { "width": 286, "height": 400 }, { "width": 732, "height": 1024 } ] } }, "seeAlso": { "@id": "https://api.wellcomecollection.org/text/alto/b18035723/b18035723_0003.JP2", "profile": "http://www.loc.gov/standards/alto/v3/alto.xsd", "format": "text/xml", "label": "METS-ALTO XML" }, "height": 3372, "width": 2411, "images": [ { "@id": "https://iiif.wellcomecollection.org/presentation/b18035723/canvases/b18035723_0003.JP2/painting/anno", "@type": "oa:Annotation", "motivation": "sc:painting", "resource": { "@id": "https://iiif.wellcomecollection.org/image/b18035723_0003.JP2/full/732,1024/0/default.jpg", "@type": "dctypes:Image", "format": "image/jpeg", "height": 1024, "width": 732, "service": { "@context": "http://iiif.io/api/image/2/context.json", "@id": "https://iiif.wellcomecollection.org/image/b18035723_0003.JP2", "profile": "http://iiif.io/api/image/2/level1.json", "protocol": "http://iiif.io/api/image", "width": 2411, "height": 3372 } }, "on": "https://iiif.wellcomecollection.org/presentation/b18035723/canvases/b18035723_0003.JP2" } ], "otherContent": [ { "@id": "https://iiif.wellcomecollection.org/annotations/v2/b18035723/b18035723_0003.JP2/line", "@type": "sc:AnnotationList", "label": "Text of page -" } ], "within": "" } まとめ 開発したプラグインについて、xmlファイルのロードが完了しない時があるなど、引き続き改善が必要ですが、Mirador3のプラグイン開発やIIIF、OCR結果の活用にあたり、参考になりましたら幸いです。 ...

Mirador 3のmirador-annotationsプラグインとSimpleAnnotationServerを試す

Mirador 3のmirador-annotationsプラグインとSimpleAnnotationServerを試す

概要 mirador-annotationsはアノテーションの作成ツールを追加するMirador 3のプラグインです。 https://github.com/ProjectMirador/mirador-annotations 今回、以下のSimpleAnnotationServerとの組み合わせを試してみましたので、その備忘録です。 https://github.com/glenrobson/SimpleAnnotationServer SimpleAnnotationServerの準備 以下のGetting Startedの通りに進めます。 https://github.com/glenrobson/SimpleAnnotationServer#getting-started http://localhost:8888/index.html にアクセスすると、以下の画面が表示されます。 エンドポイントは http://localhost:8888/annotation/ のようで、登録済みのアノテーションの一覧(はじめは空)が表示されます。 このエンドポイントをMirador 3から利用することになります。 Mirador 3の準備 ソースコードから 以下のサイトからソースコードをクローンして立ち上げます。 https://github.com/ProjectMirador/mirador-annotations git clone https://github.com/ProjectMirador/mirador-annotations cd mirador-annotations npm i # npm i --force が必要かもしれません npm run start http://localhost:3000/ にアクセスすると、以下の画面が表示されます。 アダプタの設定 demo/src/index.jsについて、SimpleAnnotationServerV2Adapterをインポートし、さらにエンドポイント(ここでは、endpointUrlV2)に先ほど起動したSimpleAnnotationServerを指定します。 import mirador from 'mirador/dist/es/src/index'; import annotationPlugins from '../../src'; import LocalStorageAdapter from '../../src/LocalStorageAdapter'; import AnnototAdapter from '../../src/AnnototAdapter'; // 以下を追加 import SimpleAnnotationServerV2Adapter from '../../src/SimpleAnnotationServerV2Adapter'; const endpointUrl = 'http://127.0.0.1:3000/annotations'; // 以下を追加 const endpointUrlV2 = 'http://0.0.0.0:8888/annotation'; const config = { annotation: { // 以下をコメントアウト // adapter: (canvasId) => new LocalStorageAdapter(`localStorage://?canvasId=${canvasId}`), // adapter: (canvasId) => new AnnototAdapter(canvasId, endpointUrl), // 以下を追加 adapter: (canvasId) => new SimpleAnnotationServerV2Adapter(canvasId, endpointUrlV2), exportLocalStorageAnnotations: false, // display annotation JSON export button }, id: 'demo', window: { defaultSideBarPanel: 'annotations', sideBarOpenByDefault: true, }, windows: [{ loadedManifest: 'https://iiif.harvardartmuseums.org/manifests/object/299843', }], }; mirador.viewer(config, [...annotationPlugins]); アダプタの修正 以下のプルリクエストでも指摘されていますが、アダプタの一部修正が必要です。 ...

【Omeka S モジュール紹介】IiifPresentation:IIIF Presentation APIの追加

【Omeka S モジュール紹介】IiifPresentation:IIIF Presentation APIの追加

概要 IIIF Presentation APIを追加するIiifPresentationモジュールを試しましたので、その備忘録です。 https://omeka.org/s/modules/IiifPresentation/ なお、簡単に試した限りでは、以下のIIIF Serverモジュールが提供する機能と大きな違いはないように思いました。 https://omeka.org/s/modules/IiifServer/ 違いとして、今回のモジュールはOmeka Teamによって開発されたモジュールであり、さらに細かな設定をせずに利用できる点が利点として考えられました。 インストール 通常のモジュールのインストール手順と同じです。 使い方 アイテムIDが8であるリソースを対象に、本モジュールが提供する機能を試してみます。 以下がベースのURLです。 https://omekas.aws.ldas.jp/omeka4/ 以下のURLにアクセスすると、IIIF manifestを取得できます。 https://omekas.aws.ldas.jp/omeka4/iiif-presentation/3/item/8/manifest 次に、以下のURLにアクセスすると、Miradorのビューアへリダイレクトされます。 https://omekas.aws.ldas.jp/omeka4/iiif-presentation/3/item/8 その他、複数のアイテムIDやアイテムセットのIDを指定することで、IIIFコレクションの取得や閲覧が可能なようです。詳細については、以下をご確認ください。 https://omeka.org/s/docs/user-manual/modules/iiifpresentation/ まとめ IIIFモジュールやビューアに関するモジュール(MiradorやUniversal Viewer)をインストールせずに、本モジュールのみでマニフェストの生成とビューアによる閲覧を実現できる点は有効だと思いました。 一方、カスタマイズ性はIIIFモジュールなどのほうが優れているように思われますので、用途に応じて使い分けるのがよさそうに思いました。 他の方の参考になりましたら幸いです。

Omeka Classic IIIF Toolkitで使用されているMiradorを2.7にアップデートしました。

Omeka Classic IIIF Toolkitで使用されているMiradorを2.7にアップデートしました。

概要 Omeka Classic IIIF Toolkitで使用されているMiradorを2.7にアップデートしました。以下のページでソースコードをご確認いただけます。 https://github.com/nakamura196/IiifItems また、以下のURLから、zipファイルをダウンロードできます。 https://github.com/nakamura196/IiifItems/releases/download/1.1.1/IiifItems-1.1.1.zip できるようになること Mirador 2.7を使用することにより、IIIFのImage APIに非対応の画像でもビューアに表示することが可能になります。これにより、一般に公開されている画像に対しても、Miradorを用いたアノテーションの付与および管理が可能になります。 この利点を活かして、画像のURLを含むCSVファイルを用意して、Omeka Classicに登録する以下の記事を執筆しています。 まとめ Omeka Classic IIIF Toolkitの利用にあたり、参考になりましたら幸いです。 なお、Omeka Classic IIIF Toolkitを開発してくださったトロント大学図書館の方々に感謝いたします。

Omeka Classic IIIF Toolkitにデータを一括登録する

Omeka Classic IIIF Toolkitにデータを一括登録する

概要 Omeka Classic IIIF Toolkitにデータを一括登録する方法を説明します。Omeka Classic IIIF Toolkitのセットアップについては、以下を参考にしてください。 また、以下の記事の内容を発展させ、excelデータを入力データとして、より簡便に使用できるようにしたものです。 excelファイルの準備 以下のようなexcelファイルを準備します。 https://github.com/nakamura196/000_tools/blob/main/data/sample.xlsx 「collection」「item」「annotation」の3つのシートを用意します。 collection manifest_uri https://d1fasenpql7fi9.cloudfront.net/v1/manifest/3437686.json item title canvas_uri width height image_url manifest_uri 校異源氏物語. 巻一 [4] https://www.dl.ndl.go.jp/api/iiif/3437686/canvas/4 6890 4706 https://www.dl.ndl.go.jp/api/iiif/3437686/R0000004/full/full/0/default.jpg https://d1fasenpql7fi9.cloudfront.net/v1/manifest/3437686.json 校異源氏物語. 巻一 [4] https://www.dl.ndl.go.jp/api/iiif/3437686/canvas/5 6890 4706 https://www.dl.ndl.go.jp/api/iiif/3437686/R0000005/full/full/0/default.jpg https://d1fasenpql7fi9.cloudfront.net/v1/manifest/3437686.json annotation chars x y w h canvas_uri tag 3125 4898 4008 241 79 https://www.dl.ndl.go.jp/api/iiif/3437686/canvas/4 序 2910 868 147 140 https://www.dl.ndl.go.jp/api/iiif/3437686/canvas/4 913.36 たH 2228 226 586 156 https://www.dl.ndl.go.jp/api/iiif/3437686/canvas/4 或は撮影して、 897 3517 83 434 https://www.dl.ndl.go.jp/api/iiif/3437686/canvas/4 一 810 3528 30 17 https://www.dl.ndl.go.jp/api/iiif/3437686/canvas/4 序 6018 1055 65 65 https://www.dl.ndl.go.jp/api/iiif/3437686/canvas/5 二 6025 3535 49 39 https://www.dl.ndl.go.jp/api/iiif/3437686/canvas/5 殆んどあらゆる現存貴重資料に及び、 5889 707 86 1090 https://www.dl.ndl.go.jp/api/iiif/3437686/canvas/5 一字をも忽にしない細緻な〓究は、 5889 1837 86 1012 https://www.dl.ndl.go.jp/api/iiif/3437686/canvas/5 フイルム等 5501 3614 76 323 https://www.dl.ndl.go.jp/api/iiif/3437686/canvas/5 大島雅太郞氏· 916 3491 89 436 https://www.dl.ndl.go.jp/api/iiif/3437686/canvas/5 序 807 1048 65 61 https://www.dl.ndl.go.jp/api/iiif/3437686/canvas/5 三 815 3517 61 57 https://www.dl.ndl.go.jp/api/iiif/3437686/canvas/5 python 以下のライブラリをインストールします。 ...

Mirador3プラグイン開発: ウインドウをコピーする

Mirador3プラグイン開発: ウインドウをコピーする

概要 Mirador3のプラグインとして、ウインドウをコピーするプラグインを作成しました。 なお本機能は以下のプラグインですでに提供されているものです。 https://github.com/ProjectMirador/mirador-plugin-demos そのため、本プラグインはプラグインの開発手順を学ぶために作成しています。そのような観点で、本プラグインが参考になりましたら幸いです。 画面例は以下です。 ソースコードは以下です。 https://github.com/nakamura196/mirador-copy-window-plugin デモサイトは以下です。 https://nakamura196.github.io/mirador-copy-window-plugin/ 開発メモ 本プラグインの開発にあたり、まず以下のリポジトリをcloneし、変更を加えていきました。 https://github.com/ProjectMirador/mirador-dl-plugin src/index.js まず以下のファイルについて、miradorDownloadをMiradorCopyWindowに書き換えました。 https://github.com/nakamura196/mirador-copy-window-plugin/blob/main/src/index.js src/MiradorCopyWindow.js 以下のファイルが主に編集するファイルです。 https://github.com/nakamura196/mirador-copy-window-plugin/blob/main/src/MiradorCopyWindow.js 本ファイルは、まず以下のファイルの内容をコピーしました。 https://github.com/ProjectMirador/mirador-plugin-demos/blob/master/src/plugins/copy-window.js まず末尾の以下の記述から説明します。 export default { target: 'WindowTopMenu', mode: 'add', component: CopyWindowComponent, mapDispatchToProps: mapDispatchToProps, mapStateToProps: mapStateToProps, } targetとmode targetはコンポーネントを設置する場所を指定します。またmodeはコンポーネントの追加方法を指定します。modeについては、addやwrapという選択肢があるようでした。 以下、targetの値の例です。 WindowTopMenu 各ウインドウ上部のメニューの部分です。 WorkspaceControlPanelButtons ワークスペースのパネル部分です。 AnnotationSettings アノテーションの設定画面です。 最後のAnnotationSettingsおよびmodeにwrapが指定されているプラグインとして、以下のMiradorのアノテーション付与モジュールがありました。 https://github.com/ProjectMirador/mirador-annotations/blob/master/src/plugins/miradorAnnotationPlugin.js mapDispatchToPropsとmapStateToProps これがはじめ理解しづらかった(そしてまだ適切に説明できるほど理解できていない)のですが、propsに渡すdispathとstateを定めた変数を指定します。 dispatchについては、以下の変数を与えてます。 const mapDispatchToProps = (dispatch, { windowId }) => ({ copyWindow: () => dispatch(copyWindowAction(windowId)), }); copyWindowActionの具体的な内容は以下です。既存のwindowを取得して(1)、不要な変数を削除した上でwindowをコピーして(2)、それをaddWindow(3)しています。 const copyWindowAction = (windowId) => (dispatch, getState) => { const window = getState().windows[windowId]; // 1 const cleanedWindow = omit(window, [ 'id', 'companionWindowIds', 'thumbnailNavigationId', ]); // 2 dispatch(mirador.actions.addWindow(cleanedWindow)); // 3 }; stateについては、以下の変数を与えています。以下の例は少し特殊で、stateをすべてpropsに渡す設定となっています。他のプラグインでは、必要な値のみをstateから抽出して、propsに渡しているようでした。 const mapStateToProps = (state) => ({ state: state, }); 実際、本プラグインでは、mapStateToPropsでpropsに渡された値は使用されていないため、この記述はなくてもよいはずです。そのため、以下でもmapStateToPropsの記述は省略しています。 https://github.com/nakamura196/mirador-copy-window-plugin/blob/main/src/MiradorCopyWindow.js component 最後にcomponentです。以下のように、コンポーネントで表示する内容を記述しています。 ...

IIIF Mirador2のアノテーション画面の説明

IIIF Mirador2のアノテーション画面の説明

概要 IIIF Mirador2のアノテーション画面の使い方(の一部)を説明します。 四角形アノテーションの作成 https://www.youtube.com/watch?v=jny09nLZvLU パス(多角形)アノテーションの作成 アノテーションを終了する場合には、ダブルクリックします。 https://www.youtube.com/watch?v=4cM-6-rXL9M 既存のアノテーションの修正 https://www.youtube.com/watch?v=HlE36inbgq4 既存のアノテーションの削除 https://www.youtube.com/watch?v=STk2vjLc_-k まとめ IIIF Mirador2を用いたアノテーション付与の際の参考になりましたら幸いです。

IIIFマニフェストファイルからPDFファイルを作成する

IIIFマニフェストファイルからPDFファイルを作成する

概要 IIIFマニフェストファイルからPDFファイルを作成する機会がありました。このソリューションとして、以下のリポジトリが見つかりましたが、うまく動かすことができませんでした。 https://github.com/jbaiter/pdiiif そこで、上記リポジトリはJavaScriptを使用していますが、今回はPythonを用いた変換ツールを作成しました。 使い方 以下のノートブックからお試しいただけます。 https://colab.research.google.com/github/nakamura196/ndl_ocr/blob/main/iiif2pdf.ipynb 初回インストール時に、img2pdfをインストールしますが、PILのバージョンの関係で、「RESTART RUNTIME」ボタンが表示されますので、クリックの上、再度同じセルを実行してください。 オプションとして、「IIIFマニフェストURLの指定」「画像が格納されているフォルダのパスの指定」「ローカルに存在するIIIFマニフェストファイルのパスの指定」の3種類を用意しています。 注意点として、2023年5月末時点では、IIIF Presentation API v2にのみ対応しています。v3へは今後の対応を検討しています。 まとめ IIIFからのPDFファイルの作成にあたり、参考になりましたら幸いです。

Omeka SのImage Serverの設定について

Omeka SのImage Serverの設定について

概要 Omeka SのImage Serverは、IIIF Image APIに対応した画像配信を可能とするモジュールです。 https://omeka.org/s/modules/ImageServer/ IIIF Serverモジュールと組み合わせて使用することにより、IIIFマニフェストによる配信も可能になります。 Image Serverモジュールでは、タイル画像の作成方法を含めて、さまざまな設定が可能です。本記事では、これらの設定について、調査結果を共有します。 実験環境 今回は、Amazon LightsailのLAMPインスタンスを使用します。2 GB RAM, 1 vCPUの比較的低スペックな環境を用います。 Amazon Lightsailを用いたOmeka Sの構築方法は、以下などを参考にしてください。 また、今回は以下のスクリプトを利用しました。今回検証する「Image Server」モジュールの使用に必要な、関連モジュールを合わせてインストールします。 https://github.com/nakamura196/omeka_aws/blob/main/2023-05-25.sh タイル画像の作成に関する設定 ImageServerモジュールのインストール後、以下にアクセスすると、ImageServerの設定画面にアクセスできます。 /admin/module/configure?id=ImageServer 以下の画面の「Tiling service」の箇所で設定を行うことができます。 Image processor項目 本モジュールの説明ページでは、vipsのインストールが推奨されていました。上記のスクリプトでも、以下によって、vipsをインストールしています。 sudo apt install --no-install-recommends libvips-tools そのため、上記設定画面の「Image processor」項目の初期値に基づき、タイル画像の作成には、以後vipsが使用されます。 Tilling type項目 この項目では、「Deep Zoom Image」「Zoomify」「Jpeg 2000」「Tiled tiff」の4つの項目を選択することができます。これらについて、公式サイトでは以下のように記載されています。 Four format are proposed to create tiles: DeepZoom, Zoomify, Jpeg 2000 and pyramidal Tiff. The recommended format is DeepZoom. For Jpeg 2000 and pyramidal tiff, some other tools may be required. ...

Drupal: 異なるコンテンツタイプのコンテンツを相互にリンクさせる

Drupal: 異なるコンテンツタイプのコンテンツを相互にリンクさせる

概要 異なるコンテンツタイプのコンテンツを相互にリンクさせる方法を調べたので、その備忘録です。 具体的には、以下のitem 1がimage 1というコンテンツをiiif_image2というフィールドを介してつながっています。 上記に対して、image 1というページに、item 1へのリンクを設けることが目的です。 この実現にあたり、以下の記事を参考にしました。 https://drupal.stackexchange.com/questions/255447/view-for-entity-reference-reverse-backwards-forwards 方法 ビューの追加 /admin/structure/views に移動し、 +ビューを追加 「Create a block」オプションをチェックします ビューの設定 次のページで、Advancedの設定を行います。 リレーションシップ field_iiif_image2のリレーションシップを追加します。これは、2つのコンテンツタイプを関連付けるために重要です。 Require this relationshipにチェックを入れる必要があります。このフィールドを持たない場合には表示しない、という挙動になるものと理解しました。 コンテキストフィルター 次に、現在のコンテンツタイプのランディングページにコンテキストフィルターを追加します。このようにして、ビューで使用される実際のノードIDを取得します。これで、field_iiif_image2で同じノードIDを持つページのみを見つけることができます。 IDで探す(コンテンツ) デフォルト値を提供-> URL からのコンテンツ IDにチェックを入れます 次のような結果になります。 Update previewの箇所で、メディアのノードID(ここでは、62602)を入力してみます。本メディアが参照されているアイテムへのリンクが表示されます。 ブロックの追加 以下にアクセスします。 /admin/structure/block 例えば、「Content」の横の「Place block」ボタンを押します。 /node/*に配置してみます。 結果、冒頭のように、当該imageが属するitemを表示することができます。 まとめ 使用している用語に統一性がなく、わかりにくい点が多く恐縮ですが、参考になりましたら幸いです。

Drupal: カスタムRESTリソースを作成する

Drupal: カスタムRESTリソースを作成する

概要 以下を参考に、カスタムRESTリソースを作成しました。 https://www.drupal.org/docs/drupal-apis/restful-web-services-api/custom-rest-resources 上記の記事の通り進めることで、以下のURLから、JSONの結果を得ることができました。 /demo_rest_api/demo_resource { "message": "Hello, this is a rest service" } REST UIモジュール 上記の記事において、以下の記載がありました。 If you are using the REST UI contrib module, you should now be able to see it in the list of available endpoints and you should be able to configure the GET method. この点については、以下の記事を参考に、REST UIモジュールを有効化しました。 https://www.studio-umi.jp/blog/12/357 IIIF Presentation APIの試作 次に、コンテンツ毎にJSON作成に取り組みます。具体的には、/iiif/3/{id}/manifestというパスにアクセスすると、IIIF Presentation API v3に基づく情報を出力するようにしてみます。 以下の記事が参考になりました。 https://medium.com/drupaljournal/create-custom-rest-resource-for-get-and-post-method-in-drupal-8-e445330be3ff 以下のようなファイルを作成します。以下の例では、とりあえず$nodeからtitleを取得しています。これを応用することで、他のフィールドの情報も取得することができそうです。 <?php namespace Drupal\demo_rest_api\Plugin\rest\resource; use Drupal\node\Entity\Node; use Drupal\node\NodeInterface; use Drupal\rest\Plugin\ResourceBase; use Drupal\rest\ResourceResponse; /** * Annotation for get method * * @RestResource( * id = "iiif_presentation_3", * label = @Translation("IIIF Presentation API v3"), * uri_paths = { * "canonical" = "/iiif/3/{id}/manifest" * } * ) */ class Presentation3 extends ResourceBase { /** * Responds to GET requests. It will return serialize json format of node * object. * * @param $id * Node id. */ public function get($id) { if ($id) { // Load node $node = Node::load($id); if ($node instanceof NodeInterface) { $manifest = [ "@context" => "http://iiif.io/api/presentation/3/context.json", "type" => "Manifest", "label" => [ "none" => [ $node->get("title")[0]->get("value")->getValue() ] ] ]; $response = new ResourceResponse($manifest); // Configure caching for results if ($response instanceof CacheableResponseInterface) { $response->addCacheableDependency($node); } return $response; } return new ResourceResponse('Article doesn\'t exist', 400); } return new ResourceResponse('Article Id is required', 400); } } パーミッションの許可 以下のページで、Anonymous userにチェックを入れて、外部からのアクセスを許可します。 ...

Google Colabを用いたNDL古典籍OCRチュートリアルの不具合の修正および機能追加を行いました。

Google Colabを用いたNDL古典籍OCRチュートリアルの不具合の修正および機能追加を行いました。

概要 以下の記事で紹介している、Google Colabを用いたNDL"古典籍"OCRアプリのチュートリアルを作成しています。 今回、以下の更新を行いました。 利用条件の追加 不具合の修正 IIIF Presentation API v3のマニフェストファイルの入力への対応 更新したノートブックは、これまでと同じ以下のURLでアクセスいただけます。 https://colab.research.google.com/github/nakamura196/ndl_ocr/blob/main/NDL古典籍OCRの実行例.ipynb 利用条件の追加 ノートブック自体はCC0でご利用ください。ただし、「NDL古典籍OCRアプリケーション」は国立国会図書館がCC BY 4.0ライセンスで公開するものですので、クレジットの表示をお願いいたします。また、OCR適用対象の資料の利用条件などについても、それぞれご確認ください。 不具合の修正 OCR結果が出力されない不具合が発生していました。また、ライブラリのインストールにも長い時間がかかるようになっていました。これらの2点を修正しています。 IIIF Presentation API v3のマニフェストファイルの入力への対応 これまで、IIIF Presentation API v2のマニフェストファイルの入力のみに対応していました。 今回、v3への対応を行いました。この検証にあたり、以下の記事で紹介したIIIF Presentation API v3のマニフェストファイルを使用しました。 まとめ この間、不具合が発生しており申し訳ありません。NDL古典籍OCRの活用に役立つことができれば幸いです。