ホーム 記事一覧 ブック DH週間トピックス 検索 このサイトについて
English
@elastic/react-search-ui を React 19 + Next.js 15.5 で使う方法

@elastic/react-search-ui を React 19 + Next.js 15.5 で使う方法

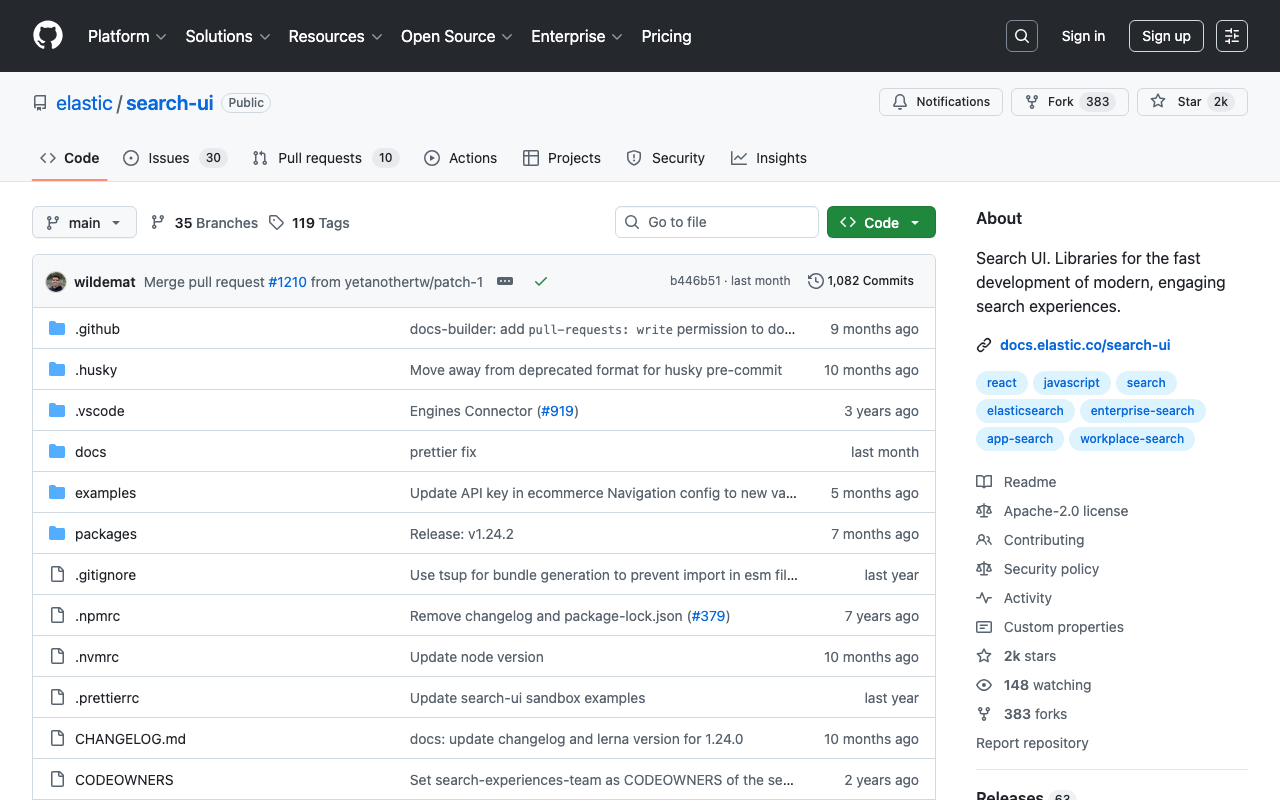
はじめに React 19 と Next.js 15 を使用しているプロジェクトで @elastic/react-search-ui を使おうとすると、以下のような依存関係エラーに遭遇することがあります。 npm error ERESOLVE could not resolve npm error peer react@">= 16.8.0 < 19" from @elastic/react-search-ui@1.23.1 この記事では、この問題の原因と解決方法を詳しく解説します。 問題の原因 @elastic/react-search-ui@1.23.1 の peer dependency が react@">= 16.8.0 < 19" となっており、React 19 をサポートしていませんでした。 解決策 1. パッケージのアップグレード 2025年5月に PR #1162 がマージされ、React 19 がサポートされました。バージョン 1.24.2 以降を使用します。 // package.json { "dependencies": { - "@elastic/react-search-ui": "^1.23.1", - "@elastic/react-search-ui-views": "^1.23.1", - "@elastic/search-ui": "^1.23.1", + "@elastic/react-search-ui": "^1.24.2", + "@elastic/react-search-ui-views": "^1.24.2", + "@elastic/search-ui": "^1.24.2", - "next": "15.3.8", + "next": "15.5.9", } } 2. 型定義の変更への対応 1.24.2 では WithSearch コンポーネントの型定義が変更されました。SearchContextState の filters が Filter[] | undefined になっています。 ...

Elasticsearch/OpenSearch クラスタ間のデータ移行ガイド

Elasticsearch/OpenSearch クラスタ間のデータ移行ガイド

Amazon Elasticsearch Service から別の OpenSearch クラスタへデータを移行する方法を解説します。本記事では、Scroll API と Bulk API を使用したシンプルかつ確実な移行手法を紹介します。 背景 クラウドサービスの移行やコスト最適化のため、Elasticsearch/OpenSearch クラスタ間でデータを移行する必要が生じることがあります。今回は以下の環境間での移行を行いました。 移行元 : Amazon Elasticsearch Service (AWS) 移行先 : セルフホスト OpenSearch 移行の流れ 移行元・移行先のインデックス確認 マッピング情報の取得と調整 移行先にインデックスを作成 Scroll API + Bulk API でデータ移行 移行結果の確認 事前準備:インデックスの確認 まず、移行元と移行先のインデックス一覧を確認します。 # 移行元のインデックス一覧 curl -u "user:password" "https://source-cluster/_cat/indices?v&s=index" # 移行先のインデックス一覧 curl -u "user:password" "https://dest-cluster/_cat/indices?v&s=index" Step 1: マッピング情報の取得 移行元からマッピング情報を取得します。 curl -s -u "user:password" \ "https://source-cluster/index_name/_mapping" \ > mappings.json Step 2: マッピングの調整 移行先の環境によっては、カスタムアナライザーが利用できない場合があります。例えば、日本語形態素解析用の kuromoji プラグインがインストールされていない場合、アナライザー設定を除去する必要があります。 def remove_analyzer(obj): """マッピングからanalyzer設定を再帰的に削除""" if isinstance(obj, dict): if 'analyzer' in obj: del obj['analyzer'] for key, value in obj.items(): remove_analyzer(value) elif isinstance(obj, list): for item in obj: remove_analyzer(item) return obj Step 3: 移行先にインデックスを作成 調整したマッピングを使用してインデックスを作成します。 ...

校異源氏物語テキストDBに対する検索を行うAPIサーバの構築

校異源氏物語テキストDBに対する検索を行うAPIサーバの構築

概要 校異源氏物語テキストDBに対する検索を行うAPIサーバの構築したので、備忘録です。 https://genji-api.aws.ldas.jp/ 背景 以下のページで、『校異源氏物語』のテキストデータをTEI/XMLに準拠した形で公開しています。 https://kouigenjimonogatari.github.io/ このテキストデータをElasticsearchに登録し、コマごとの検索を可能にするAPIを作成します。 使い方 以下のURLで、OpenAPIおよびSwaggerを用いた使い方の説明ページにアクセスできます。 https://genji-api.aws.ldas.jp/ 工夫点 検索語の展開 例えば以下のURLは、「夕顔」を検索キーワードとした例です。JSON:APIに準拠した入出力形式としています。 https://genji-api.aws.ldas.jp/search?q=夕顔&page[limit]=20&page[offset]=0&sort=page&filter[expandRepeatMarks]=true&filter[unifyKanjiKana]=true&filter[unifyHistoricalKana]=true&filter[unifyPhoneticChanges]=true&filter[unifyDakuon]=true&filter[vol_str]=04 夕顔 この時、以下のような結果が返却されます。入力したキーワード「夕顔」に対して、バリエーションを生成し、これらに基づく検索を行います。 { "data": [], "meta": { "query": "夕顔", "transformedQueries": [ "夕顔", "ゆうかお", "ゆふかお", "ゆふかほ", "ゆうかほ", "夕かお", "夕かほ", "ゆう顔", "ゆふ顔" ], "transformOptions": { "expandRepeatMarks": true, "unifyKanjiKana": true, "unifyHistoricalKana": true, "unifyPhoneticChanges": true, "unifyDakuon": true }, "filters": { "expandRepeatMarks": true, "unifyKanjiKana": true, "unifyHistoricalKana": true, "unifyPhoneticChanges": true, "unifyDakuon": true, "vol_str": "04 夕顔" }, "sort": "page", "limit": 20, "offset": 0, "total": 7, "aggregations": { "vol_str": { "doc_count_error_upper_bound": 0, "sum_other_doc_count": 0, "buckets": [ { "key": "04 夕顔", "doc_count": 7 } ] } } } } その結果、本文中に登場する「ゆふかほ」「夕かほ」「夕顔」を一度に検索することができます。 この検索キーワードの展開については、検索オプションをON/OFFを切り替えられるようにしています。詳細は、上述したSwagger UIでご確認ください。 ...

IIIF Presentation API v2のIIIFコレクションで、ページネーションを使う

IIIF Presentation API v2のIIIFコレクションで、ページネーションを使う

概要 IIIF Presentation API v2のIIIFコレクションで、ページネーションを使う機会がありましたので、備忘録です。 背景 IIIFコレクションでは、以下のように、複数のマニフェストファイル(およびコレクション)の一覧を提供することができます。 https://iiif.io/api/presentation/2.1/#collection { "@context": "http://iiif.io/api/presentation/2/context.json", "@id": "http://example.org/iiif/collection/top", "@type": "sc:Collection", "label": "Top Level Collection for Example Organization", "viewingHint": "top", "description": "Description of Collection", "attribution": "Provided by Example Organization", "manifests": [ { "@id": "http://example.org/iiif/book1/manifest", "@type": "sc:Manifest", "label": "Book 1" } ] } この時、対象とするマニフェストファイルが多数になった場合、一つのIIIFコレクションでは配信が難しくなりました。 これに対して、以下でページネーションに関する仕様がありましたので、こちらを使ってみます。 https://iiif.io/api/presentation/2.1/#paging ページネーション 上記のページでは、以下のような例が紹介されていました。 { "@context": "http://iiif.io/api/presentation/2/context.json", "@id": "http://example.org/iiif/collection/top", "@type": "sc:Collection", "label": "Example Big Collection", "total": 9316290, "first": "http://example.org/iiif/collection/c1" } { "@context": "http://iiif.io/api/presentation/2/context.json", "@id": "http://example.org/iiif/collection/c1", "@type": "sc:Collection", "within": "http://example.org/iiif/collection/top", "startIndex": 0, "next": "http://example.org/iiif/collection/c2", "manifests": [ // Manifests live here ... ] } まず、一つの目のJSONでコレクション全体のマニフェストファイル数totalを示し、さらにはじめの部分マニフェストファイル群へのリンクをfirstで提示します。 ...

Dockerによるディスク圧迫の調査と対処法【Ubuntu 22.04 運用事例】

Dockerによるディスク圧迫の調査と対処法【Ubuntu 22.04 運用事例】

はじめに 本記事では、Dockerコンテナやイメージによるディスク圧迫が原因でElasticsearchにエラーが発生した事例と、その調査・対処方法について記録します。同様の問題に直面している方の参考になれば幸いです。 🔍 問題の発生 運用中のElasticsearchで以下のエラーが発生しました。 { "error": { "type": "search_phase_execution_exception", "reason": "all shards failed", "phase": "query", ... }, "status": 503 } 初期調査により、インデックスが close 状態になっており、ディスク容量不足が疑われました。 📊 ディスク使用状況の調査 ルートディレクトリの使用量確認 まず、システム全体のディスク使用状況を確認しました。 sudo du -h --max-depth=1 / | sort -hr | head -n 20 実行結果: 60G / 50G /var 4.7G /usr 2.1G /home 1.2G /opt ... /var ディレクトリが50GBと異常に大きいことが判明しました。 /var ディレクトリの詳細調査 sudo du -h --max-depth=1 /var | sort -hr 実行結果: 50G /var 49G /var/lib 342M /var/log 240M /var/cache 128M /var/spool ... /var/lib がほぼ全容量を占めているため、さらに詳細を調査しました。 sudo du -h --max-depth=1 /var/lib | sort -hr 実行結果: ...

Elasticsearch Search UIでの初期ソート順の指定方法

Elasticsearch Search UIでの初期ソート順の指定方法

概要 本記事はAIが作成しました。 ElasticsearchとSearch UIを使って検索インターフェースを構築する際、検索結果のソート順を制御することは一般的な要件です。このガイドでは、Search UI Reactライブラリでソートを設定する方法を説明します。 参考 https://www.elastic.co/docs/reference/search-ui/api-react-search-provider#api-react-search-provider-initial-state 初期状態とソート設定の理解 Search UIライブラリでは、検索の初期状態を指定することができ、ソートの方向とソートするフィールドを含めることができます。これは、ユーザーがページに最初にアクセスしたときに、検索結果が事前に決められた順序で表示されるようにしたい場合に特に役立ちます。 基本的なソート設定の例 Search UI設定でソートを指定する方法は次のとおりです: const config = { // その他の設定オプション... initialState: { sortDirection: 'asc', sortField: 'field_tz_id', }, }; return ( <SearchProvider config={config}> {/* 検索コンポーネント */} </SearchProvider> ); ソート設定オプション initialStateオブジェクトは、ソート関連の2つのプロパティを受け付けます: sortField : ソートしたいElasticsearchインデックス内のフィールド sortDirection : ソートの方向、'asc'(昇順)または'desc'(降順) TypeScriptの型安全性 TypeScriptを使用している場合、ソート方向を定義するときにas constを使用して型安全性を確保できます: const config = { // その他の設定... initialState: { sortDirection: 'asc' as const, // 'asc' | 'desc'として型付け sortField: 'field_tz_id', }, }; これにより、sortDirectionは「asc」または「desc」のみを取り得るようになり、潜在的なエラーを防ぐことができます。 結論 Elasticsearch Search UIで初期ソートを設定する際の参考になりましたら幸いです。

Algolia における「a に x を含み、b に y を含む」部分一致検索の調査

Algolia における「a に x を含み、b に y を含む」部分一致検索の調査

この記事は、AIが作成し、一部を人が修正したものです。 はじめに フルテキスト検索エンジンの中でも、Typesense、MeiliSearch、Algolia は小規模なプロジェクト向けの選択肢として注目されています。しかし、「a に x を含み、b に y を含む」部分一致検索 が可能かどうかは、プロジェクトの要件に関わる重要なポイントです。本記事では、Algolia での部分一致検索の可否や、Elasticsearch との比較を行います。 Algolia での部分一致検索 Algolia では、全文検索 (query) を利用できますが、特定のフィールドごとに部分一致検索を行うには制限があります。 方法1:query を使った検索(部分一致可能だがフィールド指定不可) index.search('x y') 特徴: x や y を含むデータを全フィールドから検索。 どのフィールドでヒットしたかを制限できない 。 方法2:restrictSearchableAttributes を使う(単一フィールドの検索) index.search('x', { restrictSearchableAttributes: ['a'] }); index.search('y', { restrictSearchableAttributes: ['b'] }); 特徴: a に x を含むデータ、b に y を含むデータを個別に検索可能。 両方の条件を同時に適用する方法はない 。 Algolia の結論 ✅ 部分一致検索は可能だが、複数フィールドの AND 条件は難しい 。 ❌ 「a に x を含み、b に y を含む」検索は標準では不可 。 Elasticsearch での部分一致検索 Elasticsearch では、bool クエリを使うことで「a に x を含み、b に y を含む」部分一致検索が可能です。 ...

Nuxtで@elastic/search-uiを使ったサンプルリポジトリを作成しました。

Nuxtで@elastic/search-uiを使ったサンプルリポジトリを作成しました。

概要 Nuxtで@elastic/search-uiを使ったサンプルリポジトリを作成しました。 https://github.com/nakamura196/nuxt-search-ui-demo 以下からお試しいただけます。 https://nakamura196.github.io/nuxt-search-ui-demo 背景 @elastic/search-uiは以下のように説明されています。 https://www.elastic.co/docs/current/search-ui/overview A JavaScript library for the fast development of modern, engaging search experiences with Elastic. Get up and running quickly without re-inventing the wheel. (機械翻訳)Elasticを使用して、モダンで魅力的な検索エクスペリエンスを迅速に開発するためのJavaScriptライブラリです。車輪を再発明することなく、すぐに使い始めることができます。 以下でVue.jsを使ったサンプルリポジトリが公開されています。 https://github.com/elastic/vue-search-ui-demo 今回は上記のリポジトリを参考に、Nuxtを使ったサンプルリポジトリを作成しました。 メモ 初期検索 以下のように指定することで、初期読み込み時の検索を実行することができました。 https://github.com/nakamura196/nuxt-search-ui-demo/blob/main/searchConfig.ts#L49 alwaysSearchOnInitialLoad: true, 公式ドキュメントの以下に記載がありました。 https://www.elastic.co/docs/current/search-ui/api/react/search-provider 参考: カスタムconnectorの作成 以下を参考にカスタムconnectorを作成することで、Elasticsearch以外のAPIでも使用することができました。 https://www.elastic.co/docs/current/search-ui/guides/building-a-custom-connector 具体的には以下のような手順を参考に、Drupalで作成したJSON:API Search APIと組み合わせて使用することも可能でした。 https://next-drupal.org/guides/search-api まとめ 検索機能を持つアプリケーションの作成にあたり、参考になりましたら幸いです。

DjangoとAWS OpenSearchを接続する

DjangoとAWS OpenSearchを接続する

概要 DjangoとAWS OpenSearchを接続する方法に関するメモです。以下の記事が参考になりました。 https://testdriven.io/blog/django-drf-elasticsearch/ ただし、上記の記事はElasticsearchを対象にした設定のため、OpenSearchに応じた変更が必要です。 変更点 以下のElasticsearch Setupの部分から、OpenSearchに応じた変更が必要でした。 https://testdriven.io/blog/django-drf-elasticsearch/#elasticsearch-setup 具体的には、以下の2つのライブラリが必要でした。 (env)$ pip install opensearch-py (env)$ pip install django-opensearch-dsl その後は、django_elasticsearch_dslとなっている箇所をdjango-opensearch-dslに、elasticsearch_dslをopensearchpyに書き換えることで、記事の通りに進めることができました。 例えば、以下のような形です。 # blog/documents.py from django.contrib.auth.models import User from django_opensearch_dsl import Document, fields # opensearchに変更 from django_opensearch_dsl.registries import registry # opensearchに変更 from blog.models import Category, Article @registry.register_document class UserDocument(Document): class Index: name = 'users' settings = { 'number_of_shards': 1, 'number_of_replicas': 0, } class Django: model = User fields = [ 'id', 'first_name', 'last_name', 'username', ] @registry.register_document class CategoryDocument(Document): id = fields.IntegerField() class Index: name = 'categories' settings = { 'number_of_shards': 1, 'number_of_replicas': 0, } class Django: model = Category fields = [ 'name', 'description', ] @registry.register_document class ArticleDocument(Document): author = fields.ObjectField(properties={ 'id': fields.IntegerField(), 'first_name': fields.TextField(), 'last_name': fields.TextField(), 'username': fields.TextField(), }) categories = fields.ObjectField(properties={ 'id': fields.IntegerField(), 'name': fields.TextField(), 'description': fields.TextField(), }) type = fields.TextField(attr='type_to_string') class Index: name = 'articles' settings = { 'number_of_shards': 1, 'number_of_replicas': 0, } class Django: model = Article fields = [ 'title', 'content', 'created_datetime', 'updated_datetime', ] Populate Elasticsearch Elasticsearchを対象にした上記の記事では、以下のコマンドが紹介されています。 ...

StrapiとAmazon OpenSearchを連携する

StrapiとAmazon OpenSearchを連携する

概要 StrapiとElasticsearchとの連携にあたり、以下の記事が参考になりました。 https://punits.dev/blog/integrating-elasticsearch-with-strapi/ ソースコードも公開されています。 https://github.com/geeky-biz/strapi-integrate-elasticsearch ここでは、上記の記事を参考にして、Amazon OpenSearchと連携するなど、一部カスタマイズした内容についてメモします。 カスタマイズしたソースコードは以下です。 https://github.com/nakamura196/strapi-integrate-opensearch 修正点 以下について、記事ではindexing_typeとなっていますが、indexing_request_typeとする必要がありました。 https://github.com/nakamura196/strapi-integrate-opensearch/blob/006c533d4d7882fc9779552db31a7b0e2ada5e57/elastic/cron-search-indexing.js#L16 またElasticsearchではなく、Amazon OpenSearchを使用するにあたり、以下のライブラリをインストールする必要があります。 npm install @opensearch-project/opensearch npm install @aws-sdk/credential-providers 認証の方法はいくつかあると思いますが、ここでは以下のように変更しました。 https://github.com/nakamura196/strapi-integrate-opensearch/blob/006c533d4d7882fc9779552db31a7b0e2ada5e57/elastic/elasticClient.js#L1C1-L30 インデックスへの登録および削除の処理についても、以下のように修正する必要がありました。 https://github.com/nakamura196/strapi-integrate-opensearch/blob/006c533d4d7882fc9779552db31a7b0e2ada5e57/elastic/elasticClient.js#L39-L44 上記のような修正の結果、StrapiとAmazon OpenSearchを接続させることができました。 elastic/elasticClient.js および src/api/search/controllers/search.js を変更することで、APIの出力結果もカスタマイズできました。これにより、ElasticsearchのAggregationsを使用することができるようになりました。(私の調査不足により、Strapi単体でも実現できるかもしれません。) まとめ StrapiとAmazon OpenSearchの連携にあたり、参考になりましたら幸いです。

Elasticsearch 上のデータをローカルにダンプする

Elasticsearch 上のデータをローカルにダンプする

Elasticsearch 上のデータをローカルにダンプするにあたり、elasticsearch-dumpを使用しました。その備忘録です。 https://github.com/elasticsearch-dump/elasticsearch-dump 以下のように、vオプションを使用することで、コンテナ上で作ったファイルがホストの方に残ります。limitオプションなどは任意です。 docker run -v [ホストディレクトリの絶対パス]:[コンテナの絶対パス] --rm -ti elasticdump/elasticsearch-dump --input [ソースとなる Elasticsearch インデックスのエンドポイント] --output=[コンテナの絶対パス]/[出力ファイル名].json --limit 10000 具体的には、以下のような形です。 docker run -v /Users/xxx/dump:/test --rm -ti elasticdump/elasticsearch-dump --input https://xxx.us-east-1.es.amazonaws.com/images --output=test/images.json --limit 10000 参考になりましたら幸いです。

Elastic Searchにおける異なるキーと値(ラベルとID)を持つアグリゲーション

Elastic Searchにおける異なるキーと値(ラベルとID)を持つアグリゲーション

概要 現在Cultural Japanプロジェクトにおける検索アプリの更新を進めており、多言語データのアグリゲーションを行う必要がありました。本記事では、その方法に関する調査結果の備忘録です。 データ データとしては、以下のように、agential(人物を示す)フィールドに、id、ja、enの値を持つケースを想定します。 { "agential": [ { "ja": "葛飾北斎", "en": "Katsushika, Hokusai", "id": "chname:葛飾北斎" } ] } 上記のデータに対して、idでフィルタリング処理などを行いつつ、言語設定に合わせてjaまたはenの値を表示することを想定します。 理想的には、aggregationの結果として、以下のようなデータを取得したいです。 (jaを指定した場合) { "buckets": [ { "key": "葛飾北斎", "id": "chname:葛飾北斎", "doc_count": 1 } ] } (enを指定した場合) { "buckets": [ { "key": "Katsushika, Hokusai", "id": "chname:葛飾北斎", "doc_count": 1 } ] } 方法1: nested aggregationの利用 以下の記事を参考に、nested aggregationを試します。 https://discuss.elastic.co/t/aggregeations-with-different-keys-and-values-label-and-id/274218 DELETE test PUT test { "mappings": { "properties": { "agential": { "type": "nested", "properties": { "id": { "type": "keyword" }, "ja": { "type": "keyword" }, "en": { "type": "keyword" } } } } } } PUT test/_doc/1 { "agential": [ { "ja": "葛飾北斎", "en": "Katsushika, Hokusai", "id": "chname:葛飾北斎" } ] } GET test/_search { "query": { "bool": { "filter": [ { "nested": { "path": "agential", "query": { "bool": { "filter": [ { "term": { "agential.id": "chname:葛飾北斎" } } ] } } } } ] } }, "_source": [ "agential" ], "aggs": { "agential": { "nested": { "path": "agential" }, "aggs": { "id": { "terms": { "field": "agential.id" } }, "label": { "terms": { "field": "agential.ja" } } } } } } この場合、以下のような結果が返却されます。 ...

【開発者向け】AWS x Nuxt.js x Elasticsearchを用いた検索アプリケーションの開発環境の構築

【開発者向け】AWS x Nuxt.js x Elasticsearchを用いた検索アプリケーションの開発環境の構築

本記事では、AWS x Nuxt.js x Elasticsearchを用いた検索アプリケーションの開発環境の構築について、説明します。備忘録の側面が強いです。 以下の構成を目指します。よりよい構成や構築方法があるかと思いますが、とりあえずAWSを用いて、検索エンジンにElasticsearchを使用したNuxt.js製のウェブアプリケーションの開発環境が整います。 Cultural Japanプロジェクトにおいても、上記とほぼ同様の構成を採用しています。 以下の流れで説明します。 準備(任意) AWSでドメインの取得やSSL/TLS化を行う方法です。 Route 53を用いたドメイン取得 独自ドメインの取得が必要な場合、Route 53でドメインの取得が可能です。 AWS Certificate Manager 次に、AWS Certificate Managerを用いて、SSL/TLS化を行います。こちらも手順に進めれば問題ありません。 なお、検証を行う際、以下の「Route 53でレコードを作成」ボタンをクリックして手続きすることで、簡単に進めることができました。 Backend Backendの構築から進めます。 Identity and Access Management (IAM)ユーザの作成 まず、Amazon OpenSearch Serviceにアクセス権限があるユーザを作成します。 作成後に表示される「アクセスキー」と「シークレットアクセスキー」をメモしておきます。 Amazon OpenSearch Service まず、Amazon OpenSearch Serviceを選びます。 その後は、以下のチュートリアルが参考になります。 https://docs.aws.amazon.com/opensearch-service/latest/developerguide/gsg.html 上記のマニュアルからの変更点として、アクセスポリシーは「ドメインレベルのアクセスポリシーの設定」を選択し、先に作成したユーザのARNを許可してください。 (ローカル)Pythonを用いたAmazon OpenSearch Serviceへのデータ登録 次に、上記で発行した「アクセスキー」と「シークレットアクセスキー」などを用いて、Amazon OpenSearch Serviceにデータ登録を行います。 具体的には、以下のGoogle Colabなどを参考にしてください。 https://colab.research.google.com/drive/1-uygvtQwoc3Wn4XSEUWN5Z5Hxq3vT9Gj?usp=sharing AWS SAM(Serverless Application Model) 次に、API GatewayとLambda 関数を作成します。具体的には、以下の記事を参考に、AWS SAM(Serverless Application Model)を利用します。 dev.classmethod.jp ...