ホーム 記事一覧 ブック DH週間トピックス 検索 このサイトについて
RSS English
RDFストアのトリプル数を数える

RDFストアのトリプル数を数える

概要 RDFストアのトリプル数を数える方法について、備忘録です。 今回は、ジャパンサーチのRDFストアを例にします。 https://jpsearch.go.jp/rdf/sparql/easy/ トリプル数 以下でトリプル数をカウントできます。 SELECT (COUNT(*) AS ?NumberOfTriples) WHERE { ?s ?p ?o . } 結果は以下です。 https://jpsearch.go.jp/rdf/sparql/easy/?query=SELECT+(COUNT(*)+AS+%3FNumberOfTriples) WHERE+{ ++%3Fs+%3Fp+%3Fo+. } 本記事の執筆時点(2024年5月6日)において、12億8064万5565トリプルありました。 NumberOfTriples 1280645565 特定のプロパティでどれだけのトリプルが接続されているか 次に、特定のプロパティでどれだけのトリプルが接続されているかをカウントしてみます。以下がクエリ例です。 SELECT ?p (COUNT(*) AS ?count) WHERE { ?s ?p ?o . } GROUP BY ?p ORDER BY DESC(?count) 結果は以下です。 https://jpsearch.go.jp/rdf/sparql/easy/?query=SELECT+%3Fp+(COUNT(*)+AS+%3Fcount) WHERE+{ ++%3Fs+%3Fp+%3Fo+. } GROUP+BY+%3Fp ORDER+BY+DESC(%3Fcount) schema:description で接続されるトリプルが399,447,925件、約4億件あることがわかります。 p count schema:description 399447925 rdf:type 84363276 jps:relationType 72908233 jps:value 72214780 schema:name 57377225 schema:provider 52481873 指定したプロパティを使用して、特定のサブジェクトとオブジェクトのタイプの組み合わせをカウントする 上記の打ち合わせの概要を知るにあたり、?subject と ?object が schema:description プロパティによって結びつけられている場合のサブジェクトタイプとオブジェクトタイプの組み合わせをカウントします。 SELECT ?subjectType ?objectType (COUNT(*) AS ?count) WHERE { ?subject schema:description ?object . ?subject rdf:type ?subjectType . optional {?object rdf:type ?objectType . } } GROUP BY ?subjectType ?objectType ORDER BY DESC(?count) 結果は以下です。 ...

TEIGarageを試す

TEIGarageを試す

概要 TEIGarageは、以下のように説明されています。 https://github.com/TEIC/TEIGarage/ TEIGarage is a webservice and RESTful service to transform, convert and validate various formats, focussing on the TEI format. TEIGarage is based on the proven OxGarage. (機械翻訳)TEIGarageは、TEIフォーマットを中心にさまざまなフォーマットの変換、変換、検証を行うウェブサービスおよびRESTfulサービスです。TEIGarageは、実績のあるOxGarageに基づいています。 試す 以下のページで試すことができます。 https://teigarage.tei-c.org/ 以下で公開されている「TEI Minimal」のoddファイルを対象にします。このファイルは、Romaのプリセットの一つとしても使用されています。 https://tei-c.org/Vault/P5/current/xml/tei/Exemplars/tei_minimal.odd 上記のファイルをダウンロードします。 そして、TEIGarageのサイトにおいて、「Convert from」に「Compiled TEI ODD」、「Convert to」に「xHTML」を選択して、「ファイルを選択」にダウンロードしたoddファイルをアップロードします。 ダウンロードされたHTMLファイルはブラウザ等で確認することができます。 ちなみに、「Show advanced options」をクリックすると、パラメータのほか、変換に使用するURLが表示されます。 URLはエンコードされているため、デコードすると、以下になります。 https://teigarage.tei-c.org/ege-webservice/Conversions/ODDC:text:xml/TEI:text:xml/xhtml:application:xhtml+xml/conversion?properties=truetrueenfalsedefaulttruetrueenfalsedefault propertiesパラメータの中に、以下のxml記述を確認することができます。 <conversions> <conversion index="0"> <property id="oxgarage.getImages">true</property> <property id="oxgarage.getOnlineImages">true</property> <property id="oxgarage.lang">en</property> <property id="oxgarage.textOnly">false</property> <property id="pl.psnc.dl.ege.tei.profileNames">default</property> </conversion> <conversion index="1"> <property id="oxgarage.getImages">true</property> <property id="oxgarage.getOnlineImages">true</property> <property id="oxgarage.lang">en</property> <property id="oxgarage.textOnly">false</property> <property id="pl.psnc.dl.ege.tei.profileNames">default</property> </conversion> </conversions> Open API 以下にアクセスすると、Open APIに基づき、利用可能なオプション等を確認することができます。 ...

Input value "page" contains a non-scalar value.への対処

Input value "page" contains a non-scalar value.への対処

概要 以下の記事で、同エラーへの対応を行いました。 ただし、上記の対応を行なっても、エラーを解決することができないケースがありましたので、追加の対応を記載します。 エラーの内容 エラーの内容は以下です。特に、jsonapi_search_api_facetsを有効化した際に発生しました。 { "jsonapi": { "version": "1.0", "meta": { "links": { "self": { "href": "http://jsonapi.org/format/1.0/" } } } }, "errors": [ { "title": "Bad Request", "status": "400", "detail": "Input value \"page\" contains a non-scalar value.", "links": { "via": { "href": "http://localhost:61117/web/jsonapi/index/document?page%5Blimit%5D=24&sort=field_id" }, "info": { "href": "http://www.w3.org/Protocols/rfc2616/rfc2616-sec10.html#sec10.4.1" } }, "source": { "file": "/app/vendor/symfony/http-kernel/HttpKernel.php", "line": 83 }, "meta": { "exception": "Symfony\\Component\\HttpFoundation\\Exception\\BadRequestException: Input value \"page\" contains a non-scalar value. in /app/vendor/symfony/http-foundation/InputBag.php:38\nStack trace:\n#0 /app/web/modules/contrib/facets/src/Plugin/facets/url_processor/QueryString.php(92): Symfony\\Component\\HttpFoundation\\InputBag->get('page')\n#1 /app/web/modules/contrib/facets/src/Plugin/facets/processor/UrlProcessorHandler.php(76): Drupal\\facets\\Plugin\\facets\\url_processor\\QueryString->buildUrls(Object(Drupal\\facets\\Entity\\Facet), Array)\n#2 /app/web/modules/contrib/facets/src/FacetManager/DefaultFacetManager.php(339): ... 対応 そこで、上記で言及されている以下のファイルについて、buildUrlsを修正しました。 <?php namespace Drupal\facets\Plugin\facets\url_processor; use Drupal\Core\Cache\UnchangingCacheableDependencyTrait; use Drupal\Core\Entity\EntityTypeManagerInterface; use Drupal\Core\EventSubscriber\MainContentViewSubscriber; use Drupal\facets\Event\ActiveFiltersParsed; use Drupal\facets\Event\QueryStringCreated; use Drupal\facets\Event\UrlCreated; use Drupal\facets\FacetInterface; use Drupal\facets\UrlProcessor\UrlProcessorPluginBase; use Drupal\facets\Utility\FacetsUrlGenerator; use Symfony\Component\DependencyInjection\ContainerInterface; use Symfony\Component\EventDispatcher\EventDispatcherInterface; use Symfony\Component\HttpFoundation\Request; use Drupal\jsonapi\Query\OffsetPage; // 追加 /** * Query string URL processor. * * @FacetsUrlProcessor( * id = "query_string", * label = @Translation("Query string"), * description = @Translation("Query string is the default Facets URL processor, and uses GET parameters, for example ?f[0]=brand:drupal&f[1]=color:blue") * ) */ class QueryString extends UrlProcessorPluginBase { ... /** * {@inheritdoc} */ public function buildUrls(FacetInterface $facet, array $results) { // No results are found for this facet, so don't try to create urls. if (empty($results)) { return []; } // First get the current list of get parameters. $get_params = $this->request->query; // When adding/removing a filter the number of pages may have changed, // possibly resulting in an invalid page parameter. /* // コメントアウト if ($get_params->has('page')) { $current_page = $get_params->get('page'); $get_params->remove('page'); } */ // 追加 if ($get_params->has(OffsetPage::KEY_NAME)) { $page_params = $get_params->all(OffsetPage::KEY_NAME); unset($page_params[OffsetPage::OFFSET_KEY]); $get_params->set(OffsetPage::KEY_NAME, $page_params); } 上記の修正は、以下のファイルを参考に、Drupal\jsonapi\Query\OffsetPageを追加して、pageの処理を修正しました。 ...

AWS CLIを使用したS3バケットの一括削除

AWS CLIを使用したS3バケットの一括削除

AWS CLIを使用してS3バケットの一覧を取得し、特定のパターンに基づいてバケットを削除するには、以下の手順を実行できます。ここでは、wbyという文字列で始まるバケットを削除する方法について説明します。 必要なもの AWS CLIがインストールされていること。 適切なAWSの認証情報とアクセス権限が設定されていること。 ステップ 1: バケットの一覧を取得 まず、インストールされているAWS CLIを使用して、すべてのS3バケットの一覧を取得します。 aws s3 ls ステップ 2: 条件に一致するバケットの削除 wbyで始まるバケットを削除するには、シェルスクリプトを利用して条件に一致するバケットをフィルタリングし、それらを削除します。 以下のスクリプトは、wbyで始まるバケット名を検索し、各バケットを削除します。注意:このスクリプトはバケットとその中のすべてのオブジェクトを削除します。実行前にデータのバックアップを確認してください。 aws s3 ls | awk '{print $3}' | grep '^wby' | while read bucket do echo "Deleting bucket $bucket..." aws s3 rb s3://$bucket --force done このスクリプトは次のことを行います: aws s3 lsでバケット一覧を取得。 awk '{print $3}'でバケット名のみを抽出。 grep '^wby'でwbyで始まるバケット名をフィルタリング。 while read bucketループで各バケットを削除。 注意 バケットを削除する前に、必要なデータがバックアップされていることを確認してください。 バケットが空でない場合、aws s3 rb --forceオプションを使用してバケットとその中のすべてのオブジェクトを削除します。 実行する前に、削除されるバケット名を確認するために、実際に削除するコマンドを実行する前にechoステートメントを挟むことをお勧めします。

「SAT大蔵経DB 2018」で公開されているテキストの分析例

「SAT大蔵経DB 2018」で公開されているテキストの分析例

概要 「SAT大蔵経DB 2018」は以下のように説明されています。 https://21dzk.l.u-tokyo.ac.jp/SAT2018/master30.php このサイトは、SAT大蔵経テキストデータベース研究会が提供するデジタル研究環境の2018年版です。 SAT大蔵経テキストデータベース研究会は、2008年4月より、大正新脩大藏経テキスト部分85巻の全文検索サービスを提供するとともに、各地のWebサービスとの連携機能を提供することにより、利便性を高めるとともに、Webにおける人文学研究環境の可能性を追求してきました。 2018年版となるSAT2018では、近年広まりつつある機械学習の技術と、IIIFによる高精細画像との連携、高校生でもわかる現代日本語訳の公開及び本文との連携、といった新たなサービスに取り組んでみました。また、本文の漢字をUnicode10.0に対応させるとともに、すでに公開していたSAT大正蔵図像DBの機能の大部分も統合いたしました。ただし、今回は、コラボレーションを含む仕組みの提供という側面もあり、今後は、この輪組に沿ってデータを増やし、より利便性を高めていくことになります。 当研究会が提供するWebサービスは、さまざまな関係者が提供するサービスや支援に依拠しています。SAT2018で新たに盛り込んだサービスでは、機械学習及びIIIF対応に関しては一般財団法人人文情報学研究所、現代日本語訳の作成に関しては公益財団法人全日本仏教会の支援と全国の仏教研究者の方々のご協力をいただいております。 SAT2018が、仏教研究者のみなさまだけでなく、仏典に関心を持つ様々な方々のお役に立つことを願っております。さらに、ここで提示されている文化資料への技術の適用の仕方が、人文学研究における一つのモデルになることがあれば、なお幸いです。 今回は、上記のDBが公開するテキストデータを対象として、簡単な分析を試みます。 説明 以下の「T0220 大般若波羅蜜多經」のテキストを対象にします。 方法 テキストデータの取得 ネットワークを確認したところ、以下のようなURLでテキストデータを取得することができました。 https://21dzk.l.u-tokyo.ac.jp/SAT2018/satdb2018pre.php?mode=detail&ob=1&mode2=2&useid=0220_,05,0001 0220_,05,0001の部分について、05を06に変えると6巻のデータが取得できました。また、末尾の0001を0011に変更すると、0011の前後を含むテキストが取得できました。 この傾向を踏まえて、以下のようなプログラムを実行しました。 import os import requests import time from bs4 import BeautifulSoup def fetch_soup(url): """Fetches and parses HTML content from the given URL.""" time.sleep(1) # Sleep for 1 second before making a request response = requests.get(url) return BeautifulSoup(response.text, "html.parser") def write_html(soup, filepath): """Writes the prettified HTML content to a file.""" with open(filepath, "w") as file: file.write(soup.prettify()) def read_html(filepath): """Reads HTML content from a file and returns its parsed content.""" with open(filepath, "r") as file: return BeautifulSoup(file.read(), "html.parser") def process_volume(vol): """Processes each volume by iterating over pages until no new page is found.""" page_str = "0001" while True: url = f"https://21dzk.l.u-tokyo.ac.jp/SAT2018/satdb2018pre.php?mode=detail&ob=1&mode2=2&useid=0220_{vol}_{page_str}" id = url.split("useid=")[1] opath = f"html/{id}.html" if os.path.exists(opath): soup = read_html(opath) else: soup = fetch_soup(url) write_html(soup, opath) new_page_str = get_last_page_id(soup) if new_page_str == page_str: break page_str = new_page_str def get_last_page_id(soup): """Extracts the last page ID from the soup object.""" spans = soup.find_all("span", class_="ln") if spans: last_id = spans[-1].text return last_id.split(".")[-1][0:4] return None def main(): vols = ["05", "06", "07"] for vol in vols: process_volume(vol) if __name__ == "__main__": main() 上記の処理により、HTMLファイルをダウンロードすることができます。 ...

Node.jsでXML文字列をパースする

Node.jsでXML文字列をパースする

概要 Node.jsでXML文字列を解析し、その中から情報を抽出するための関数を完成させるには、xmldom ライブラリの使用をお勧めします。これにより、ブラウザでDOMを操作するような方法でXMLを扱うことができます。以下に、xmldom を使ってXMLを解析し、“PAGE” タグに焦点を当てて要素を抽出するための関数の設定方法を示します。 xmldom ライブラリをインストールする: まず、XML文字列を解析するために必要な xmldom をインストールしてください。 npm install xmldom xmldom を使用してXMLを解析し、必要な要素を抽出します。 const { DOMParser } = require('xmldom'); const xmlString = "..."; // DOMParserを使用してXML文字列を解析 const parser = new DOMParser(); const xmlDoc = parser.parseFromString(xmlString, 'text/xml'); // 全てのPAGE要素を取得 const pages = xmlDoc.getElementsByTagName('PAGE'); // 発見されたPAGE要素の数をログに記録(例) console.log('PAGE要素の数:', pages.length); この例では、XML文字列をログに記録し、文書に解析し、各 “PAGE” 要素を繰り返し処理して属性や内容をログに記録する基本的な関数を設定します。ループ内の処理は、各ページから特定の詳細を抽出するなど、具体的な要件に基づいてカスタマイズできます。

LlamaIndex+GPT4+gradio

LlamaIndex+GPT4+gradio

概要 LlamaIndexとGPT4、gradioを組み合わせて使う機会がありましたので、備忘録です。 使用したテキストのサイズが小さいので、結果もそれなりですが、渋沢栄一のチャットボットを試作しました。 背景 以下の記事を参考にしました。 https://qiita.com/DeepTama/items/1a44ddf6325c2b2cd030 上記をもとに、2024年4月20日時点のライブラリで動作するように修正しています。ノートブックを以下で公開しています。 https://github.com/nakamura196/000_tools/blob/main/LlamaIndex%2BGPT4%2Bgradio.ipynb 以下のデータを使用しています。 TEIを用いた『渋沢栄一伝記資料』テキストデータの再構築と活用 まとめ 参考になりましたら幸いです。

Editor.jsでインラインのマーカーツールで作成する

Editor.jsでインラインのマーカーツールで作成する

概要 Editor.jsでインラインのマーカーツールを作成する方法の備忘録です。 参考 以下のページが参考になりました。 https://editorjs.io/creating-an-inline-tool/ https://note.com/eveningmoon_lab/n/n638b9541c47c TypeScriptでの記述にあたっては、以下が参考になりました。 https://github.com/codex-team/editor.js/issues/900 実装 Nuxtで実装します。以下のmarker.tsを作成します。 import type { API } from "@editorjs/editorjs"; class MarkerTool { button: null | HTMLButtonElement; state: boolean; api: API; tag: string; class: string; // 静的メソッドで許可されるHTMLタグと属性を指定 static get sanitize() { return { mark: { class: "cdx-marker", }, }; } // インラインツールとしての振る舞いを定義 static get isInline() { return true; } constructor({ api }: { api: API }) { this.api = api; this.button = null; this.state = false; this.tag = "MARK"; this.class = "cdx-marker"; } // ボタン要素を作成し、SVGアイコンを設定 render() { this.button = document.createElement("button"); this.button.type = "button"; this.button.innerHTML = '<svg width="20" height="18"><path d="M10.458 12.04l2.919 1.686-.781 1.417-.984-.03-.974 1.687H8.674l1.49-2.583-.508-.775.802-1.401zm.546-.952l3.624-6.327a1.597 1.597 0 0 1 2.182-.59 1.632 1.632 0 0 1 .615 2.201l-3.519 6.391-2.902-1.675zm-7.73 3.467h3.465a1.123 1.123 0 1 1 0 2.247H3.273a1.123 1.123 0 1 1 0-2.247z"/></svg>'; this.button.classList.add(this.api.styles.inlineToolButton); return this.button; } // 選択されたテキストを <mark> タグで囲む surround(range: Range) { if (this.state) { this.unwrap(range); return; } this.wrap(range); } // テキストを <mark> タグでラップ wrap(range: Range) { const selectedText = range.extractContents(); const mark = document.createElement(this.tag); mark.className = this.class; // class 属性の追加 mark.appendChild(selectedText); range.insertNode(mark); this.api.selection.expandToTag(mark); } // <mark> タグを解除 unwrap(range: Range) { const mark = this.api.selection.findParentTag(this.tag); const text = range.extractContents(); mark?.remove(); range.insertNode(text); } // ツールの状態をチェック checkState() { const mark = this.api.selection.findParentTag(this.tag, this.class); this.state = !!mark; if (this.state) { this.button?.classList.add("cdx-marker--active"); } else { this.button?.classList.remove("cdx-marker--active"); } } } export default MarkerTool; 上記を以下のように呼び出します。 ...

Editor.jsのmax-widthを変更する

Editor.jsのmax-widthを変更する

概要 Editor.jsを使用する際、デフォルトでは左右に大きなマージンができます。これを解決する方法を紹介します。 方法 以下が参考になりました。 https://github.com/codex-team/editor.js/issues/1328 具体的には、以下を追加します。 .ce-block__content, .ce-toolbar__content { max-width: calc(100% - 80px) !important; } .cdx-block { max-width: 100% !important; } ソースコード全体は以下です。 <script setup lang="ts"> import EditorJS from "@editorjs/editorjs"; import type { OutputData } from "@editorjs/editorjs"; const blocks = ref<OutputData>({ time: new Date().getTime(), blocks: [ { type: "paragraph", data: { text: "大明副使蒋 承奉すらく 、 欽差督察総制提督浙江等処軍務各衙門 、近年以来、日本各島小民、仮るに買売を以て名と為し 、 しばしば中国辺境を犯し、居民を刼掠するを因となし、旨を奉じて 、 浙江等処承宣布政使司 に議行し、本職に転行して 、 親しく貴国に詣り面議せしめん等の因あり。", }, }, ], }); const editor = () => { new EditorJS({ holder: "editorjs", data: blocks.value, onChange: async (api) => { blocks.value = await api.saver.save(); }, }); }; editor(); </script> <template> <div style="background-color: aliceblue"> <div id="editorjs"></div> <hljson :content="blocks" /> </div> </template> <style> .ce-block__content, .ce-toolbar__content { max-width: calc(100% - 80px) !important; } .cdx-block { max-width: 100% !important; } pre { background-color: #f4f4f4; border: 1px solid #ccc; padding: 10px; } </style> 結果、以下のように、左右のマージンが小さくなりました。 ...

Linuxシステムで特定のグループに所属しているユーザーを確認する

Linuxシステムで特定のグループに所属しているユーザーを確認する

概要 ! ChatGPT 4による回答です。 Linuxシステムで特定のグループに所属しているユーザーを確認するには、いくつかの方法があります。ここでは、コマンドラインを使用して、特定のグループ(この場合は「group1」と「group2」)に所属するユーザーをリストする方法を説明します。 方法1: /etc/group ファイルを確認する Linuxでは、/etc/group ファイルにシステム上のすべてのグループとそれに所属するユーザーの情報が格納されています。このファイルを確認することで、特定のグループに含まれるユーザーを確認することができます。 コマンド: grep '^group1:' /etc/group grep '^group2:' /etc/group これらのコマンドは、group1 と group2 グループについての情報を /etc/group ファイルから検索し、出力します。出力例は以下のようになります: group1:x:1001:user1,user2 group2:x:1002:user3,user4 ここで、user1 と user2 は group1 グループのメンバーで、user3 と user4 は group2 グループのメンバーです。 方法2: getent コマンドを使用する getent コマンドを使用しても、グループに所属するユーザーを調べることができます。このコマンドは /etc/group ファイルから直接情報を取得します。 コマンド: getent group group1 getent group group2 出力は /etc/group を grep した時と同様のフォーマットです。 方法3: members コマンドを使用する members コマンドは、特定のグループに属するすべてのユーザーの名前をリストアップするために使われます。ただし、このコマンドはすべてのLinuxディストリビューションにはデフォルトでインストールされていないため、インストールが必要な場合があります。 コマンド: sudo apt install members # Debian系の場合 members group1 members group2 これらの方法を使用して、group1 および group2 グループに含まれるユーザーを確認できます。どの方法を選択するかは、使用しているシステムやインストールされているプログラムによります。 ...

Omeka SのAdvanced Searchモジュールでの部分一致検索

Omeka SのAdvanced Searchモジュールでの部分一致検索

概要 Advanced Searchモジュールを使って、追加したフィルタで部分一致検索を行う方法について説明します。 上記では、「とる」という文字列をクエリとして、タイトルが「abc タイトル」のアイテムがヒットしています。 背景 Advanced Searchモジュールを使用すると、検索条件やファセットなどを柔軟に設定することができます。 https://omeka.org/s/modules/AdvancedSearch/ 特に、「Reference」モジュールと組み合わせることで、以下のようなファセット検索を実現できます。 フィルタの追加もできます。ただし、フィルタを用いた部分一致検索を行う場合には、設定が必要です。 上記の例では、「とる」という文字列をクエリとした際、タイトルが「abc タイトル」のアイテムがヒットしていません。 設定方法 フィルタの追加は、以下の設定画面のFiltersで行います。(slugの部分は必要に応じて読み替えてください。) /admin/search-manager/config/1/configure 上記の例では、titleとsubjectをフィルタとして以下のように追加しています。 title = Title subject = Subject advanced = Filters = Advanced = このままでは、titleおよびsubjectに対する完全一致になります。 これに対して、以下のように、Textを追加します。 title = Title = Text subject = Subject advanced = Filters = Advanced = これにより、titleについては部分一致、subjectについては完全一致、を実現することができます。 まとめ Omeka SのAdvanced Searchモジュールの利用にあたり、参考になりましたら幸いです。

Omeka Sで独自の検索ページを作成する

Omeka Sで独自の検索ページを作成する

概要 Omeka Sで以下のような独自の検索ページを作成する方法について紹介します。 背景 Omeka Sでの検索ページの作成にあたり、詳細検索画面で絞り込み項目を限定する方法を紹介しました。 一方、概要で紹介したように、指定した項目だけを列挙した検索画面を作成したい場合もあります。このような検索ページの作成にあたり、「Advanced Search」モジュールを使うことができます。 https://omeka.org/s/modules/AdvancedSearch/ 以下のページで使い方を説明しています。以下ではApache Solrとの連携を行っていますが、Referenceモジュールなどと組み合わせて、Omeka S単体で使用することもできます。 ただし、「Advanced Search」モジュールは機能が豊富なゆえに、使いこなすのが難しい面があります。そこで、今回は簡単に上記のようなカスタム検索ページを作成する方法について紹介します。 作成方法 具体的には、検索用の独自ページを作成します。 以下のように、特定のサイトで、ページを作成します。 「HTML」ブロックを追加します。 「ソース」ボタンをクリックして、以下のHTMLをコピペします。 <div id="dynamic-fields"></div> <button id="submit" class="btn btn-primary">検索</button> <script> const params = [ { label: "キーワード検索", type: "in", placeholder: "すべてのフィールドに対して検索します。", help: "部分一致", }, { label: "タイトル", property: 1, type: "in", help: "部分一致" }, { label: "資料番号", property: 10, type: "eq", help: "完全一致" }, { label: "主題", property: 3, type: "in", help: "部分一致" }, ]; // 以下はそのまま document.addEventListener("DOMContentLoaded", () => { initializeSearchForm(); setupFormSubmission(); }); function initializeSearchForm() { const container = document.getElementById("dynamic-fields"); params.forEach((param, index) => { container.appendChild(createFormGroup(param, index)); }); } function createFormGroup(param, index) { const formGroup = document.createElement("div"); formGroup.className = "form-group mb-4"; formGroup.appendChild(createLabel(param.label)); formGroup.appendChild( createInput( `property[${index}][text]`, "form-control", param.placeholder ) ); formGroup.appendChild(createHelpText(param.help)); formGroup.appendChild( createHiddenInput(`property[${index}][type]`, param.type) ); if (param.property) { formGroup.appendChild( createHiddenInput(`property[${index}][property][]`, param.property) ); } formGroup.appendChild( createHiddenInput(`property[${index}][joiner]`, "and") ); return formGroup; } function createLabel(text) { const label = document.createElement("label"); label.className = "mb-1"; label.textContent = text; return label; } function createInput(name, className, placeholder) { const input = document.createElement("input"); input.type = "text"; input.name = name; input.className = className; input.placeholder = placeholder || ""; // set value const urlParams = new URLSearchParams(window.location.search); const value = urlParams.get(name); if (value) { input.value = value; } return input; } function createHelpText(text) { const small = document.createElement("small"); small.className = "form-text text-muted"; small.textContent = text; return small; } function createHiddenInput(name, value) { const input = document.createElement("input"); input.type = "hidden"; input.name = name; input.value = value; return input; } function setupFormSubmission() { document.getElementById("submit").addEventListener("click", () => { const form = document.createElement("form"); form.method = "GET"; form.action = "../item"; form.style.display = "none"; Array.from( document.querySelectorAll("#dynamic-fields input") ).forEach((input) => { form.appendChild(input.cloneNode(true)); }); document.body.appendChild(form); form.submit(); }); } </script> 結果、以下のように、ボタンのみが表示されます。 ...

学習指導要領コード推薦アプリのAPIを使用する

学習指導要領コード推薦アプリのAPIを使用する

概要 以下の記事で、学習指導要領コードの推薦アプリについて紹介しました。 今回は、GradioのAPIを使って、上記の推薦アプリを使用する方法について紹介します。 使い方 ライブラリをインストールします。 pip install gradio_client 例えば、以下のデータを使用してみます。 テキスト 学校種別 空気鉄砲や水鉄砲、ペットボトルロケットなどのしくみを調べ、空気はおし縮められ体積が小さくなるにつれて反発する力が大きくなるが、水はおし縮められないことに気づく。 小学校 JSONデータは実行結果の配列の2つ目の要素に格納されているため、result[1]で取得します。 from gradio_client import Client client = Client("nakamura196/jp-cos") result = client.predict( text="空気鉄砲や水鉄砲、ペットボトルロケットなどのしくみを調べ、空気はおし縮められ体積が小さくなるにつれて反発する力が大きくなるが、水はおし縮められないことに気づく。", courseOfStudy=["小学校"], api_name="/predict" ) json_data = result[1] 結果、以下のようなJSONデータが得られます。 [{'dcterms:identifier': '8260243111200000', 'jp-cos:courseOfStudy': '小学校', 'jp-cos:subjectArea': '理科', 'score': 0.215, 'jp-cos:sectionText': '閉じ込めた空気は圧《お》し縮められるが,水は圧《お》し縮められないこと。'}, {'dcterms:identifier': '8260243111100000', 'jp-cos:courseOfStudy': '小学校', 'jp-cos:subjectArea': '理科', 'score': 0.236, 'jp-cos:sectionText': '閉じ込めた空気を圧《お》すと,体積は小さくなるが,圧《お》し返す力は大きくなること。'}, {'dcterms:identifier': '8260243112000000', 'jp-cos:courseOfStudy': '小学校', 'jp-cos:subjectArea': '理科', 'score': 0.246, 'jp-cos:sectionText': '空気と水の性質について追究する中で,既習の内容や生活経験を基に,空気と水の体積や圧《お》し返す力の変化と圧《お》す力との関係について,根拠のある予想や仮説を発想し,表現すること。'}, {'dcterms:identifier': '8260243110000000', 'jp-cos:courseOfStudy': '小学校', 'jp-cos:subjectArea': '理科', 'score': 0.255, 'jp-cos:sectionText': '空気と水の性質 空気と水の性質について,体積や圧《お》し返す力の変化に着目して,それらと圧《お》す力とを関係付けて調べる活動を通して,次の事項を身に付けることができるよう指導する。'}] 発展 より詳細な使用方法について、フッター部分の「Use via API」から確認することができます。 パラメータや返却される値について説明されています。 まとめ 参考になりましたら幸いです。

学習指導要領コードの推薦アプリの試作

学習指導要領コードの推薦アプリの試作

概要 学習指導要領コードの推薦アプリを作成しましたので、その紹介です。以下のhuggingfaceのspaceでお試しいただけます。学習指導要領LODを利用しました。 https://huggingface.co/spaces/nakamura196/jp-cos 使い方 テキストフォームに任意のテキストを入力します。「学校種別」は任意項目です。 結果が画面右側に表示されます。 サンプルも用意していますので、お試しください。NHK for Schoolの情報を利用しています。 仕組み 以下の記事を参考に、学習指導要領のテキストをベクトル化し、同様にベクトル化した質問文と類似する学習指導要領を返却します。 https://zenn.dev/yumefuku/articles/llm-langchain-rag 上記の記事の通り、ベクトル検索ライブラリには「FAISS」、埋め込みモデルには「multilingual-e5-large」を使用しています。 https://huggingface.co/intfloat/multilingual-e5-large 推論部分のソースコードは以下でご確認いただけます。 https://huggingface.co/spaces/nakamura196/jp-cos/blob/main/app.py 工夫点 「学校種別」などを用いたフィルタリング 「学校種別」が指定された場合、langchainのFAISS.similarity_search_with_scoreによる類似度検索において、フィルタリングを行っています。 具体的には、以下のfilterを用いています。 metadata = {} if grade: metadata["学校種別"] = grade try: docs_and_scores = index.similarity_search_with_score(input_text, filter=metadata) except Exception as e: print(f"Error during search: {e}") return [] 今後 「教科等」による絞り込み 「学校種別」による絞り込みに加えて、「教科等(理科、社会、数学など)」も追加予定です。 推薦精度の評価 学習指導要領コードがすでに付与されているNHK for Schoolのコンテンツを対象に、推薦精度の評価を行う予定です。 「学校種別」の追加 現在は、以下の7つの学校種別のみを使用しています。他の学習指導要領も今後追加予定です。 UpperSecondary/2018 UpperSecondaryDeptSNES/2019 Elementary/2017 ElementaryAndLowerSecondaryDeptSNES/2017 LowerSecondary/2017 Kindergarten/2017 KindergartenDeptSNES/2017 まとめ 学習指導要領LODの開発者の方々に感謝いたします。 ...

researchmapのapiを使う

researchmapのapiを使う

概要 researchmapのapiを使って、業績リストを作成する機会がありましたので、備忘録です。 
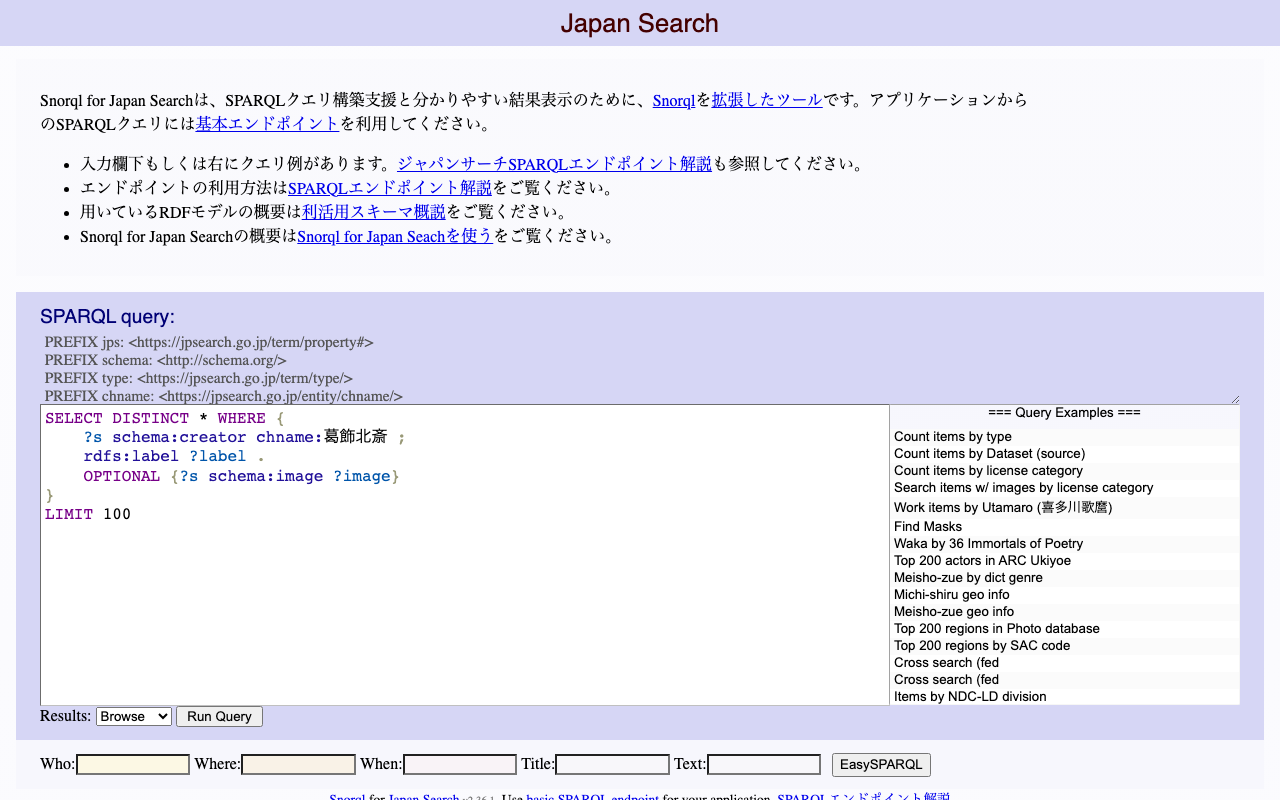
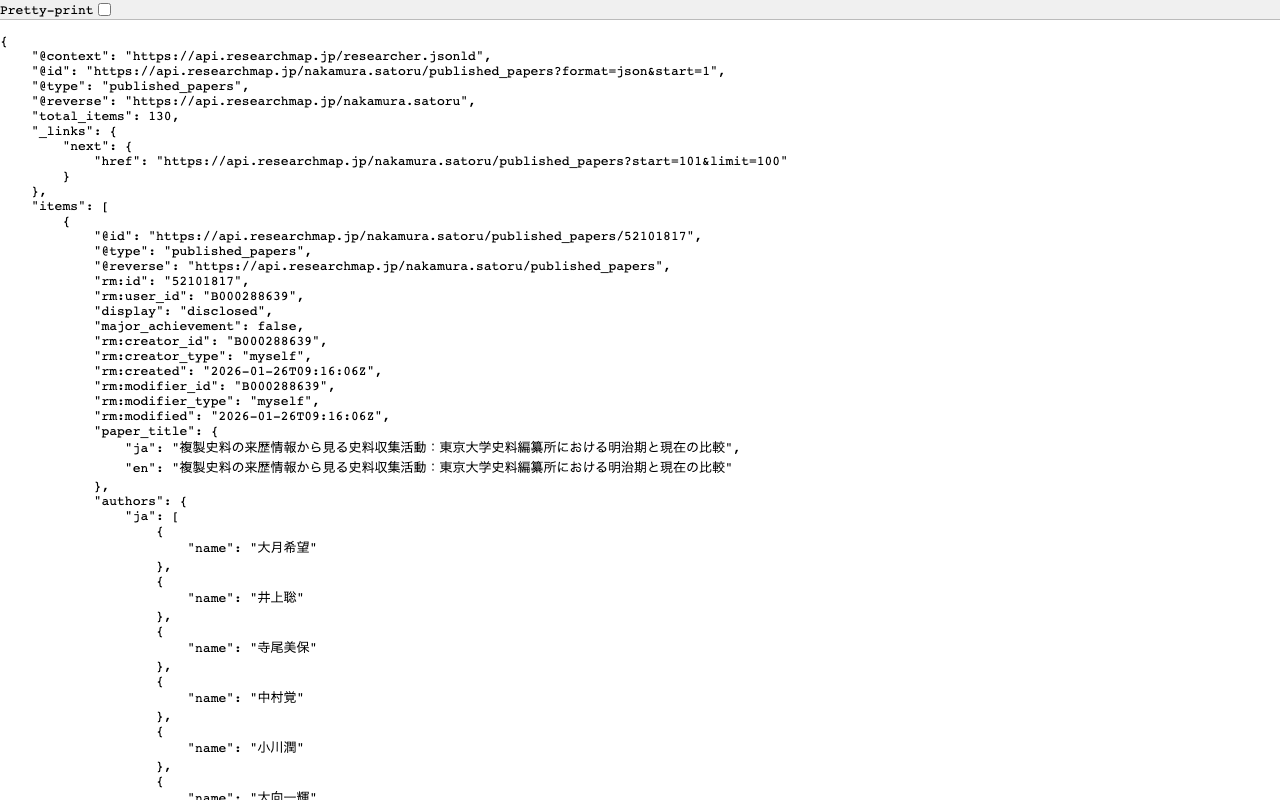
researchmapのapiに対するクエリ例 researchmapのapiに対するクエリ例をいくつか紹介します。 論文の一覧を取得する https://api.researchmap.jp/nakamura.satoru/published_papers 上限を指定する(limitの使用) https://api.researchmap.jp/nakamura.satoru/published_papers?limit=5 x件以降の結果を取得する(startの使用) https://api.researchmap.jp/nakamura.satoru/published_papers?limit=5&start=6 出版年月日を指定する(from_dateとto_date) https://api.researchmap.jp/nakamura.satoru/published_papers?from_date=2023-04-01&to_date=2024-03-31 Pythonでの使用例 指定したユーザと出版年月日に基づき、published_papersとpresentationsをExcelに書き出します。 #| export import requests import pandas as pd import os class Client: def __init__(self, slug, date_start, date_end): self.slug = slug self.date_start = date_start self.date_end = date_end self.output_dir = f"data/{self.slug}/{self.date_start}_{self.date_end}" os.makedirs(self.output_dir, exist_ok=True) @staticmethod def main(slug, date_start, date_end): client = Client(slug, date_start, date_end) client.process_data() def process_data(self): self.df_paper = self.fetch_data('published_papers', self.paper_processing_logic) self.df_presentation = self.fetch_data('presentations', self.presentation_processing_logic) self.write_to_excel() def fetch_data(self, data_type, processing_function): url = f"https://api.researchmap.jp/{self.slug}/{data_type}" params = { "limit": 100, "start": 0, "from_date": self.date_start, "to_date": self.date_end, } response = requests.get(url, params=params) if response.status_code == 200: data = response.json().get("items", []) return processing_function(data) else: raise Exception(f"Error fetching {data_type}: {response.status_code}") def paper_processing_logic(self, papers): rows = [] for item in papers: rows.append(self.process_paper_item(item)) return pd.DataFrame(rows) def process_paper_item(self, item): author_list = [auth["name"] for auth in item.get('authors', {}).get("ja", [])] c1 = '''1.掲載論文のDOI (デジタルオブジェクト識別子)''' c2 = '''2.著者名''' c3 = '''3.論文標題''' c4 = '''4.雑誌名''' c5 = '''5.巻 (半角数字)''' c6 = '''6.発行年 (半角数字)''' c7 = '''7.最初と最後の頁 (半角数字)''' c8 = '''8.査読の有無 (1:有 0:無)''' c9 = '''9.国際共著 (1:有 0:無)''' c10 = '''10.オープンアクセス (1:有 0:無)''' return { c1: item.get('identifiers', {}).get('doi', [None])[0], c2: ", ".join(author_list), c3: item.get('paper_title', {}).get('ja', ''), c4: item.get('publication_name', {}).get('ja', ''), c5: item.get('volume', None), c6: item['publication_date'][:4], c7: f"{item.get('starting_page', '')}-{item.get('ending_page', '')}", c8: 1 if item.get('referee', False) else 0, c9: 1 if item.get('is_international_collaboration', False) else 0, c10: 1 if item.get('rm:is_open_access', False) else 0 } def presentation_processing_logic(self, presentations): rows = [] for item in presentations: rows.append(self.process_presentation_item(item)) return pd.DataFrame(rows) def process_presentation_item(self, item): author_list = [auth["name"] for auth in item.get('presenters', {}).get("ja", [])] c1 = '''1.発表者名''' c2 = "2.発表標題" c3 = "3.学会等名" c4 = '''4.発表年(開始) (半角数字)''' c5 = '''5.発表年(終了) (半角数字)''' c6 = '''6.招待講演 (1:有 0:無)''' c7 = '''7.国際学会 (1:有 0:無)''' return { c1: ", ".join(author_list), c2: item.get('presentation_title', {}).get('ja', ''), c3: item.get('event', {}).get('ja', ''), c4: item['publication_date'][:4], c5: item['publication_date'][:4], c6: 1 if item.get('invited', False) else 0, c7: 1 if item.get('is_international_presentation', False) else 0 } def write_to_excel(self): with pd.ExcelWriter(f'{self.output_dir}/merged.xlsx', engine='openpyxl') as writer: self.df_paper.to_excel(writer, sheet_name='Papers', index=False) self.df_presentation.to_excel(writer, sheet_name='Presentations', index=False) self.df_paper.to_csv(f"{self.output_dir}/papers.csv", index=False) self.df_presentation.to_csv(f"{self.output_dir}/presentations.csv", index=False) 使用例は以下です。dataフォルダにcsvやexcelが出力されます。 ...

TEI/XMLの可視化例:Leafletを用いた地図表示

TEI/XMLの可視化例:Leafletを用いた地図表示

概要 TEI/XMLファイルの可視化にあたり、可視化例とソースコードを公開するリポジトリを作成しました。 https://github.com/nakamura196/tei_visualize_demo 可視化例は以下のページでご確認いただけます。 https://nakamura196.github.io/tei_visualize_demo/ 今回、MarkerClusterを用いたマーカー表示の例を追加しましたので、紹介します。 前提 Leafletを使って、(MarkerClusterを使用せずに、)マーカーの表示ができていることを前提とします。まだの方は、以下の可視化例、およびソースコードを参考にしてください。 可視化例 https://nakamura196.github.io/tei_visualize_demo/01/ ソースコード https://github.com/nakamura196/tei_visualize_demo/blob/main/docs/01/index.html MarkerClusterを使った実装例 可視化例は以下です。 https://nakamura196.github.io/tei_visualize_demo/02/ ソースコードは以下です。 https://github.com/nakamura196/tei_visualize_demo/blob/main/docs/02/index.html 「TEIを用いた『渋沢栄一伝記資料』テキストデータの再構築と活用」のデータを利用しています。 ライブラリの追加 以下を追記します。 <link rel="stylesheet" href="https://leaflet.github.io/Leaflet.markercluster/dist/MarkerCluster.css" /> <link rel="stylesheet" href="https://leaflet.github.io/Leaflet.markercluster/dist/MarkerCluster.Default.css" /> <script src="https://leaflet.github.io/Leaflet.markercluster/dist/leaflet.markercluster-src.js"></script> L.markerClusterGroupの利用 markersを作成して、個々のmarkerをaddLayerメソッドを使って追加します。最後に、mapにaddLayerメソッドを使って、markersを追加します。 ... // 地図の初期化 var map = L.map("map").setView(center, zoom); ... var markers = L.markerClusterGroup(); for (var i = 0; i < places.length; i++) { var place = places[i]; const geoList = place.getElementsByTagName("geo"); for (const geo of geoList) { var [lat, lon] = geo.textContent.trim().split(" ").map(Number); // 文字列を数値の緯度経度に変換 // マーカーを作成して地図上に追加 var marker = L.marker([lat, lon]); const placeName = place.getElementsByTagName("placeName")[0].textContent; // マーカーにクリック時のポップアップを設定 marker.bindPopup(placeName); markers.addLayer(marker); } } map.addLayer(markers); まとめ TEI/XMLの可視化にあたり、参考になりましたら幸いです。 ...

Nuxt3でサイトマップを作成する

Nuxt3でサイトマップを作成する

概要 Nuxt3でサイトマップを作成する方法がいくつかありましたので、備忘録です。 [1] @nuxtjs/sitemap ドキュメント https://sitemap.nuxtjs.org/ 参考記事 https://zenn.dev/kumao/articles/3fe10078a7e9d2 インストール npm install -D @nuxtjs/sitemap リポジトリ https://github.com/nuxt-community/sitemap-module [2] sitemap 参考記事 https://zenn.dev/kakkokari_gtyih/articles/db1aed4fed6054 インストール npm install -D sitemap リポジトリ https://github.com/ekalinin/sitemap.js [3] nuxt-simple-sitemap こちらは、以下の記載がありましたので、[1]の@nuxtjs/sitemapを使うのがよさそうです。 Package has been migrated to @nuxtjs/sitemap. https://www.npmjs.com/package/nuxt-simple-sitemap ドキュメント https://nuxt.com/modules/simple-sitemap 参考記事 https://shinobiworks.com/blog/615/ インストール npm install --save-dev nuxt-simple-sitemap リポジトリ https://github.com/nuxt-modules/sitemap まとめ 他にもあるかもしれませんが、参考になりましたら幸いです。

DrupalのSimple OAuthとPostmanを使ったOAuth認証の確認

DrupalのSimple OAuthとPostmanを使ったOAuth認証の確認

概要 DrupalのSimple OAuthとPostmanを使ったOAuth認証の確認を行います。 以前に以下の記事を書きましたが、もう少し掘り下げてみます。 DrupalでSimple OAuthの設定を行う 以下を参考にしてください。 https://tech.ldas.jp/ja/posts/e4ce978db12227/#oauthクライアントの作成 Postman グラントタイプがpasswordの場合 /oauth/token に対して、Body > x-www-form-urlencoded に以下を指定しました。 キー 値 grant_type password client_id {作成したCLIENT_ID。例:gt8UKlKltI4qs1XP5KLucIXiYw9ulGb0xS4RyO437dc} client_secret {作成したCLIENT_SECRET。例:test} username {ユーザ名。例:yamato} password {パスワード。例:yamato} 結果、以下のようなJSONが返却されました。 { "token_type": "Bearer", "expires_in": 300, "access_token": "eyJ0eXAiOiJKV1QiLCJhbGciOiJS...", "refresh_token": "def50200295e412f..." } jwt.ioで確認したところ、以下のようにデコードされました。 { "aud": "gt8UKlK...", "jti": "6dc1fee..", "iat": 1709386974, "nbf": 1709386974, "exp": 1709387274.122002, "sub": "2", "scope": [ "authenticated", "cj" ] } subはDrupalのユーザのIDに該当し、scopeはDrupalで設定した値が返却されました。 異なるユーザでログインした場合、異なるsubが与えられました。 ユーザ名またはパスワードをまちがえる 以下が返却されました。 { "error": "invalid_grant", "error_description": "The user credentials were incorrect.", "message": "The user credentials were incorrect." } 間違ったscopeを指定する 以下のように、間違ったscopeを指定します。 キー 値 grant_type password client_id {作成したCLIENT_ID。例:gt8UKlKltI4qs1XP5KLucIXiYw9ulGb0xS4RyO437dc} client_secret {作成したCLIENT_SECRET。例:test} username {ユーザ名。例:yamato} password {パスワード。例:yamato} scope test 以下が返却されました。 ...

METSFlaskを試す

METSFlaskを試す

概要 以下のMETSFlaskを試します。 https://github.com/tw4l/METSFlask 以下のように説明されています。 A web application for human-friendly exploration of Archivematica METS files [機械翻訳] ArchivematicaのMETSファイルを人間に優しい方法で探索するためのウェブアプリケーション 使い方 以下のサイトで試すことができます。 http://bitarchivist.pythonanywhere.com/ METSファイルをアップロードした結果が以下です。今回は、1つのWordファイルのみが格納されていたため、1つのオリジナルファイルに関する情報が表示されます。 Viewボタンをクリックすると、詳細画面に遷移します。 PREMIS Eventsにおいて、METSファイルのmets:digiprovMDセクションの内容が表示されていました。このセクションは、デジタルプロビナンス(デジタルオブジェクトの起源や履歴を追跡する情報)メタデータを扱うようです。 <mets:digiprovMD ID="digiprovMD_8"> <mets:mdWrap MDTYPE="PREMIS:EVENT"> <mets:xmlData> <premis:event xmlns:premis="http://www.loc.gov/premis/v3" xsi:schemaLocation="http://www.loc.gov/premis/v3 http://www.loc.gov/standards/premis/v3/premis.xsd" version="3.0"> <premis:eventIdentifier> <premis:eventIdentifierType>UUID</premis:eventIdentifierType> <premis:eventIdentifierValue>24741142-467a-45da-936e-78e43ab68a6c</premis:eventIdentifierValue> </premis:eventIdentifier> <premis:eventType>ingestion</premis:eventType> <premis:eventDateTime>2024-02-26T03:34:19.082563+00:00</premis:eventDateTime> <premis:eventDetailInformation> <premis:eventDetail/> </premis:eventDetailInformation> <premis:eventOutcomeInformation> <premis:eventOutcome/> <premis:eventOutcomeDetail> <premis:eventOutcomeDetailNote/> </premis:eventOutcomeDetail> </premis:eventOutcomeInformation> <premis:linkingAgentIdentifier> <premis:linkingAgentIdentifierType>preservation system</premis:linkingAgentIdentifierType> <premis:linkingAgentIdentifierValue>Archivematica-1.16</premis:linkingAgentIdentifierValue> </premis:linkingAgentIdentifier> <premis:linkingAgentIdentifier> <premis:linkingAgentIdentifierType>repository code</premis:linkingAgentIdentifierType> <premis:linkingAgentIdentifierValue>test</premis:linkingAgentIdentifierValue> </premis:linkingAgentIdentifier> <premis:linkingAgentIdentifier> <premis:linkingAgentIdentifierType>Archivematica user pk</premis:linkingAgentIdentifierType> <premis:linkingAgentIdentifierValue>1</premis:linkingAgentIdentifierValue> </premis:linkingAgentIdentifier> </premis:event> </mets:xmlData> </mets:mdWrap> </mets:digiprovMD> mets:mdWrapのChatGPT 4による説明は以下のとおりです。 ...

Access to MemoryのRESTful APIを試す

Access to MemoryのRESTful APIを試す

概要 Access to MemoryのRESTful APIの一例を試してみます。 以下が公式のドキュメントです。 https://www.accesstomemory.org/en/docs/2.8/dev-manual/api/api-intro/ Browse taxonomy terms https://demo.accesstomemory.org/api/taxonomies/34 [ { "name": "Collection" }, { "name": "File" }, { "name": "Fonds" }, { "name": "Item" }, { "name": "Part" }, { "name": "Record group" }, { "name": "Series" }, { "name": "Sous-fonds" }, { "name": "Subseries" } ] Browse information objects endpoint https://demo.accesstomemory.org/api/informationobjects { "total": 460, "results": [ { "reference_code": "CA ON00012 SC105", "slug": "kathleen-munn-fonds", "title": "Kathleen Munn fonds", "repository": "Art Gallery of Ontario", "level_of_description": "Fonds", "creators": [ "Munn, Kathleen Jean, 1887-1974" ], "creation_dates": [ "1912-[193-]" ] }, { "reference_code": "CA ON00012 SC069", "slug": "gallery-44-centre-for-contemporary-photography-fonds", "title": "Gallery 44 Centre for Contemporary Photography fonds", "repository": "Art Gallery of Ontario", "level_of_description": "Fonds", "creators": [ "Gallery 44 Centre for Contemporary Photography" ], "creation_dates": [ "[ca. 1979] - 2000" ], "place_access_points": [ "Toronto", "York, Regional Municipality of", "Ontario", "Canada" ] }, { "slug": "bitter-paradise-sell-out-of-east-timor-fonds", "title": "*Bitter Paradise: The Sell-Out of East Timor* fonds", "repository": "University of British Columbia Archives", "level_of_description": "Fonds", "creators": [ "Briere, Elaine" ], "creation_dates": [ "1985 - 1997" ] }, ... Read information object endpoint 以下の記事でOAIを通じて取得したレコードを、API経由で取得してみます。 ...