Home Articles Books Search About
日本語
Building a Django CI/CD Environment from GitHub to EC2 Using GitHub Actions (2023 Edition)

Building a Django CI/CD Environment from GitHub to EC2 Using GitHub Actions (2023 Edition)

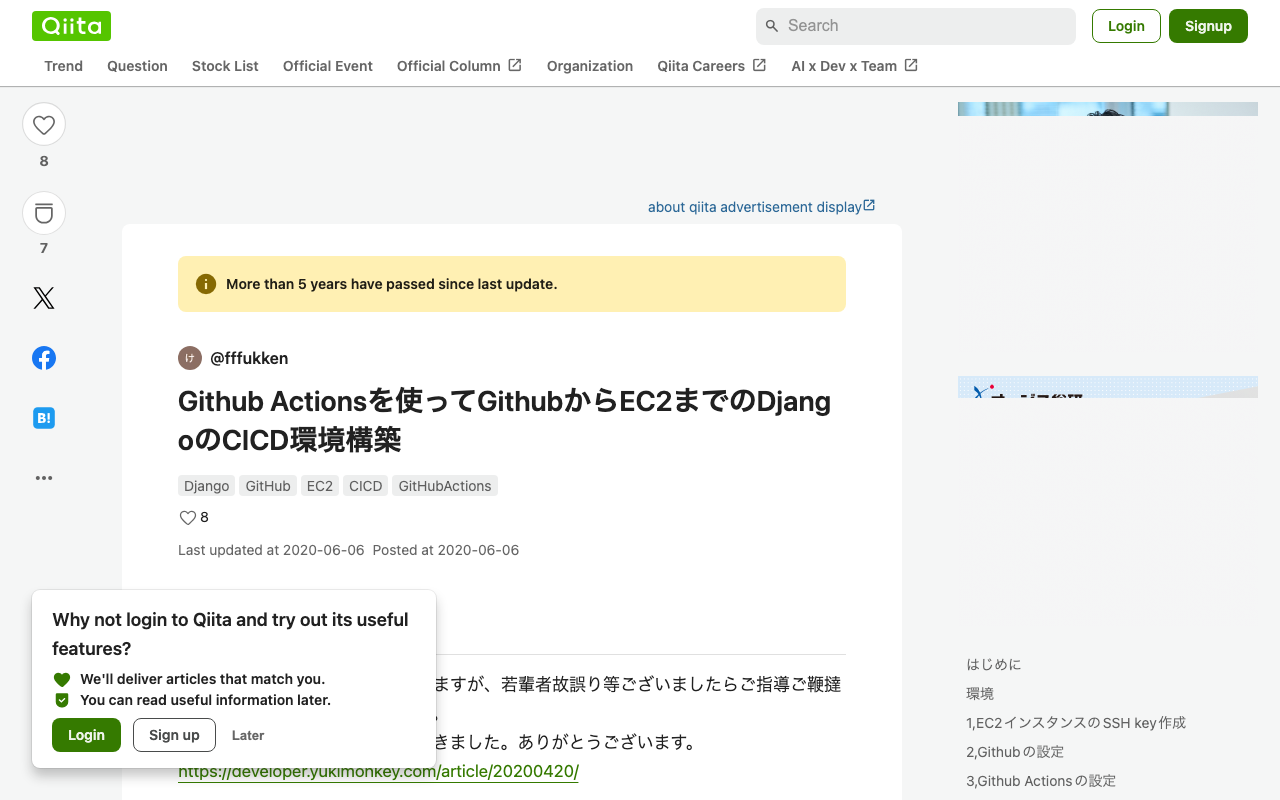
Overview I had the opportunity to build a Django CI/CD environment from GitHub to EC2 using GitHub Actions, and here are my notes. The following article was used as a reference. https://qiita.com/fffukken/items/27b0bfa712940914d3f6 I made some updates to the GitHub Actions configuration compared to the above article. GitHub Actions Configuration name: Test and Deploy on: push: branches: [ develop, main ] pull_request: branches: [ develop ] jobs: build: runs-on: ubuntu-latest strategy: max-parallel: 4 matrix: python-version: [3.9, "3.10"] steps: - uses: actions/checkout@v3 - name: Set up Python ${{ matrix.python-version }} uses: actions/setup-python@v4 with: python-version: ${{ matrix.python-version }} - name: Install Dependencies run: | python -m pip install --upgrade pip pip install -r requirements.txt - name: Run Tests run: | python manage.py makemigrations python manage.py migrate python manage.py test - name: deploy run: | echo "$SECRET_KEY" > secret_key chmod 600 secret_key ssh -oStrictHostKeyChecking=no ${EC2_USER}@${EC2_HOST} -i secret_key "source <仮想環境名>/bin/activate \ && cd ~/<プロジェクト名>\ && git pull origin main \ && python manage.py makemigrations \ && python manage.py migrate \ && deactivate \ && sudo systemctl restart gunicorn" env: SECRET_KEY: ${{ secrets.SECRET_KEY }} EC2_USER: ${{ secrets.EC2_USER }} EC2_HOST: ${{ secrets.EC2_HOST }} The changes made were updating the versions of actions/checkout and actions/setup-python. I also changed the pip install section to pip install -r requirements.txt. ...

Bulk Deleting Amazon ECR Repositories

Bulk Deleting Amazon ECR Repositories

Overview I had an opportunity to bulk delete Amazon ECR repositories, so here are my notes. Please exercise caution when running these commands. Creating a List of Repositories I referenced the following article. https://qiita.com/fk_2000/items/bffd3b1ad6f3ab109766 Run the following command. aws ecr describe-repositories --output json | jq -re ".repositories[].repositoryName" > repository.list On macOS, if you don’t have the jq command, install it with brew install jq. Deletion Run the following command. The --force flag is used to delete even if images exist. ...

Creating a REST API Using OpenAPI and AWS CDK (OpenSearch Connection and Custom Domain)

Creating a REST API Using OpenAPI and AWS CDK (OpenSearch Connection and Custom Domain)

Overview I had the opportunity to create a REST API using OpenAPI and AWS CDK, so this is a memo. The following article was very helpful. https://zenn.dev/taroman_zenn/articles/91879cec40627c The project created this time is published in the following repository. https://github.com/nakamura196/CdkOpenapi Connecting to OpenSearch The implementation is done in the following Lambda. https://github.com/nakamura196/CdkOpenapi/blob/main/lambda/search.ts Environment variables need to be passed to the Lambda, and the following was written in the ts file under lib. ...

Integrating Strapi with Amazon OpenSearch

Integrating Strapi with Amazon OpenSearch

Overview The following article was helpful for integrating Strapi with Elasticsearch. https://punits.dev/blog/integrating-elasticsearch-with-strapi/ The source code is also publicly available. https://github.com/geeky-biz/strapi-integrate-elasticsearch Here, I will note some customizations made based on the above article, including integration with Amazon OpenSearch. The customized source code is available here: https://github.com/nakamura196/strapi-integrate-opensearch Modifications The article references indexing_type, but it needed to be changed to indexing_request_type. https://github.com/nakamura196/strapi-integrate-opensearch/blob/006c533d4d7882fc9779552db31a7b0e2ada5e57/elastic/cron-search-indexing.js#L16 Additionally, to use Amazon OpenSearch instead of Elasticsearch, the following libraries need to be installed. ...

AWS CDK x CloudFront x S3 x Basic Auth x index.html Support x Custom Domain

AWS CDK x CloudFront x S3 x Basic Auth x index.html Support x Custom Domain

Overview I used AWS CDK to create a static site with CloudFront + S3. Additionally, I used CloudFront Functions to add Basic authentication and processing to append index.html to requests that do not include a filename or extension in the URL. I also added a custom domain, so this is a memo of the process. While somewhat incomplete, the source code is available in the following repository. https://github.com/nakamura196/staticBasic The intended use is to prepare an .env file like the following and run cdk deploy. ...

Connecting Drupal with Amazon OpenSearch Service

Connecting Drupal with Amazon OpenSearch Service

Overview I had the opportunity to connect Drupal with Amazon OpenSearch Service, so this is a personal note for future reference. The following article was helpful. https://www.acquia.com/jp/blog/intergration-with-drupal-and-elasticsearch Module Installation In addition to drupal/search_api and drupal/elasticsearch_connector, it was necessary to install nodespark/des-connector. (There may be room for improvement in how version specifications are handled.) composer require "nodespark/des-connector:^7.x-dev" composer require 'drupal/search_api:^1.29' composer require "drupal/elasticsearch_connector ^7.0@alpha" Then, enable them with the following. drush pm:enable search_api elasticsearch_connector Connecting Drupal to Elasticsearch Cluster Access the following. ...

Running Strapi on Amazon Lightsail (SSL, Custom Domain)

Running Strapi on Amazon Lightsail (SSL, Custom Domain)

Overview I had the opportunity to run Strapi on Amazon Lightsail, so here are my notes. I referenced the following article: https://zenn.dev/holykzm/articles/1e54cc25207657 Instance Select Node.js. Choose an instance with at least 1GB of memory. If you build on Lightsail, an out-of-memory error will occur with less. SSL and Custom Domain Please refer to the following: https://zenn.dev/nakamura196/articles/5772d6c918508a#独自ドメインの付与 Assign a Static IP, configure a custom domain in Route 53, and run the following: ...

Web Application for NDL Classical Book OCR Using Hugging Face Space

Web Application for NDL Classical Book OCR Using Hugging Face Space

Overview I created a web application for NDL Classical Book OCR using Hugging Face Space. You can try it at the link below. Upload an image, and after about 1 minute, the OCR result text and JSON data will be displayed. https://huggingface.co/spaces/nakamura196/ndl_kotenseki_ocr The following article was used as a reference for creating this application. https://qiita.com/relu/items/e882e23a9bd07243211b Choosing the Right Tool I have separately prepared a Google Colab tutorial as another environment for trying NDL Classical Book OCR. ...

Running NDL Classical Japanese OCR on Amazon EC2 CPU Environment

Running NDL Classical Japanese OCR on Amazon EC2 CPU Environment

Overview This is a memo of running NDL Classical Japanese OCR on an Amazon EC2 CPU environment. The advantage is that it can be run without preparing an expensive GPU environment, but please note that it takes about 30 seconds to 1 minute per image. The following article was referenced when building this environment. https://qiita.com/relu/items/e882e23a9bd07243211b Instance Select Ubuntu from Quick Start. For the instance type, I recommend t2.medium or higher. Errors occurred with smaller instances. ...

Running NDL Classical Text OCR Using Amazon SageMaker Studio

Running NDL Classical Text OCR Using Amazon SageMaker Studio

Overview Previously, I created tutorials for NDL OCR and NDL Classical Text OCR using Google Cloud Platform and Google Colab. This time, I will explain how to run NDL Classical Text OCR using Amazon SageMaker Studio. Please note that this method incurs costs during execution. The description of Amazon SageMaker Studio is available at the following link: https://aws.amazon.com/jp/sagemaker/studio/ Domain Setup and Other Configuration For domain setup and other configuration, please refer to articles such as the following: ...

Setting Up Archivematica on Amazon EC2

Setting Up Archivematica on Amazon EC2

Overview Archivematica is open-source software for long-term preservation of digital data. https://www.archivematica.org/en/ I had the opportunity to set up Archivematica on Amazon EC2, so this is a memo. Installation The installation instructions are described on the following page. https://www.archivematica.org/en/docs/archivematica-1.13/admin-manual/installation-setup/installation/installation/ There are several options, but this time I tried “CentOS 7 64-bit, Installing Archivematica on CentOS/Red Hat.” https://www.archivematica.org/en/docs/archivematica-1.13/admin-manual/installation-setup/installation/install-centos/#install-pkg-centos EC2 Instance Since CentOS 7 was specified, I selected the following Amazon Machine Image (AMI). ...

Script for Initial Setup of Omeka S on Amazon Lightsail (Adding the Easy Admin Module)

Script for Initial Setup of Omeka S on Amazon Lightsail (Adding the Easy Admin Module)

I created an updated version of the “Script for Initial Setup of Omeka S on Amazon Lightsail” introduced in the following article. This version adds “Easy Admin,” which makes it easy to add themes and modules, and also fixes permissions for related directories. I hope you find this helpful. # 変数 OMEKA_PATH=/home/bitnami/htdocs/omeka-s ## ハイフンは含めない DBNAME=omeka_s VERSION=3.2.3 ############# set -e mkdir $OMEKA_PATH # Omekaのダウンロード wget https://github.com/omeka/omeka-s/releases/download/v$VERSION/omeka-s-$VERSION.zip unzip -q omeka-s-$VERSION.zip mv omeka-s/* $OMEKA_PATH # .htaccessの移動 mv omeka-s/.htaccess $OMEKA_PATH # 不要なフォルダの削除 rm -rf omeka-s rm omeka-s-$VERSION.zip # 元からあったindex.htmlを削除(もし存在すれば) if [ -e $OMEKA_PATH/index.html ]; then rm $OMEKA_PATH/index.html fi # データベースの作成 cat <<EOF > sql.cnf [client] user = root password = $(cat /home/bitnami/bitnami_application_password) host = localhost EOF mysql --defaults-extra-file=sql.cnf -e "create database $DBNAME"; # Omeka Sの設定 cat <<EOF > $OMEKA_PATH/config/database.ini user = root password = $(cat bitnami_application_password) dbname = $DBNAME host = localhost EOF sudo chown -R daemon:daemon $OMEKA_PATH/files sudo apt install imagemagick -y # Module cd $OMEKA_PATH/modules ## easy admin wget https://github.com/Daniel-KM/Omeka-S-module-EasyAdmin/releases/download/3.3.7/EasyAdmin-3.3.7.zip unzip EasyAdmin-3.3.7.zip rm EasyAdmin-3.3.7.zip sudo chown -R daemon:daemon $OMEKA_PATH/files sudo chown -R daemon:daemon $OMEKA_PATH/modules sudo chown -R daemon:daemon $OMEKA_PATH/themes

Deploying Nuxt 3 on Amazon Lightsail: Using pm2

Deploying Nuxt 3 on Amazon Lightsail: Using pm2

Introduction When deploying applications developed with Nuxt 3 and similar frameworks, I often use GitHub Pages, Netlify, AWS Amplify, and Serverless Framework + Lambda. However, this time I had the opportunity to deploy using a VPS, so this is a memo. References Specifically, I use Amazon Lightsail and pm2. Creating an Amazon Lightsail Instance Select the Node.js blueprint. Also, since port 3000 is used, open the firewall for it. ...

TODO Memo for EC2 Server Setup

TODO Memo for EC2 Server Setup

This is a TODO memo for setting up a server on EC2. Assign an Elastic IP Add a User with sudo Privileges sudo su useradd nakamura passwd nakamura usermod -G wheel nakamura Set Up Public Key cd /home/nakamura mkdir .ssh touch .ssh/authorized_keys chmod 700 .ssh chmod 600 .ssh/authorized_keys vi .ssh/authorized_keys chown -R nakamura:nakamura .ssh

Script for Initial Setup of Omeka Classic on Amazon Lightsail

Script for Initial Setup of Omeka Classic on Amazon Lightsail

I created a script for the initial setup of Omeka Classic on Amazon Lightsail. This is the “Omeka Classic version” of the following article. I hope this serves as a helpful reference when using Omeka Classic with Amazon Lightsail. # Variables OMEKA_PATH=/home/bitnami/htdocs/omeka ## Do not include hyphens DBNAME=omeka VERSION=3.0.3 ############# set -e mkdir -p $OMEKA_PATH # Download Omeka wget https://github.com/omeka/Omeka/releases/download/v$VERSION/omeka-$VERSION.zip unzip -q omeka-$VERSION.zip mv omeka-$VERSION/* $OMEKA_PATH # Move .htaccess mv omeka-$VERSION/.htaccess $OMEKA_PATH # Remove unnecessary folders rm -rf omeka-$VERSION rm omeka-$VERSION.zip # Remove existing index.html (if it exists) if [ -e $OMEKA_PATH/index.html ]; then rm $OMEKA_PATH/index.html fi # Create database cat <<EOF > sql.cnf [client] user = root password = $(cat /home/bitnami/bitnami_application_password) host = localhost EOF mysql --defaults-extra-file=sql.cnf -e "create database $DBNAME"; # Omeka S configuration cat <<EOF > $OMEKA_PATH/db.ini [database] host = localhost username = root password = $(cat bitnami_application_password) dbname = $DBNAME prefix = "omeka_" charset = "utf8" EOF sudo chown -R daemon:daemon $OMEKA_PATH/files sudo apt install imagemagick -y

An Example of Deploying Nuxt 3 to Netlify and AWS

An Example of Deploying Nuxt 3 to Netlify and AWS

Overview This is a personal note on an example of deploying Nuxt 3 to Netlify and AWS. Below are the deployment examples. Netlify app.vue https://nuxt3-nakamura196.netlify.app/ server/api/hello.ts https://nuxt3-nakamura196.netlify.app/api/hello AWS (Serverless) app.vue https://nuxt3.aws.ldas.jp/ server/api/hello.ts https://nuxt3.aws.ldas.jp/api/hello The source code is at the following URL. https://github.com/nakamura196/nuxt3 I will explain each of them below. Netlify By referring to the following article, I was able to deploy including BFF (Backend for Frontend). https://blog.cloud-acct.com/posts/nuxt3-netlify-deploy/ AWS (Serverless) The following article was helpful for the method using Lambda Functions URL. ...

Script for Initial Setup of Omeka S on Amazon Lightsail

Script for Initial Setup of Omeka S on Amazon Lightsail

I created a script for the initial setup of Omeka S on Amazon Lightsail. I hope this serves as a useful reference when using Omeka S with Amazon Lightsail. # 変数 OMEKA_PATH=/home/bitnami/htdocs/omeka-s ## ハイフンは含めない DBNAME=omeka_s VERSION=3.2.3 ############# set -e mkdir $OMEKA_PATH # Omekaのダウンロード wget https://github.com/omeka/omeka-s/releases/download/v$VERSION/omeka-s-$VERSION.zip unzip -q omeka-s-$VERSION.zip mv omeka-s/* $OMEKA_PATH # .htaccessの移動 mv omeka-s/.htaccess $OMEKA_PATH # 不要なフォルダの削除 rm -rf omeka-s rm omeka-s-$VERSION.zip # 元からあったindex.htmlを削除(もし存在すれば) if [ -e $OMEKA_PATH/index.html ]; then rm $OMEKA_PATH/index.html fi # データベースの作成 cat <<EOF > sql.cnf [client] user = root password = $(cat /home/bitnami/bitnami_application_password) host = localhost EOF mysql --defaults-extra-file=sql.cnf -e "create database $DBNAME"; # Omeka Sの設定 cat <<EOF > $OMEKA_PATH/config/database.ini user = root password = $(cat bitnami_application_password) dbname = $DBNAME host = localhost EOF sudo chown -R daemon:daemon $OMEKA_PATH/files sudo apt install imagemagick -y

Building a Virtuoso RDF Store Using AWS EC2

Building a Virtuoso RDF Store Using AWS EC2

Introduction These are notes on building a Virtuoso RDF store using AWS EC2. This covers custom domain configuration, HTTPS connection, and Snorql installation. There are many other useful articles on building Virtuoso. Please refer to them as well: https://midoriit.com/2014/04/rdfストア環境構築virtuoso編1.html https://qiita.com/mirkohm/items/30991fec120541888acd https://zenn.dev/ningensei848/articles/virtuoso_on_gcp_faster_with_cos Prerequisites An ACM Certificate should already be created. Please refer to articles such as the following: https://dev.classmethod.jp/articles/specification-elb-setting/#toc-3 EC2 First, create an EC2 instance. Select Amazon Linux, and set the instance type to t2.micro. ...

Hosting Hugging Face Models on AWS Lambda for Serverless Inference

Hosting Hugging Face Models on AWS Lambda for Serverless Inference

Overview This is a personal note on hosting Hugging Face models on AWS Lambda for serverless inference, based on the following article. https://aws.amazon.com/jp/blogs/compute/hosting-hugging-face-models-on-aws-lambda/ Additionally, I cover providing an API using Lambda function URLs and CloudFront. Hosting Hugging Face Models on AWS Lambda Preparation For this section, I referred to the document introduced at the beginning. https://aws.amazon.com/jp/blogs/compute/hosting-hugging-face-models-on-aws-lambda/ First, run the following commands. I created a virtual environment called venv, but this is not strictly required. ...

Scheduled Backup of Omeka S Data Using AWS Copilot

Scheduled Backup of Omeka S Data Using AWS Copilot

Overview I previously created a program to download Omeka S data. This time, I use AWS Copilot to run the above program on a scheduled basis. Installing AWS Copilot Please refer to the following. https://docs.aws.amazon.com/ja_jp/AmazonECS/latest/developerguide/AWS_Copilot.html Preparing Files Create three files in any location: Dockerfile, main.sh, and .env. Dockerfile FROM python:3 COPY *.sh . CMD sh main.sh main.sh set -e export output_dir=../docs # Program to download data from Omeka S export repo_tool=https://github.com/nakamura196/omekas_backup.git dir_tool=tool dir_dataset=dataset # If folder exists if [ -d $dir_tool ]; then rm -rf $dir_tool rm -rf $dir_dataset fi # clone git clone --depth 1 $repo_tool $dir_tool git clone --depth 1 $repo_dataset $dir_dataset # requirements.txt cd $dir_tool pip install --upgrade pip pip install -r requirements.txt # Execute cd src sh main.sh # copy odir=../../$dir_dataset/$subdir mkdir -p $odir cd $odir cp -r ../../$dir_tool/data . cp -r ../../$dir_tool/docs . # git git status git add . git config user.email "$email" git config user.name "$name" git commit -m "update" git push # Cleanup cd ../../ rm -rf $dir_tool rm -rf $dir_dataset .env api_url=https://dev.omeka.org/omeka-s-sandbox/api github_url=https://<personal-access-token>@github.com/<username>/<repository-name>.git username=nakamura email=nakamura@example.org dirname=dev The following is an explanation of the parameters. ...