Uploading VTT subtitle files in YouTube Studio turned out to be less straightforward than expected. Here is a step-by-step guide.
Prerequisites
- VTT files (with timecodes) ready
- Access to the video editing screen in YouTube Studio
Step 1: Set the Video Language
Open “Language” from the left menu. On first visit, the language is not set.
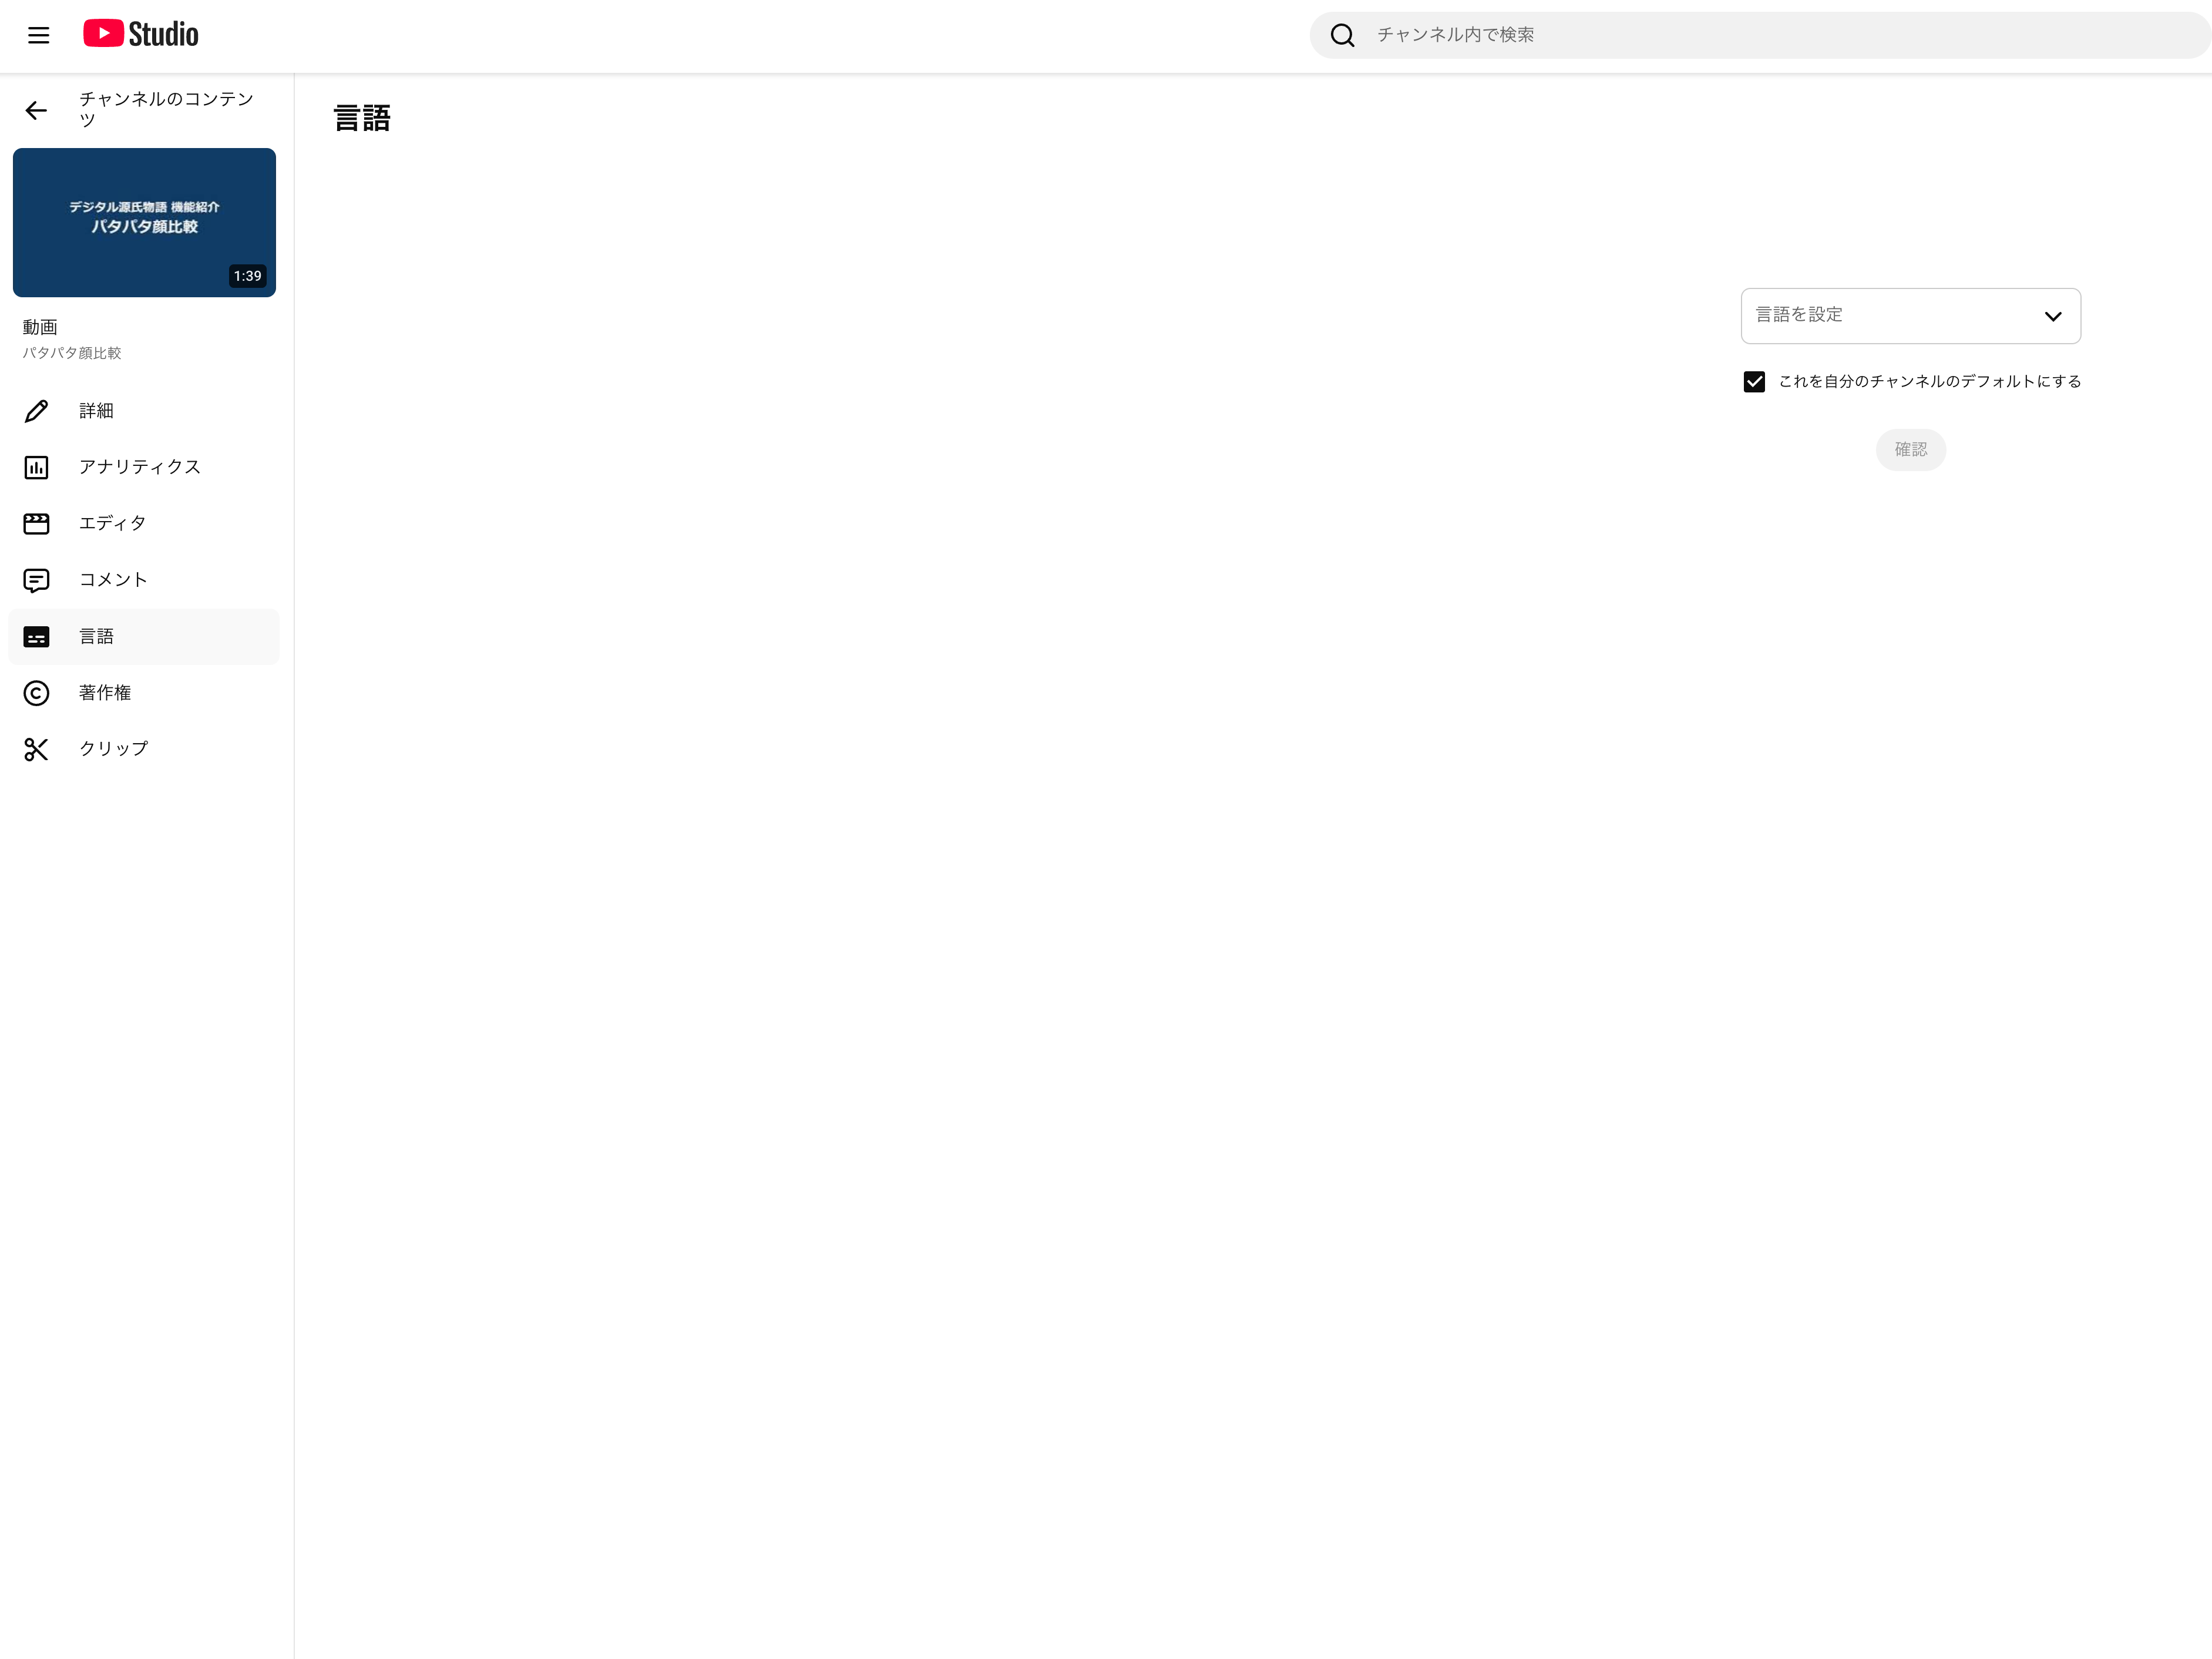
Select “Japanese” from the “Set language” dropdown and click “Confirm.”
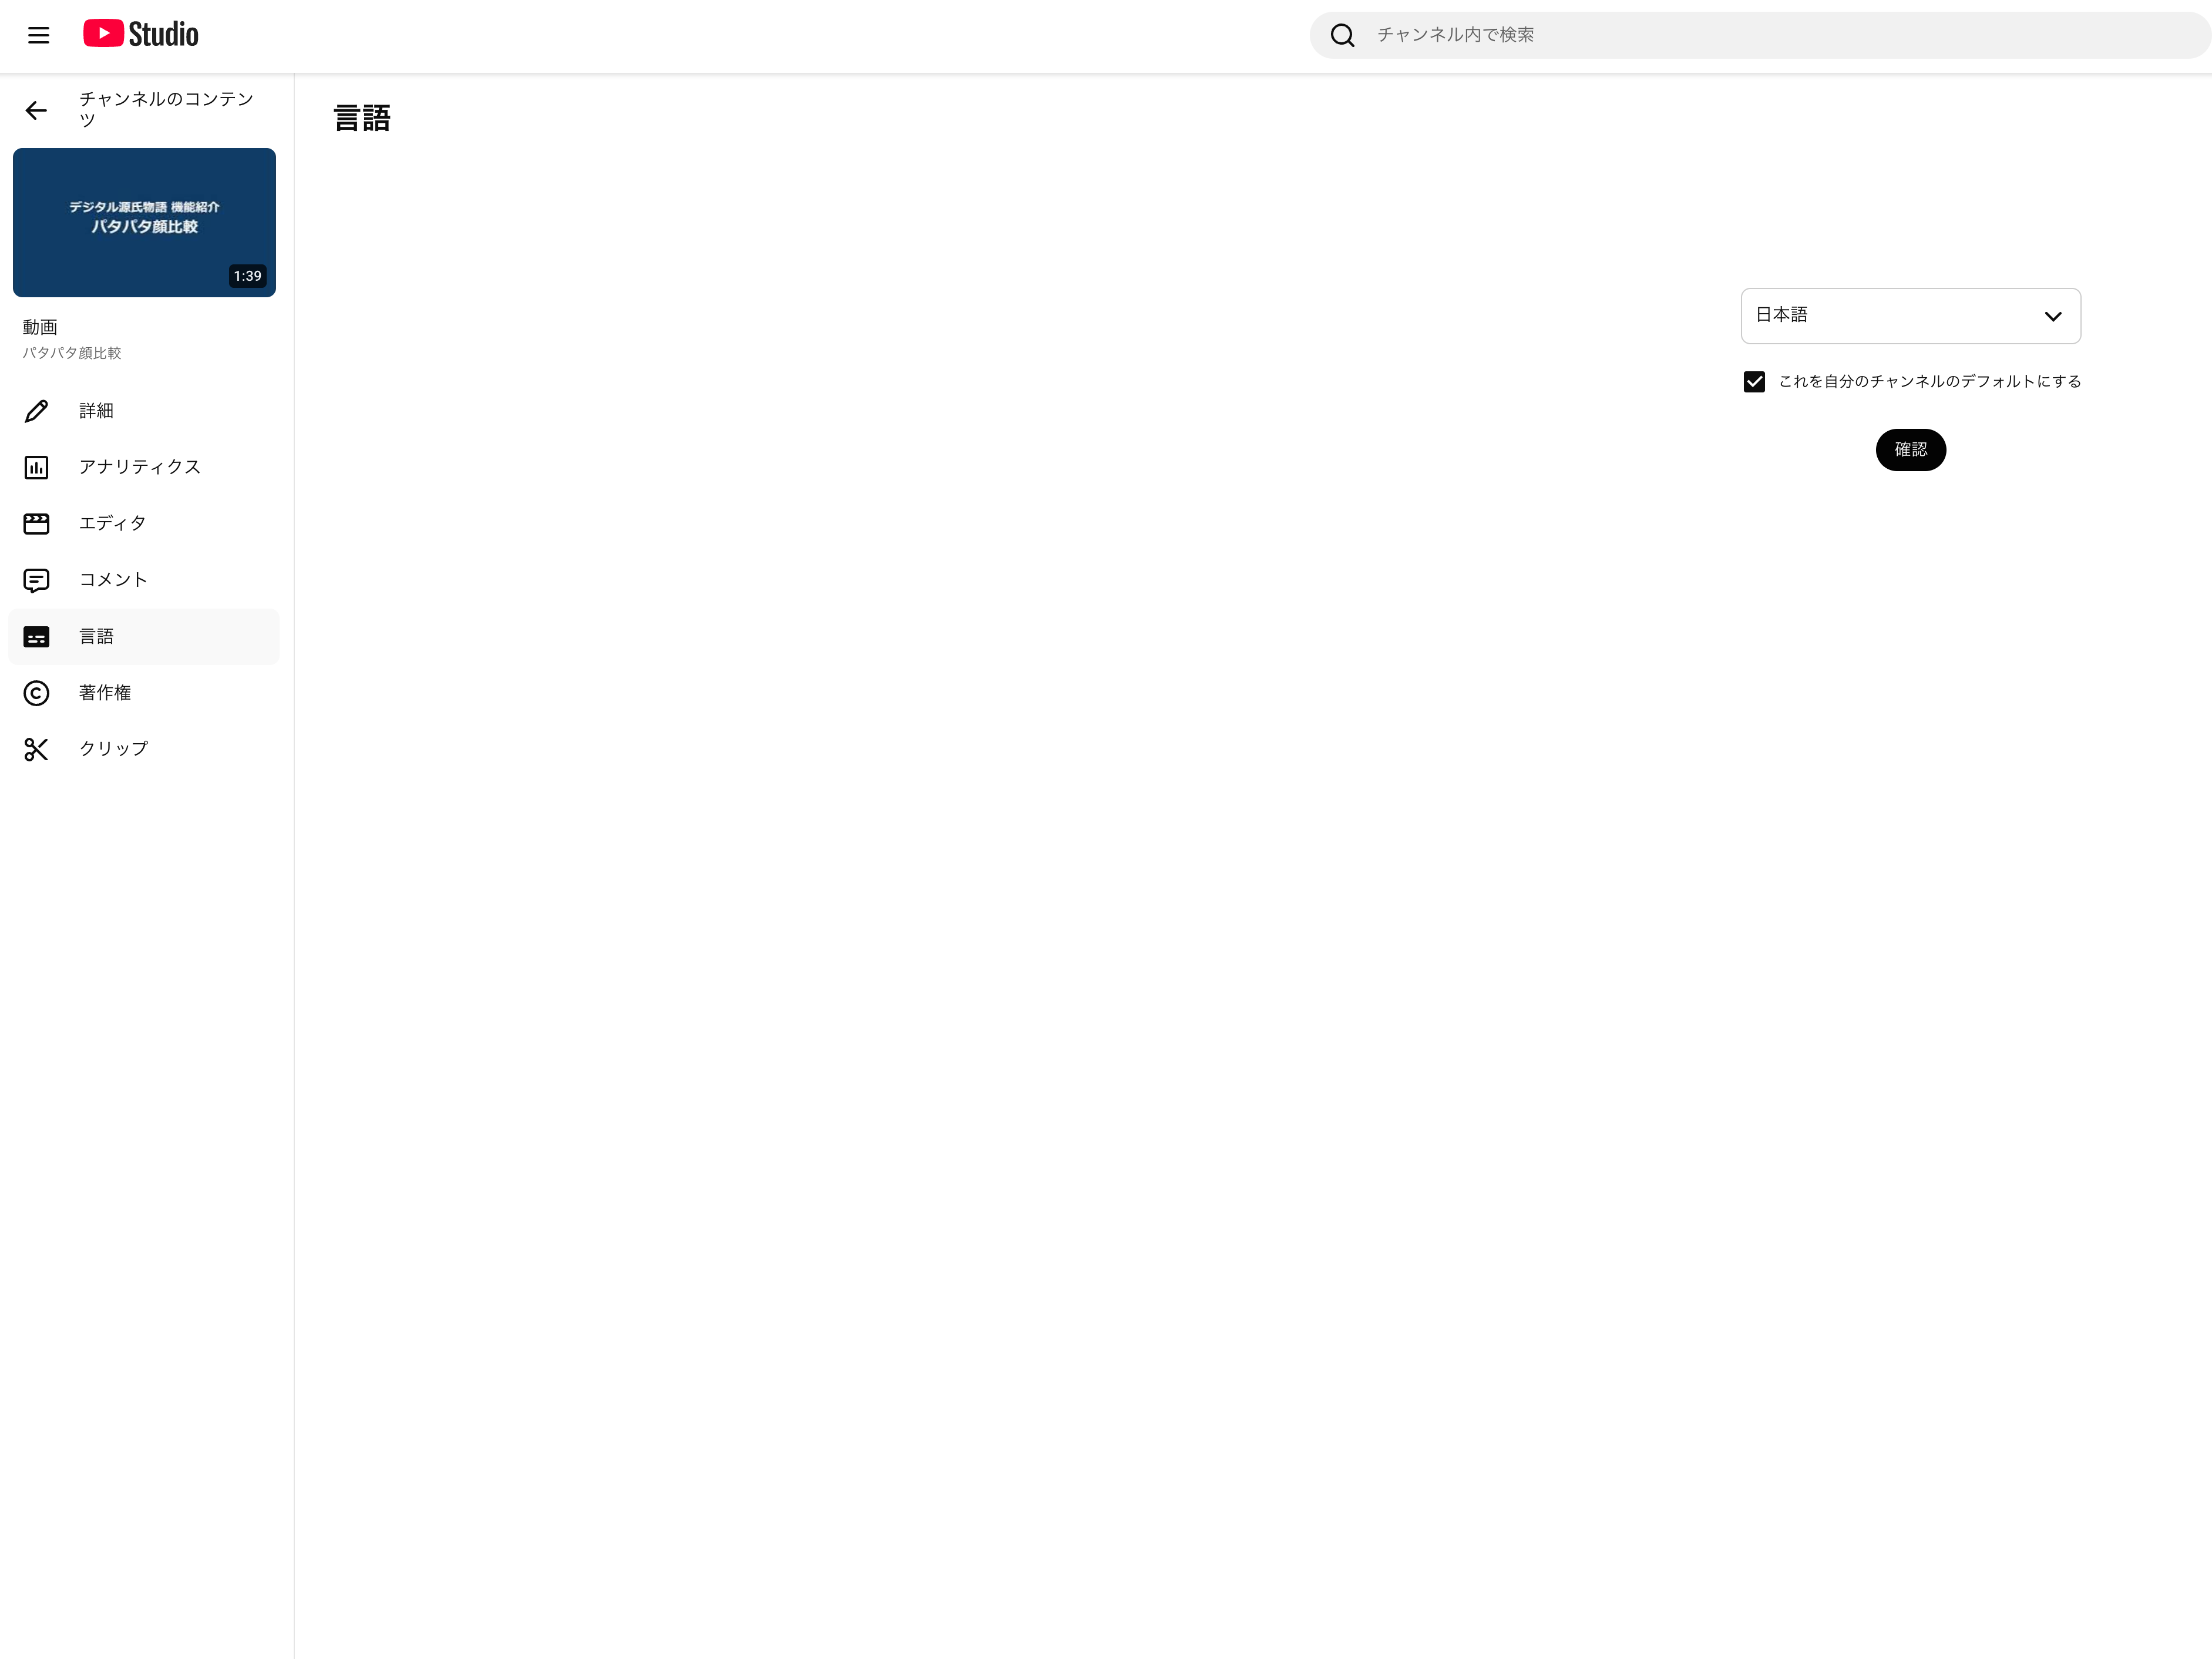
After confirmation, the screen changes to show “Edit subtitles,” “Upload manually” buttons, and a “Translations” section.
Step 2: Upload the Original Language (Japanese) Subtitles
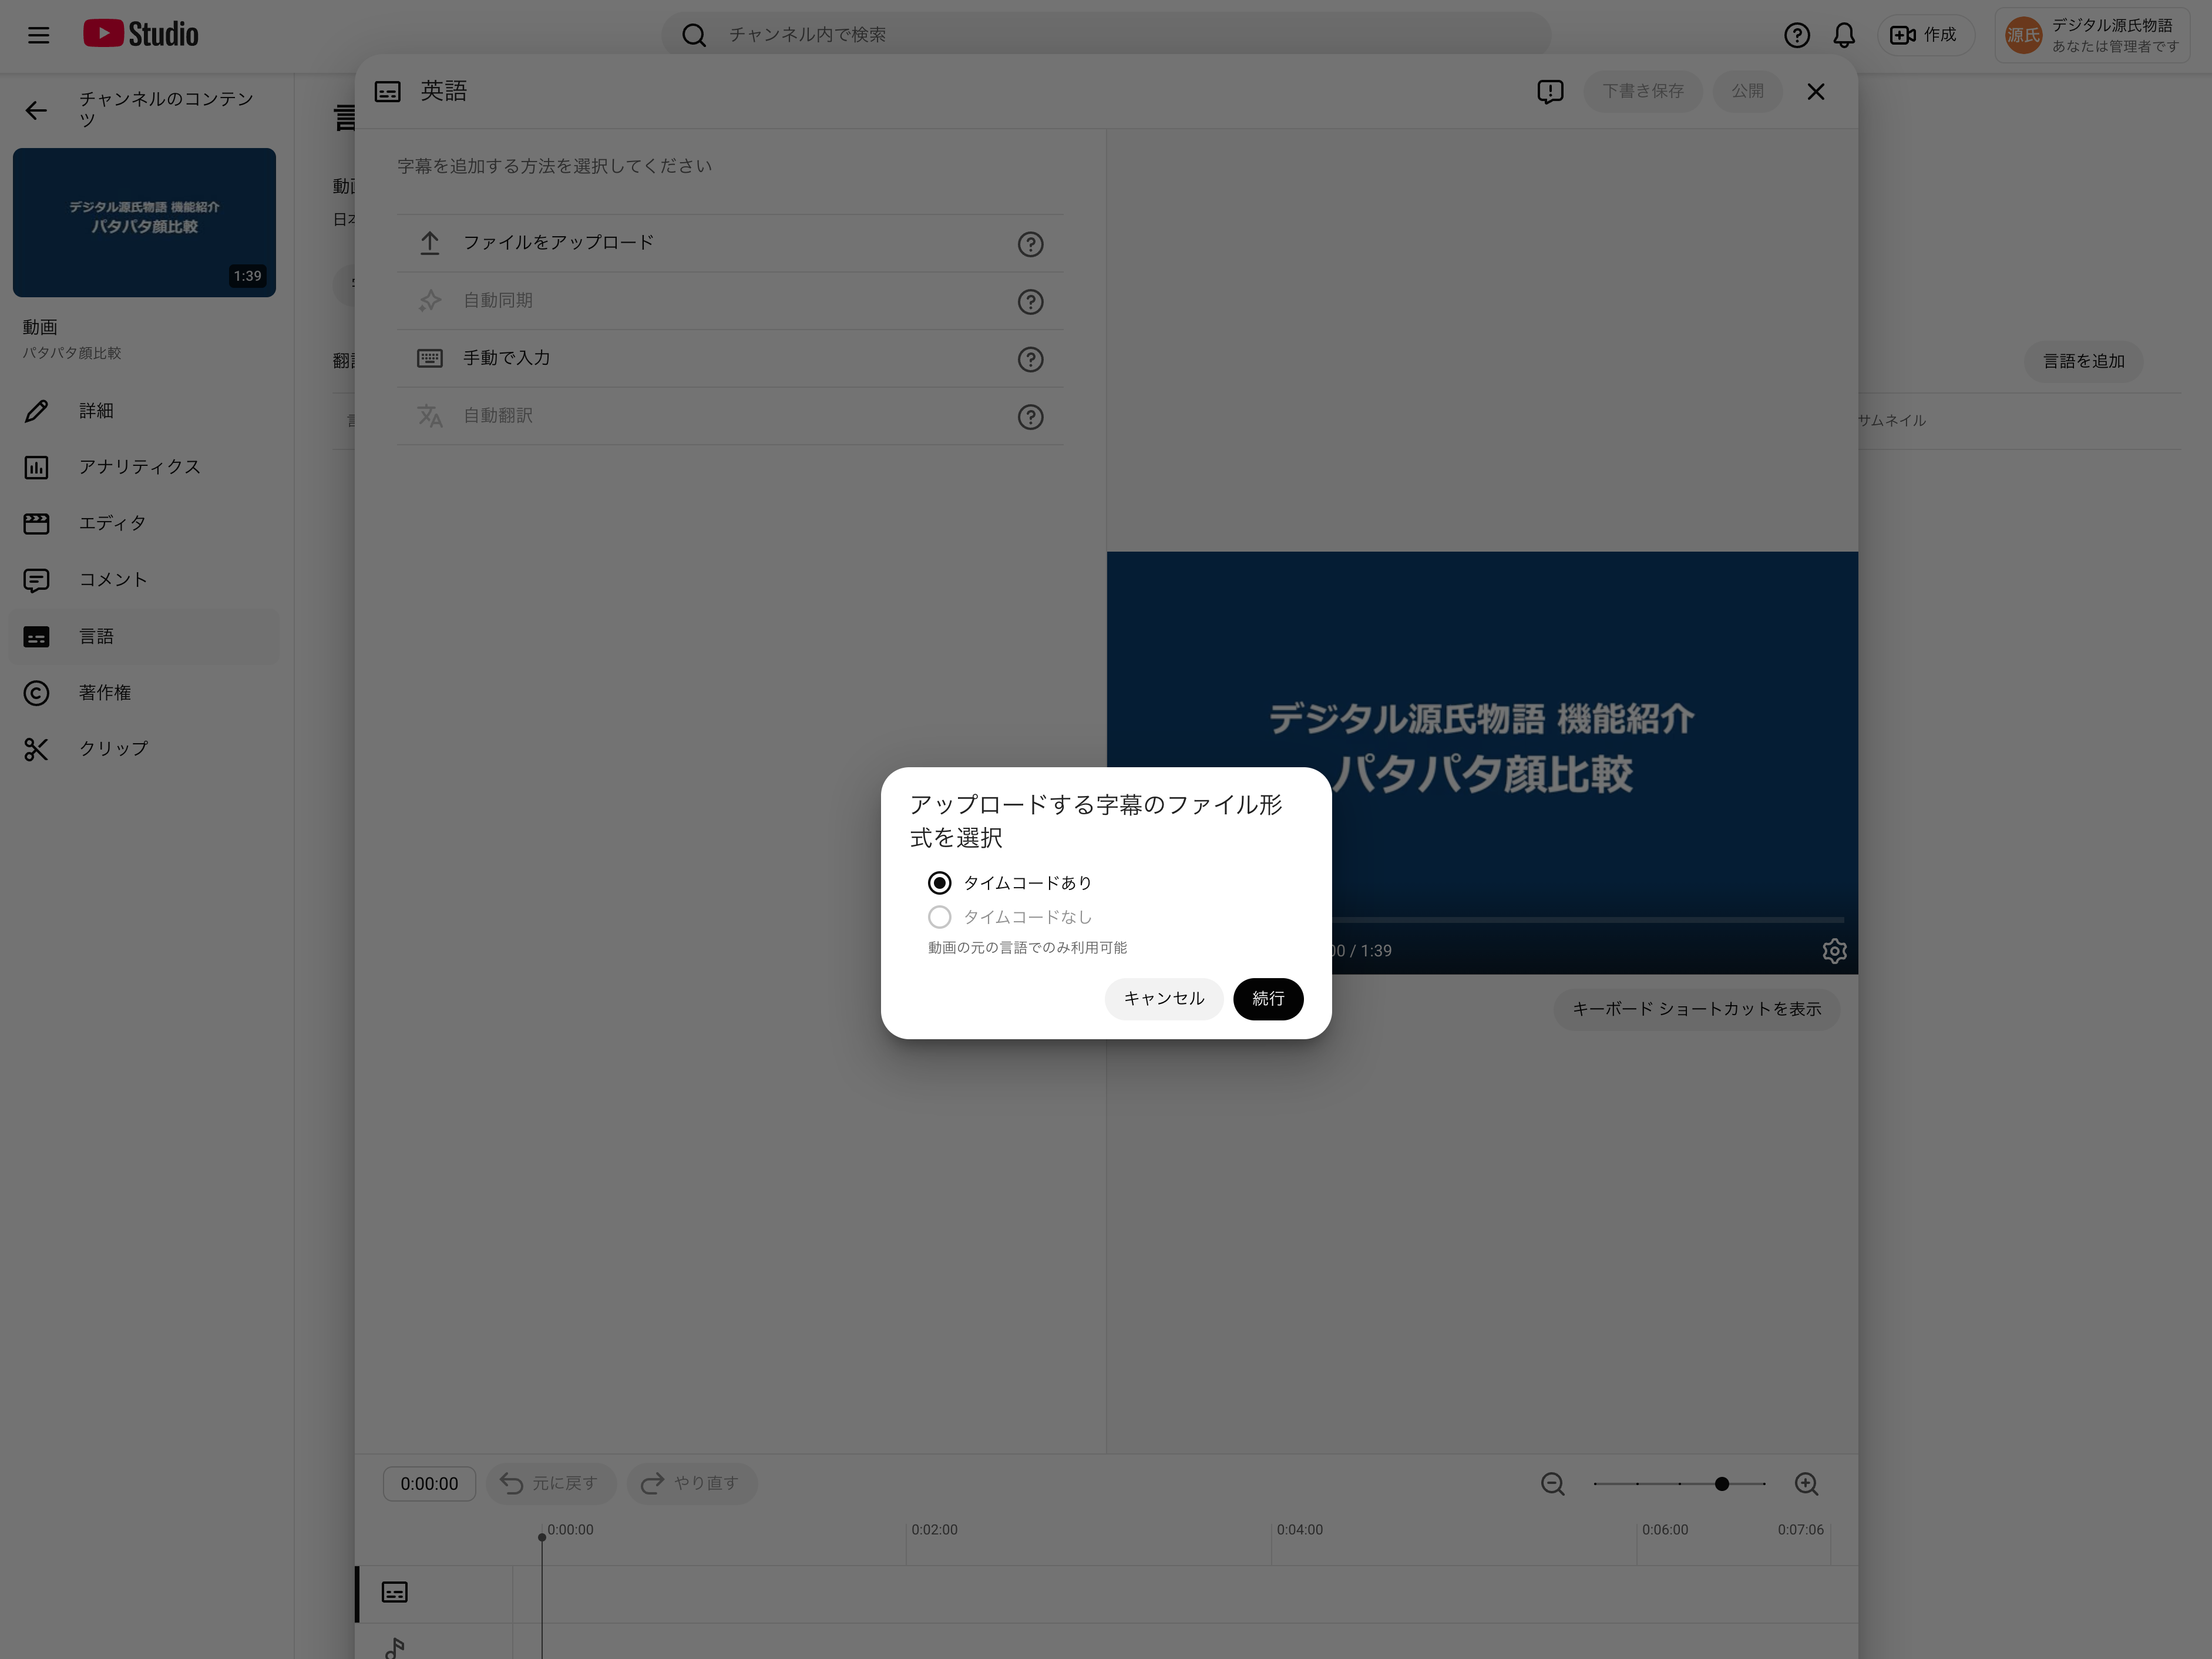
Click “Upload manually” at the top. A file format selection dialog appears.

Select “With timing” and click “Continue,” then select the ja.vtt file.
Upload Alone Does Not Publish
This is the tricky part. Uploading the VTT file alone does not publish the subtitles. After uploading, you must:
- Click “Edit subtitles” to open the editor
- Review the content
- Click “Publish” in the top right
Until you click “Publish,” the subtitles remain in draft state and are not visible to viewers. Since we are uploading complete data with timecodes, one would expect it to publish directly, but YouTube Studio requires manual confirmation.
Step 3: Upload Translation Language (English) Subtitles
Click “Add language” in the upper right of the Translations section. A language list appears.
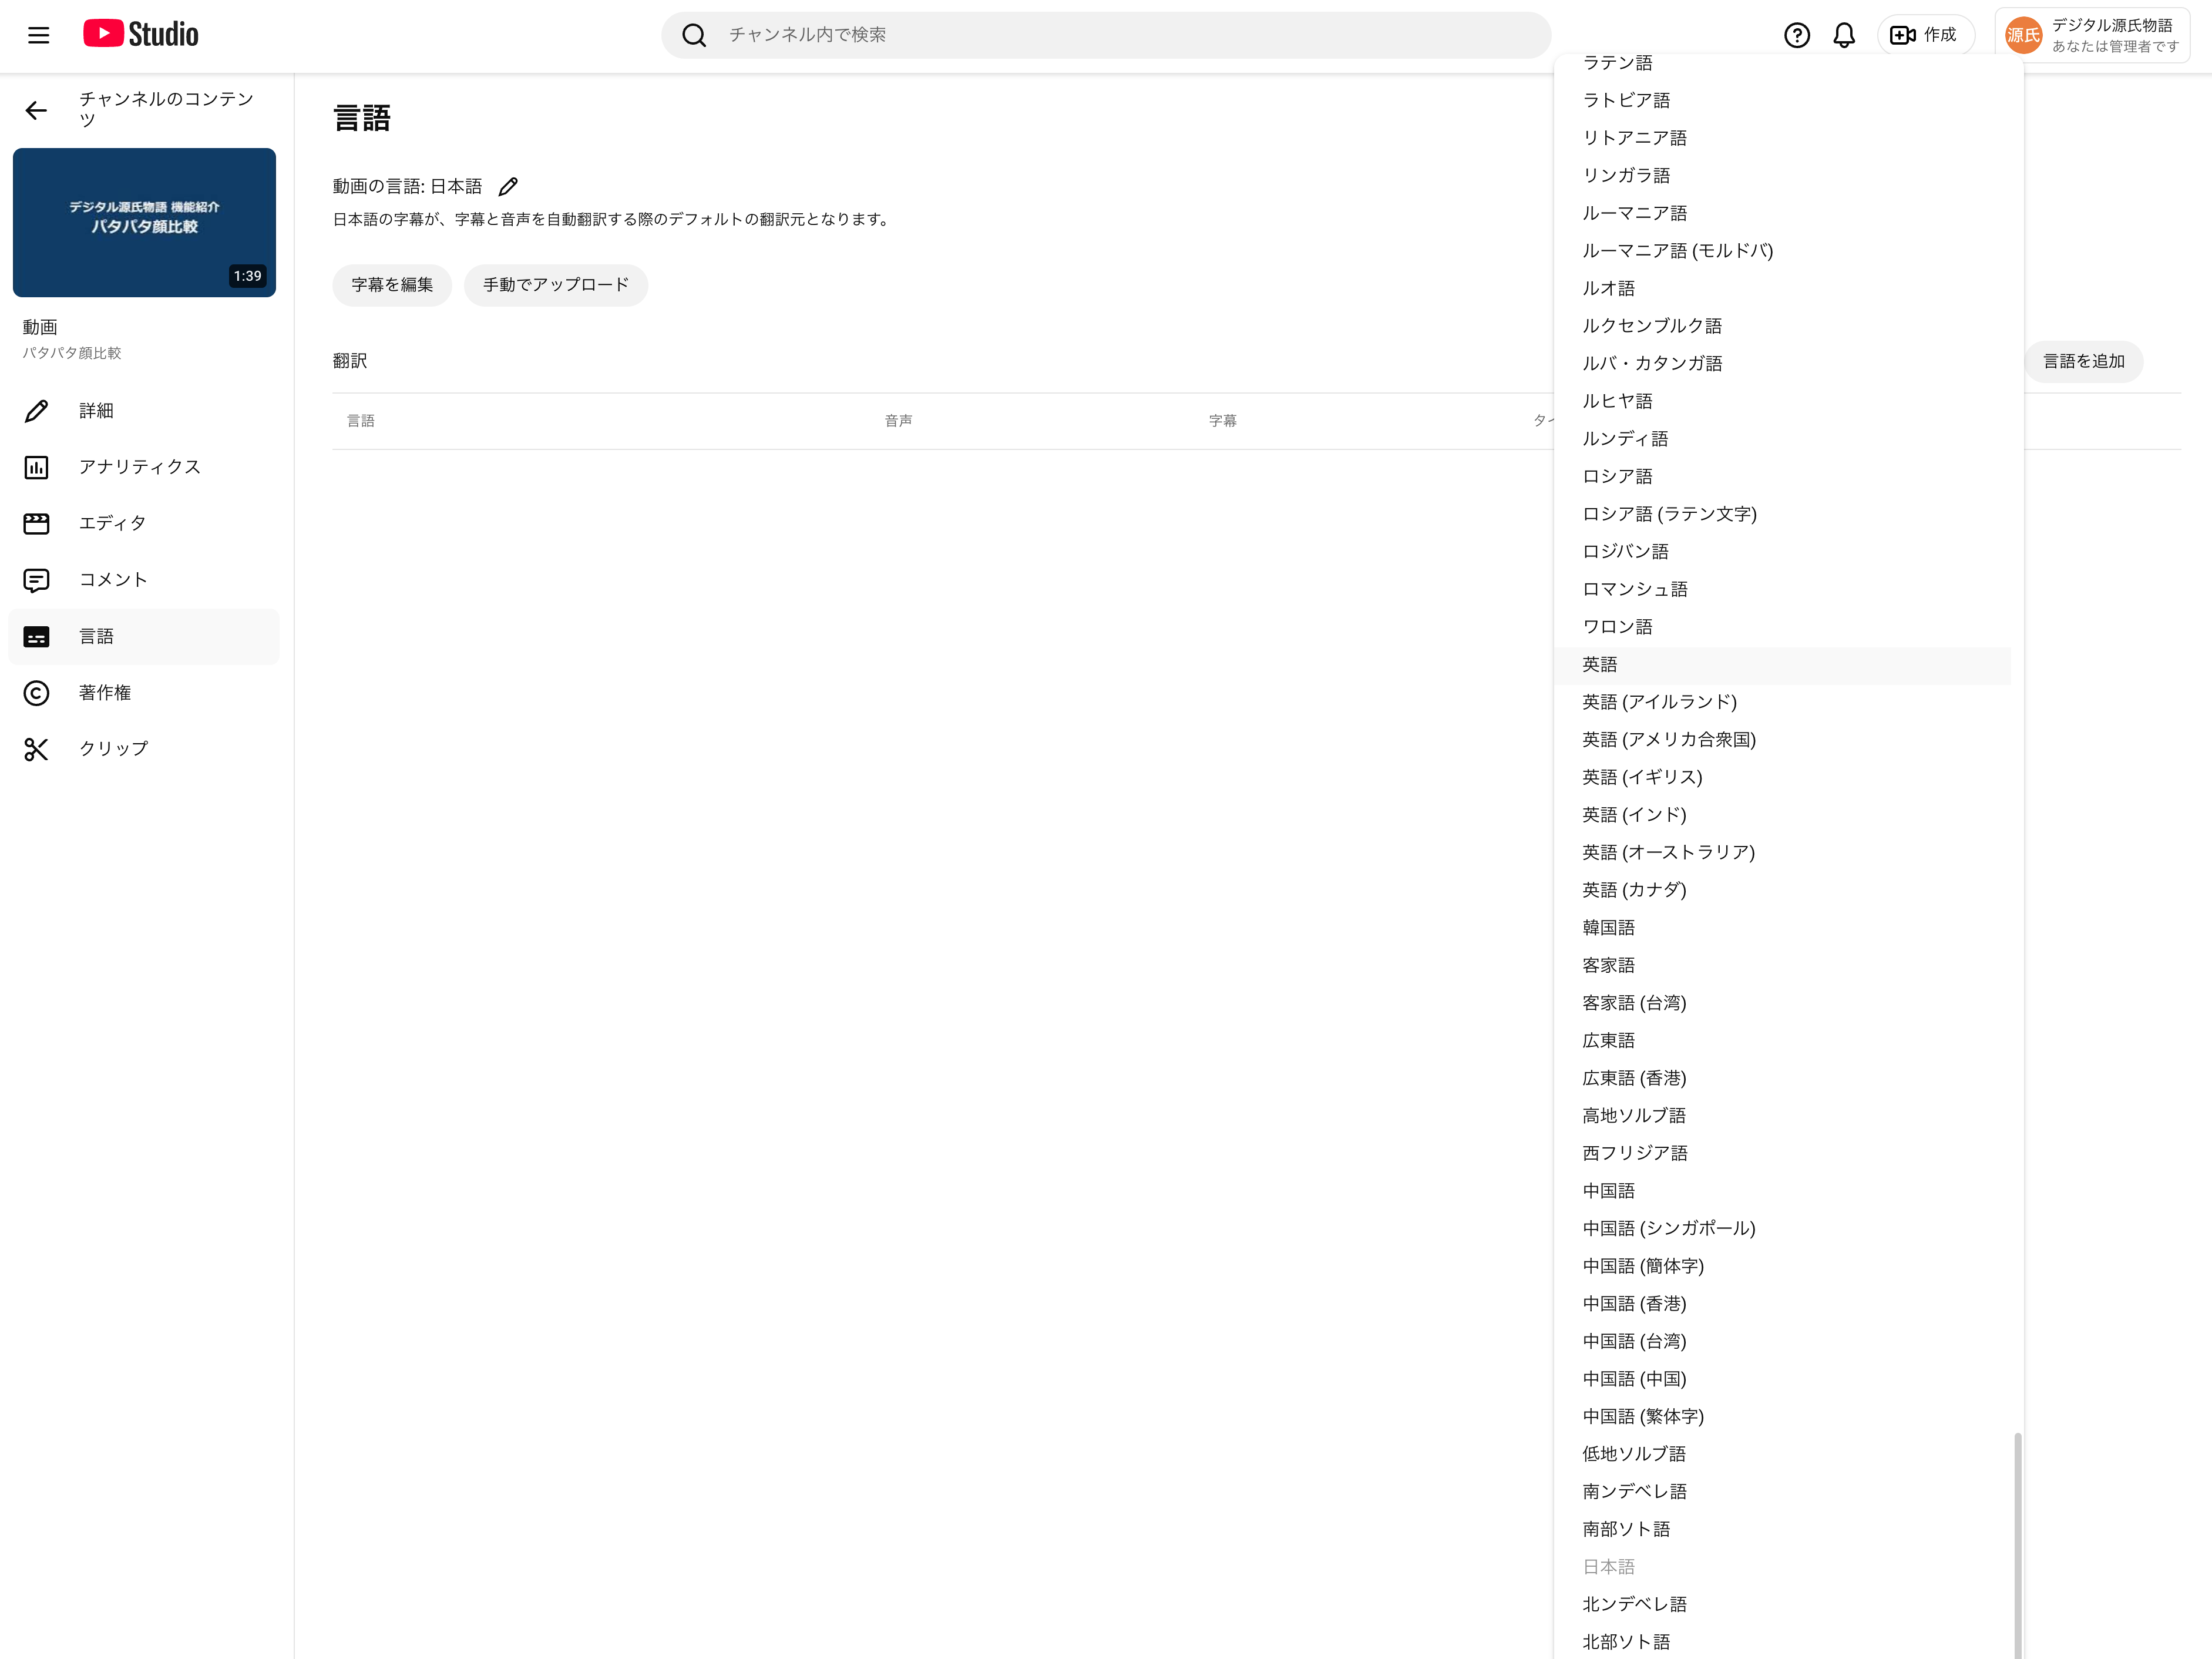
Select “English” to open the English subtitle addition screen. Choose “Upload file” and select “With timing,” then upload the en.vtt file.
After uploading, the editor screen appears.

Click “Publish” in the top right to complete. The publish step is also required for translation languages.
Differences Between Original and Translation Language Operations
| Operation | Original Language (Japanese) | Translation Language (English) |
|---|---|---|
| Upload location | Top “Upload manually” button | Translation table row for the language |
| Publish operation | “Edit subtitles” → Review → “Publish” | “Publish” in editor screen |
The UI flow differs between original and translation languages, which can be confusing.
Controlling Subtitles via URL Parameters
Adding cc_load_policy=1 to a YouTube URL turns subtitles on by default.
https://www.youtube.com/watch?v=VIDEO_ID&cc_load_policy=1
Language Selection with cc_lang_pref
A cc_lang_pref=en parameter exists for specifying the subtitle language. It is documented in the YouTube IFrame Player API.
https://www.youtube.com/watch?v=VIDEO_ID&cc_load_policy=1&cc_lang_pref=en
However, this parameter does not work reliably on regular watch URLs. In testing, the same URL showed only English at one time and only Japanese at another, with no reproducibility.
This is a known bug in Google’s Issue Tracker.
Limitations
cc_lang_prefworks more reliably in iframe embeds but often has no effect onyoutube.com/watchURLs- Viewer’s browser language and YouTube account language settings may take priority
- Some platforms and page builders strip the parameter
Recommendation
Since URL-based language control is unreliable, use only cc_load_policy=1 to enable subtitles and instruct viewers to switch languages manually via the subtitle button (⚙ → Subtitles).
For embeds, the following format works relatively well:
<iframe src="https://www.youtube.com/embed/VIDEO_ID?cc_load_policy=1&cc_lang_pref=en"></iframe>
References
- YouTube Embedded Players and Player Parameters
- cc_lang_pref parameter doesn’t work, in embedded youtube
- How to Force YouTube Closed Captions & Subtitles ‘On’
- How to share Youtube videos with a specific language subtitles turned on
VTT File Source
The VTT files used in this article were created in the Digital Tale of Genji Video Subtitle Project. VTT files can be downloaded from: