Introduction
In the following article, I explained how to batch register metadata and images using CSV files with Bulk Import.
This article explains how to batch update already registered metadata.
Procedure
Bulk Import offers the following five options:
- Create new resources
- Append data to resources
- Revise data of resources
- Update data of resources
- Replace all data of resources
- Delete resources
Below, we examine the behavior of each option.
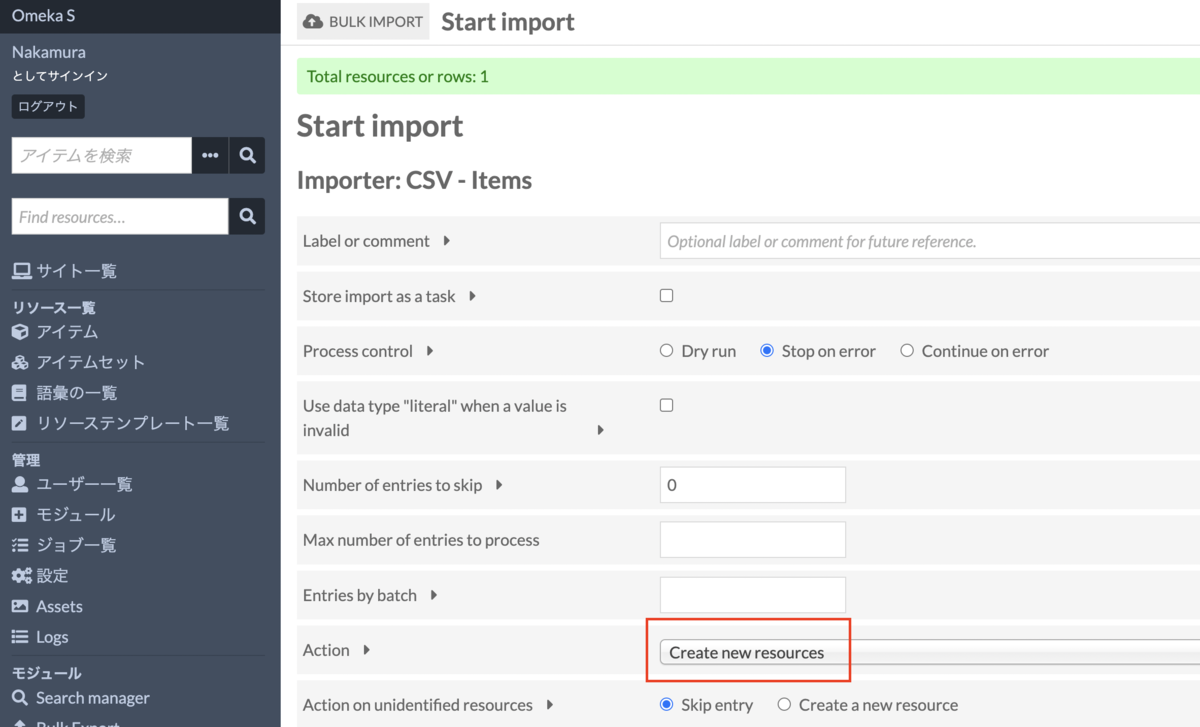
1. Create new resources
First, as with the batch registration method shared earlier, we use the “Create new resources” option.
Register the following data:
https://github.com/omeka-j/Omeka-S-module-BulkImport-Sample-Data/blob/main/update/01_create.csv
| dummy | dcterms:identifier | dcterms:title | dcterms:subject |
|---|---|---|---|
| abc | Dummy Item 1 | Batch Registration Sample 01-create |
The key point is that the string given to “dcterms:identifier” is used as the ID below. Updates and deletions are performed on items with the same string.
While it is common to use the string given to “dcterms:identifier” as the ID, any property can be selected.
In the module registration screen, select the following options and register. An item with the metadata specified in the CSV will be registered.
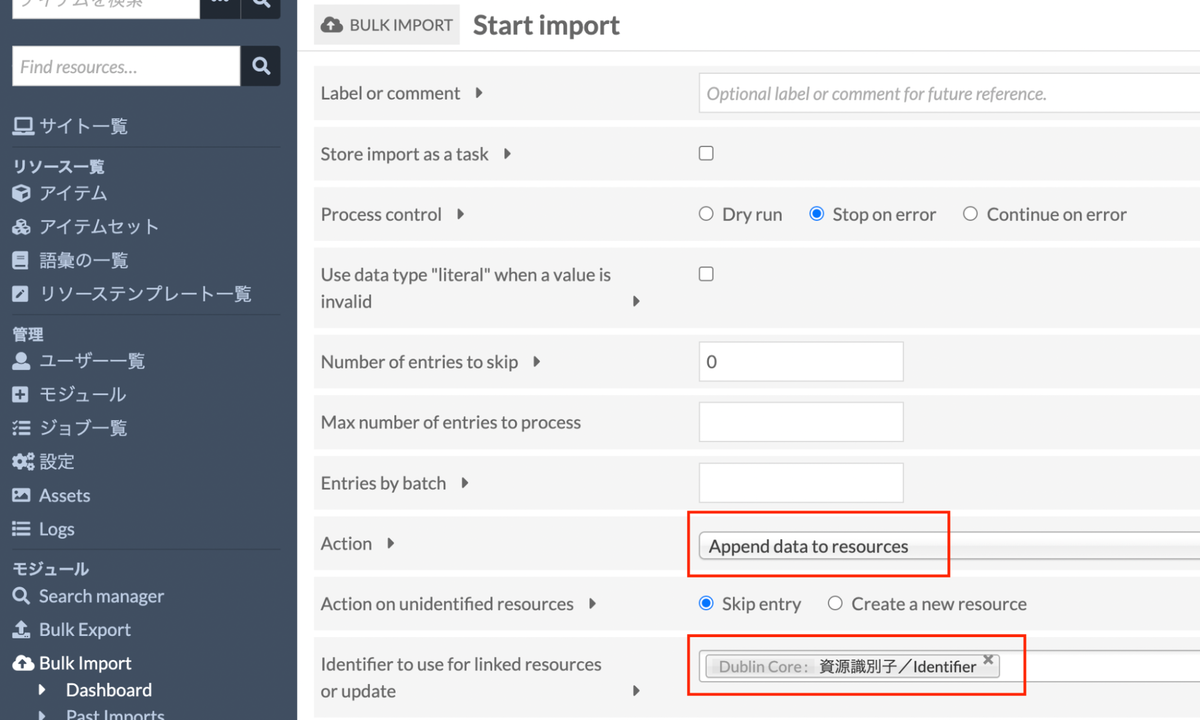
2. Append data to resources
Next, we use the “Append data to resources” option.
Register the following data:
https://github.com/omeka-j/Omeka-S-module-BulkImport-Sample-Data/blob/main/update/02_append.csv
| dummy | dcterms:identifier | dcterms:title | dcterms:subject | dcterms:creator |
|---|---|---|---|---|
| abc | Dummy Item 1 | Batch Registration Sample 02-append | Nakamura Satoru |
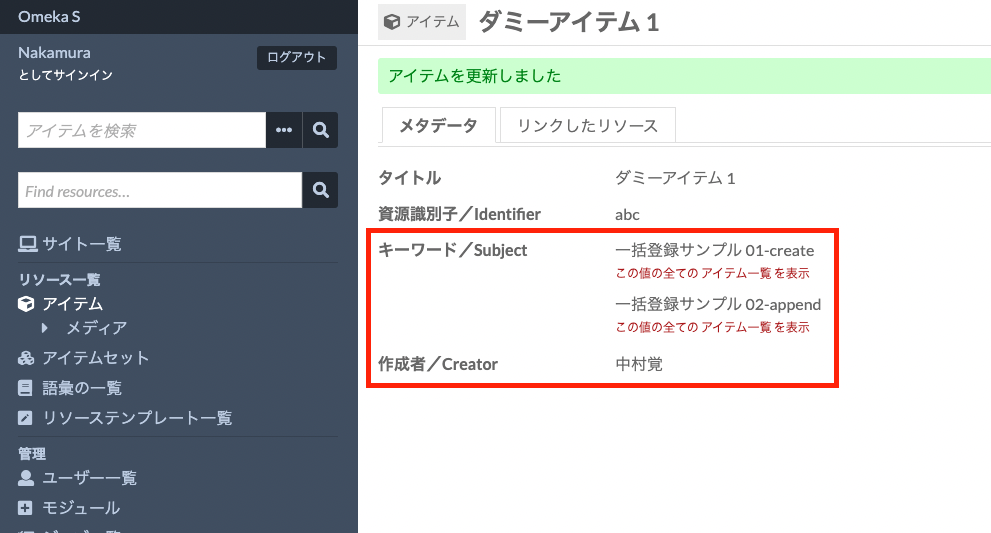
The changes are: the value of “dcterms:subject” is modified, and “dcterms:creator” is added. The value of “dcterms:title” remains unchanged.
Register this using “Append data to resources” as follows:
As a result, values are added to “Subject (dcterms:subject)” and “Creator (dcterms:creator)” as shown below. The “Title (dcterms:title)” remains unchanged because the data before registration and the CSV data were the same (it stays as Dummy Item 1).
3. Revise data of resources
Next, we use the “Revise data of resources” option.
Register the following data:
https://github.com/omeka-j/Omeka-S-module-BulkImport-Sample-Data/blob/main/update/03_revise.csv
| dummy | dcterms:identifier | dcterms:subject | dcterms:creator |
|---|---|---|---|
| abc | Batch Registration Sample 03-revise |
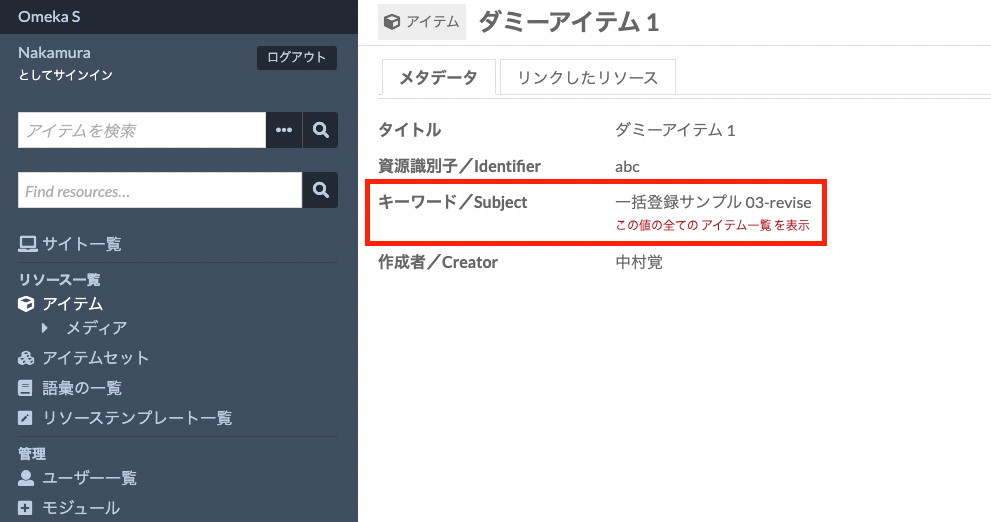
The changes are: the value of “dcterms:subject” is modified, the “dcterms:title” column is removed, and “dcterms:creator” is left empty.
Register this using “Revise data of resources.”
As a result, the value of “Subject (dcterms:subject)” is replaced with the CSV data as shown below.
The key point is that “Creator (dcterms:creator),” which was left empty in the CSV data, remains unchanged.
4. Update data of resources
Next, we use the “Update data of resources” option.
Register the following data:
https://github.com/omeka-j/Omeka-S-module-BulkImport-Sample-Data/blob/main/update/04_update.csv
| dummy | dcterms:identifier | dcterms:subject | dcterms:creator |
|---|---|---|---|
| abc | Batch Registration Sample 04-update |
The changes are: the value of “dcterms:subject” is modified, and as in step 3, “dcterms:creator” is left empty.
Register this using “Update data of resources.”
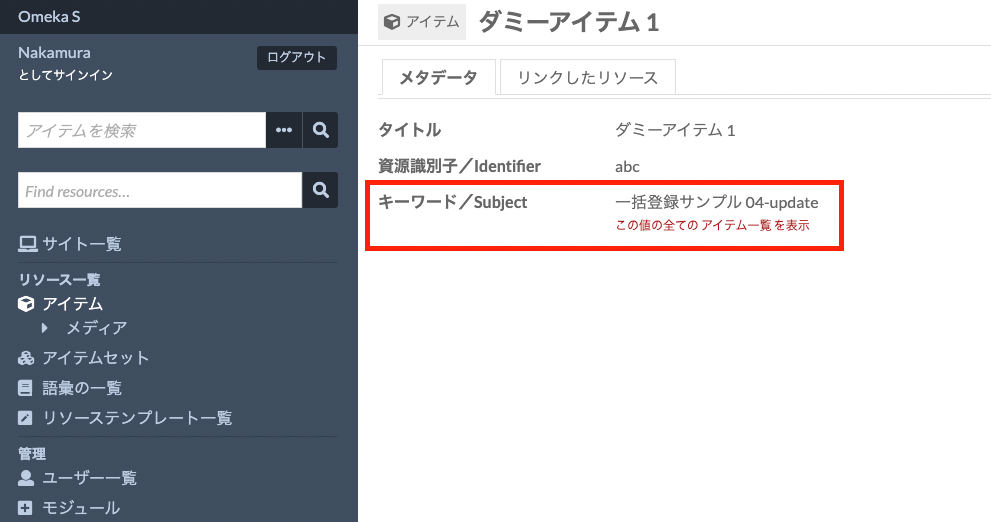
As a result, the value of “Subject (dcterms:subject)” is replaced with the CSV data as shown below.
The key point is that the value of “Creator (dcterms:creator),” which was left empty in the CSV data, has been deleted. This is the difference from “Revise” in step 3: values left empty in the CSV data are deleted.
5. Replace all data of resources
Next, we use the “Replace all data of resources” option.
Register the following data:
https://github.com/omeka-j/Omeka-S-module-BulkImport-Sample-Data/blob/main/update/04_update.csv
| dummy | dcterms:identifier | dcterms:subject | dcterms:creator |
|---|---|---|---|
| abc | Batch Registration Sample 05-replace |
The changes are: the value of “dcterms:subject” is modified, and as in step 3, “dcterms:creator” is left empty.
Register this using “Replace all data of resources.”
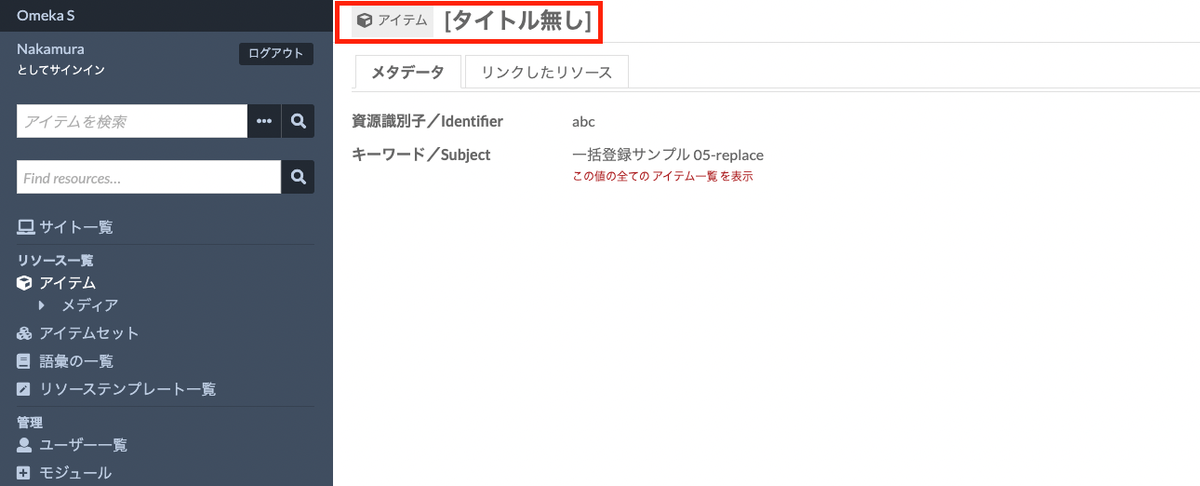
As a result, the values of “Subject (dcterms:subject)” and “Identifier (dcterms:identifier)” are replaced with the CSV data. Additionally, “Title (dcterms:title)” has been deleted.
The key point is that this option first deletes all metadata and then registers only the values present in the CSV data. Therefore, not only “dcterms:creator” (which has an empty value) but also “dcterms:title” (which has no column in the CSV data) is deleted.
6. Delete resources
Next, we use the “Delete resources” option.
Register the following data:
https://github.com/omeka-j/Omeka-S-module-BulkImport-Sample-Data/blob/main/update/06_delete.csv
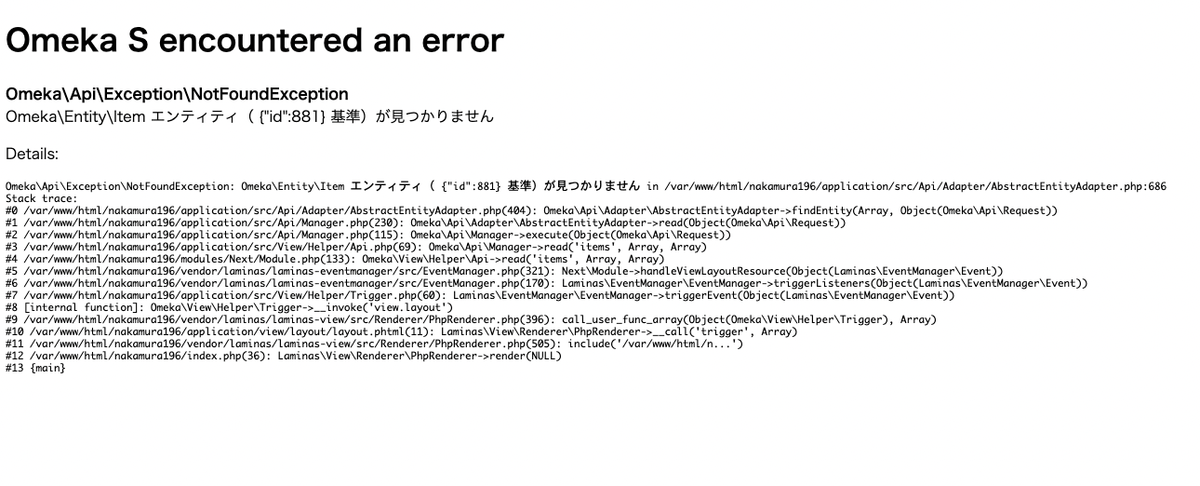
The result of this option is straightforward: it deletes items with the ID specified in dcterms:identifier. As a result, the item returns a NotFound error as shown below.
Summary
In this article, we examined the differences between the options for batch updating metadata using the Bulk Import module. To avoid unintended metadata deletion during update operations, I recommend starting with the “3. Revise data of resources” option for adding or replacing metadata. Once you are familiar with the module, you can then use options 4 and 5.
This module provides many features beyond what is described in this article. As mentioned above, identifiers other than “dcterms:identifier” can be used to identify items for update. By adjusting the settings, it is possible to accommodate a wide variety of needs.
I hope this article is helpful for batch editing metadata using CSV data.