Overview
I created an “Image Collection Management” tool designed to make it easy to try out IIIF features.
This article introduces how to use this tool.
Collection Management
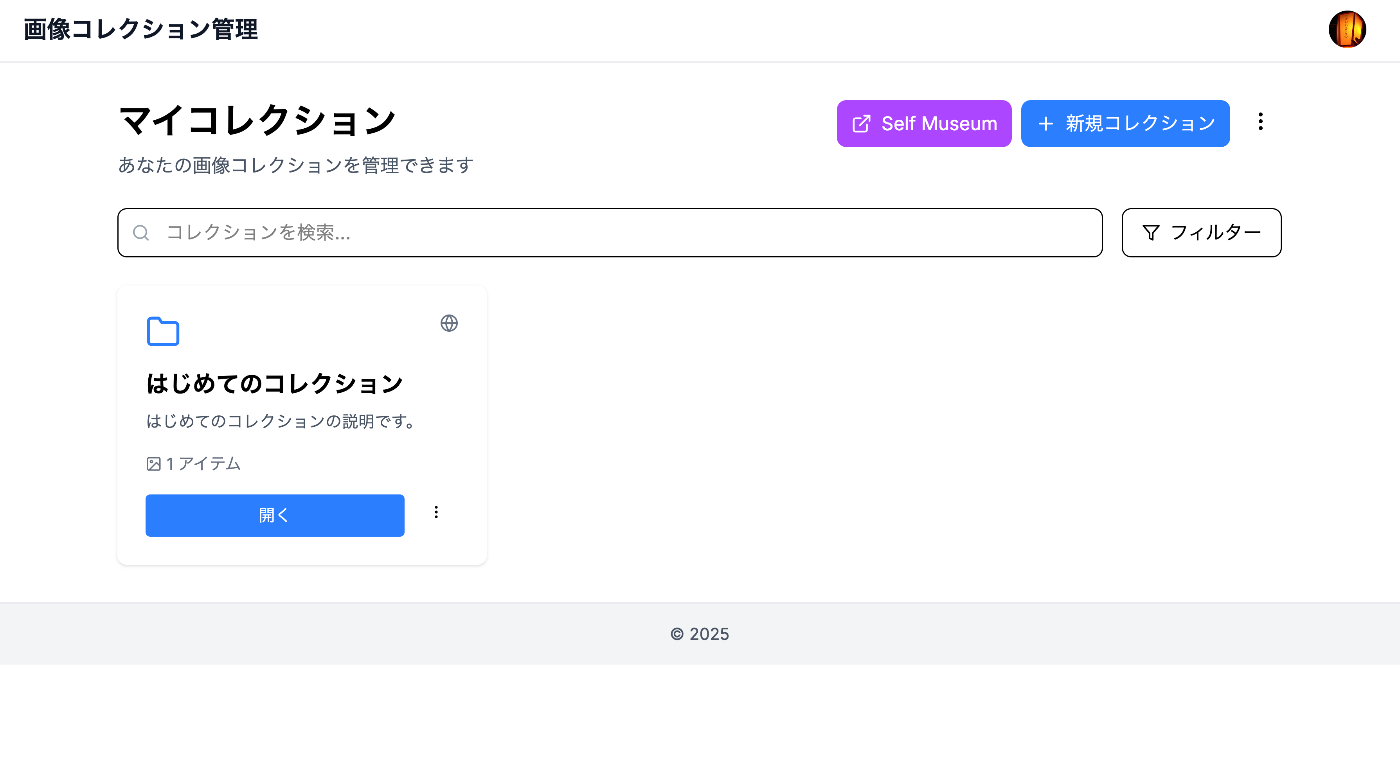
Creating a Collection
- Click the “New Collection” button on the dashboard
- Enter the required information:
- Collection Name (required): Give it a descriptive name
- Description (optional): Describe the collection’s contents
- Visibility Setting: Choose public or private
- Click “Create”
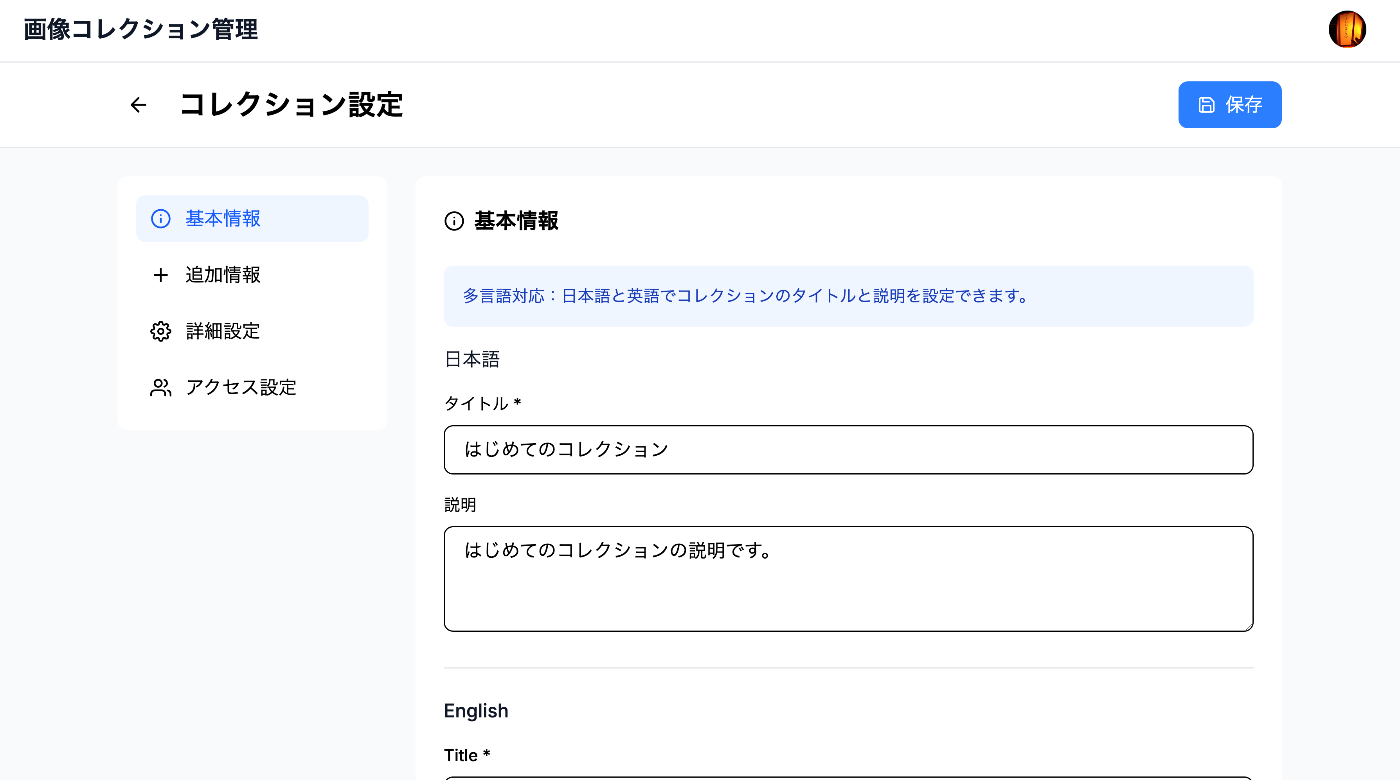
Editing a Collection
- Click the “…” menu on the collection you want to edit from the collection list
- Select “Edit”
- Update the information and click “Save”
Deleting a Collection
- Click the “…” menu on the collection you want to delete from the collection list
- Select “Delete”
- Click “Delete” in the confirmation dialog
Warning: Deleting a collection will also delete all items it contains.
Item (Image) Management

Adding Items
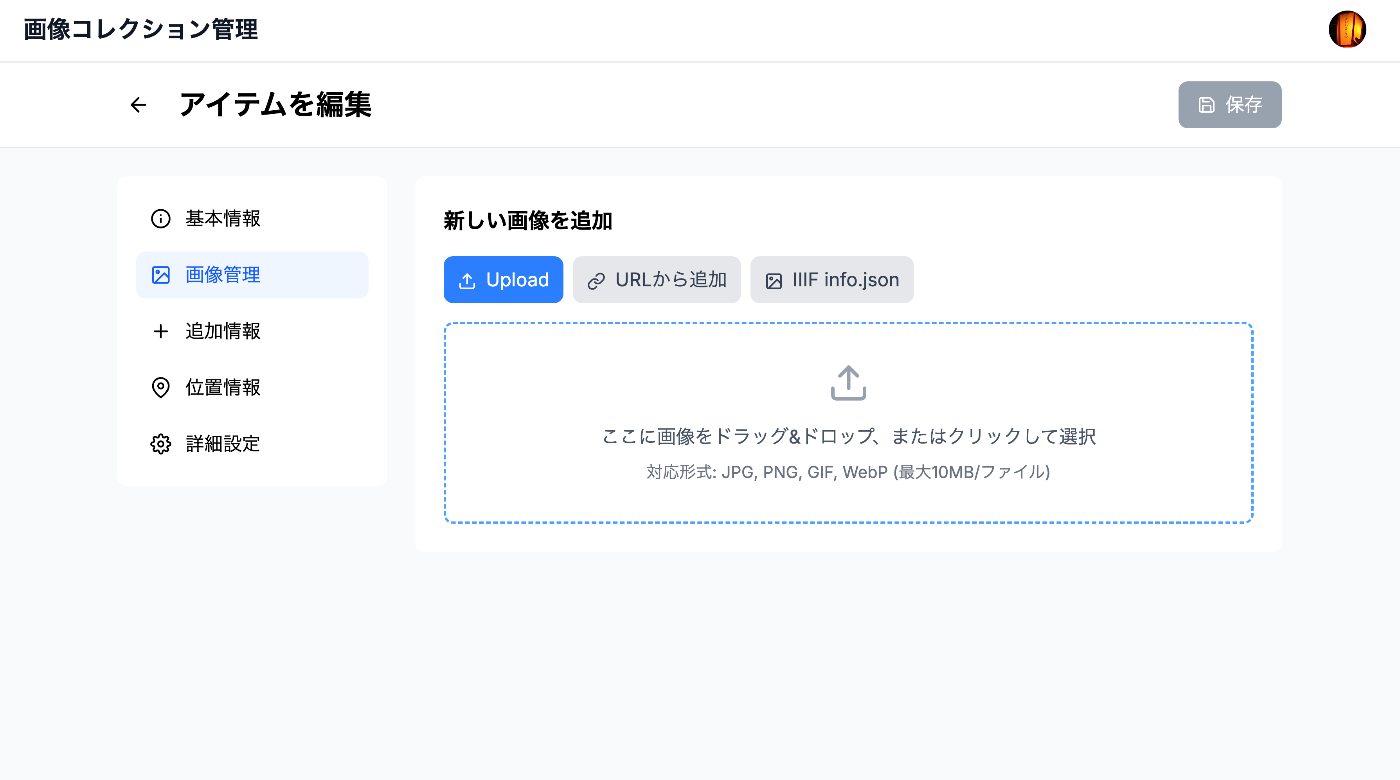
Method 1: Drag & Drop
- Open the collection page
- Click the “New Item” button
- Drop image files onto the drag & drop area
- Enter a title and description
- Click “Create and Edit”
Method 2: File Selection
- Click the “Select Files” button
- Select images to upload (multiple selection possible)
- Enter a title and description
- Click “Create and Edit”
Method 3: Add from URL
- Select the “Add from URL” tab
- Enter the image URL
- Click “Add”
Method 4: Add IIIF Image
- Select the “Add from info.json” tab
- Enter the IIIF info.json URL
- Click “Add”
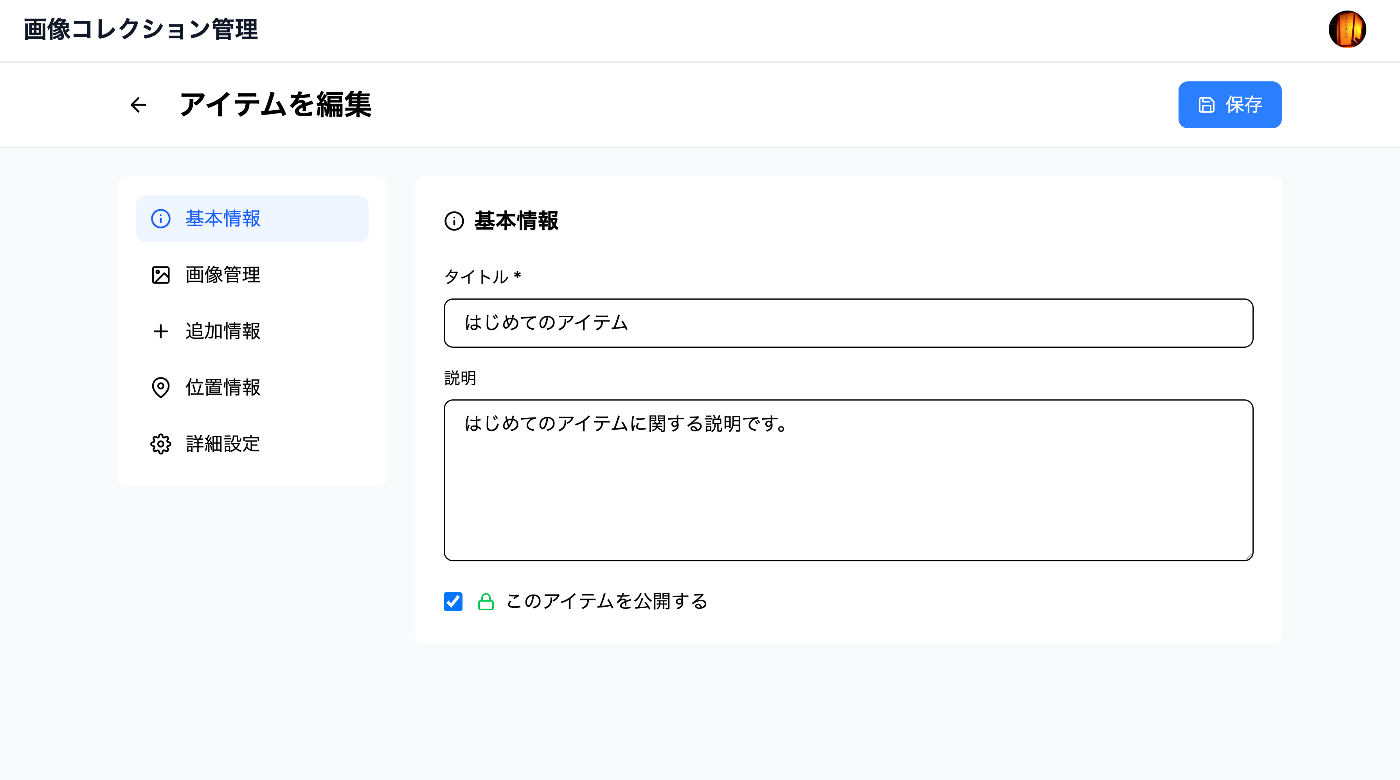
Editing Items
- Click on the item you want to edit from the item list
- Update the following information on the edit screen:
- Basic Information: Title, description, visibility setting
- Location Information: Latitude, longitude, place name
- Detailed Information: Attribution, rights information
- Additional Information: Custom fields (year of creation, author, etc.)
- Click “Save”
Reordering Items
- Drag images on the collection page
- Drop them at the desired position
- Changes are saved automatically
Deleting Items
- Open the item’s edit screen
- Click the “Delete” button
- Confirm deletion in the confirmation dialog
Display Modes
Grid View
- Default display mode
- Displays images as thumbnails in a list
- Shows each item’s title and visibility status
Map View
- Select “Map” from the display toggle button
- Items with location information are displayed on the map
- Click a marker to view details
Publishing and Sharing
Visibility Settings
Collection Level
- Public: Accessible by anyone
- Private: Accessible only by logged-in users
Item Level
- Public: Viewable by anyone if the collection is public
- Private: Viewable only by the owner
- Limited Access: Only users with an authentication token
Sharing Methods
1. Direct Link Sharing
- Copy the collection or item URL
- Share via email or social media
2. Limited Sharing via Authentication Token
- Click the “Authentication Key” button on the item
- Generate a token
- Share the token-embedded URL
3. Sharing IIIF Manifest
- Click the “IIIF” button on the collection page
- Copy the Manifest URL
- Open it in a IIIF-compatible viewer
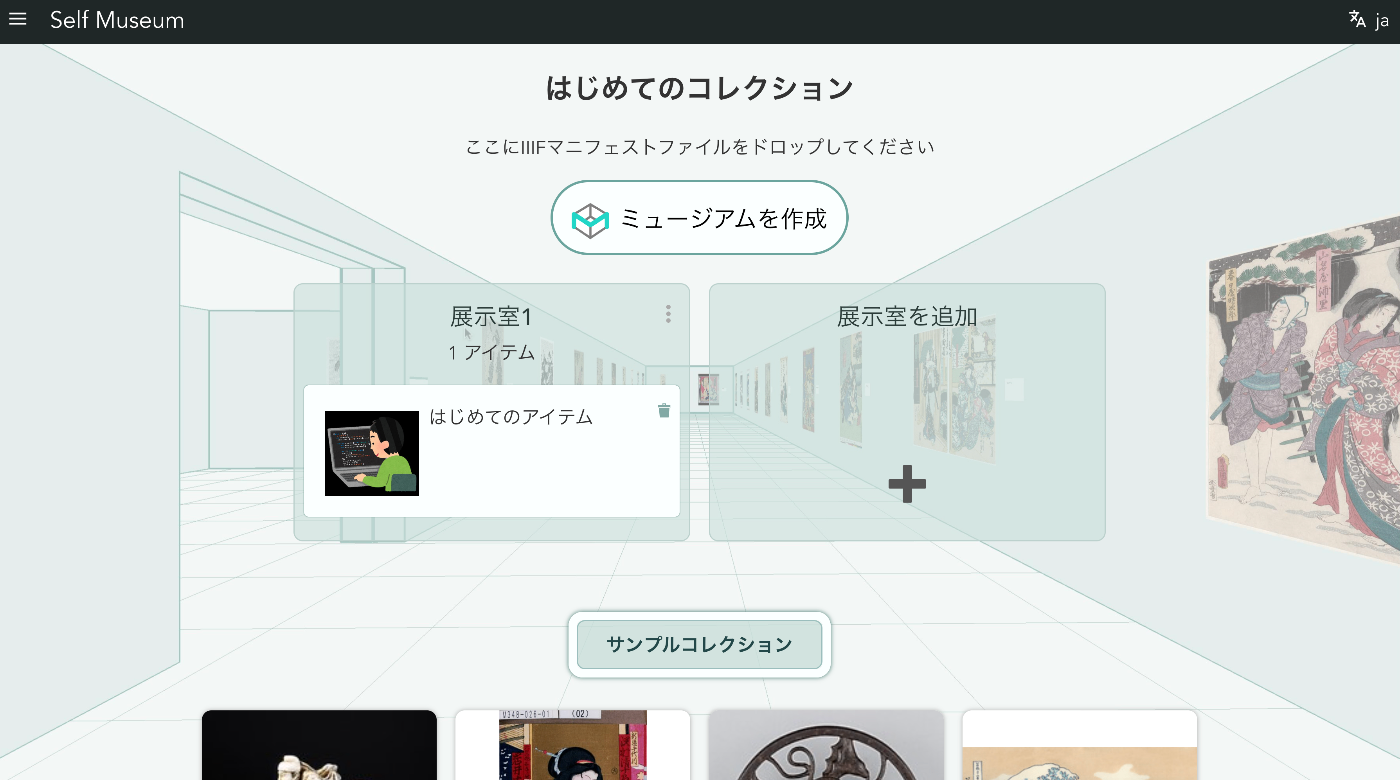
4. Publishing on Self Museum
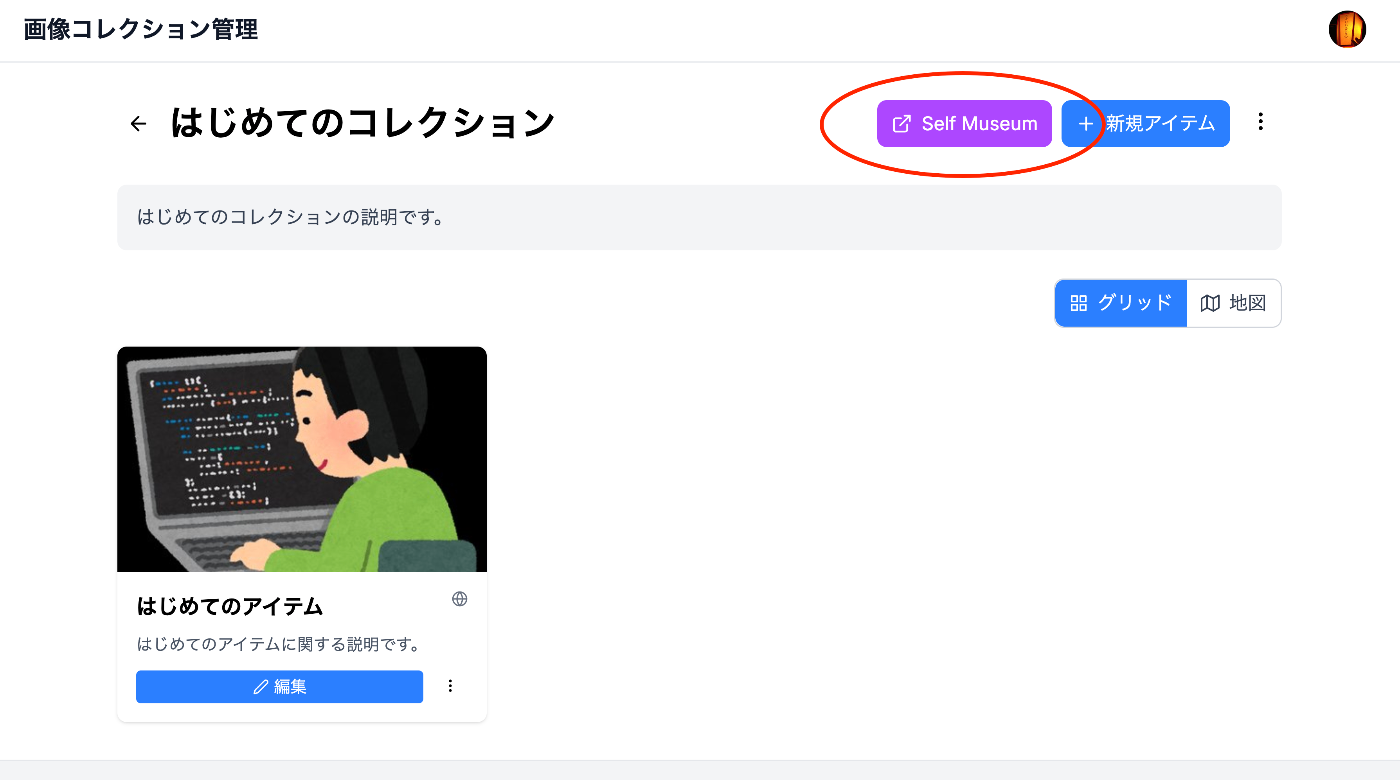
- Click the “Self Museum” button on the collection page
- View the published page on Self Museum
Search and Filtering
Dashboard Search
- Enter keywords in the search bar
- Searches across collection names and descriptions
- Press Enter or click the search icon
Filtering
- Filter by public/private
- Sort by creation date/update date
Using Viewers
Mirador Viewer
- Click “Open in Mirador” on the item
- An advanced viewer opens
- The following features are available:
- Zoom/Pan
- Full screen display
- Image comparison
- Annotation
OpenSeadragon Viewer
- Automatically displayed on the item’s detail page
- Zoom with mouse wheel
- Move by dragging
Data Export
IIIF Manifest
- Click the “IIIF” button on the collection page
- Download the Manifest in JSON format
Image Download
- Open the item’s detail page
- Right-click on the image
- Select “Save Image”
Keyboard Shortcuts
Ctrl/Cmd + S: Save editsEsc: Close modalLeft/Right Arrow: Navigate between items (in detail view)
Tips and Tricks
- Bulk Upload: Select multiple files at once for upload
- Batch Metadata Editing: Select multiple items for batch updates
- Template Usage: Create templates for frequently used metadata
- Backup: Regularly export important data
Troubleshooting
If you encounter any issues, please refer to the troubleshooting guide.