Home Articles Books Search About
RSS 日本語

Latest Articles

Created a Python Library to Convert Freehand Annotations to Rectangles

Created a Python Library to Convert Freehand Annotations to Rectangles

Created a Python Library to Convert Freehand Annotations to Rectangles Taking freehand annotations created as shown below as input, they are converted to rectangular annotations as follows. The “Tanaka Yoshio Hakubutsugaku Collection” (held by the University of Tokyo General Library) is used. For specific usage instructions, please refer to the following notebook. https://github.com/nakamura196/000_tools/blob/main/フリーハンドのアノテーションを矩形にconversionする.ipynb I hope this serves as a useful reference for utilizing IIIF annotations.

Making Field Values Selectable in Drupal

Making Field Values Selectable in Drupal

Purpose This article explains how to make field value input selectable, as shown below. Below, I’ll explain both the text case and the entity reference case. Text Case Create a field called age. Here, select “List (text)”. Enter the choices as follows. As a result, the field can be edited in a “Select list” format as shown below. Furthermore, from the content type list page, click “Manage form display”. ...

Enabling Search by ID and Title When Referencing Other Content in Drupal

Enabling Search by ID and Title When Referencing Other Content in Drupal

Introduction For example, suppose you create a content type called “Organization” in Drupal and create content items for “The University of Tokyo” and “Kyoto University.” At this point, assume that IDs from the Research Organization Registry (ROR) are also registered as follows. Title ID The University of Tokyo 057zh3y96 Kyoto University 02kpeqv85 Now, let’s try referencing this content from another content type (for example, a “Researcher” content type) using an affiliation field. When you type something like “University,” the two registered content items are displayed as shown below. ...

Drupal: Handling Errors When Updating the `uid` Field via API

Drupal: Handling Errors When Updating the `uid` Field via API

When attempting to update a node’s uid field using Drupal’s JSONAPI, the following error occurred: The current user is not allowed to PATCH the selected field (uid). The 'administer nodes' permission is required. This was resolved by changing the permissions. Specifically, the issue was resolved by enabling the Administer content checkbox under Node. However, please note the following warning that was displayed: Warning: Give to trusted roles only; this permission has security implications. Promote, change ownership, edit revisions, and perform other tasks across all content types. ...

Handling "Some resources have been omitted because of insufficient autho..." in Drupal

Handling "Some resources have been omitted because of insufficient autho..." in Drupal

When using Drupal’s JSON API, I tried to retrieve field_name from a field ID using a query like the following, but got zero results. https://xxx/jsonapi/field_config/field_config?fields[field_config–field_config]=label%2Cfield_name&filter[name-filter][condition][path]=field_name&filter[name-filter][condition][operator]=IN&filter[name-filter][condition][value][1]=field_xxx1&filter[name-filter][condition][value][2]=field_xxx2&filter[name-filter][condition][value][3]=field_xxx3&filter[bundle]=yyy The meta field in the returned result indicated a permissions issue. { "jsonapi": { "version": "1.0", "meta": { "links": { "self": { "href": "http://jsonapi.org/format/1.0/" } } } }, "data": [], "meta": { "omitted": { "detail": "Some resources have been omitted because of insufficient authorization.", ... } }, ... } By changing the permissions for Content: Administer fields under Field UI as shown in the figure below, the permissions issue was resolved. ...

Converting JSON-LD Data to RDF/XML and Turtle Using EASY RDF

Converting JSON-LD Data to RDF/XML and Turtle Using EASY RDF

Overview In the following article, I introduced how to add an export feature. One of the export formats available is JSON-LD. In this article, we will try converting this JSON-LD to RDF/XML and Turtle formats. Tool Used This time, we will use EASY RDF. https://www.easyrdf.org/converter 
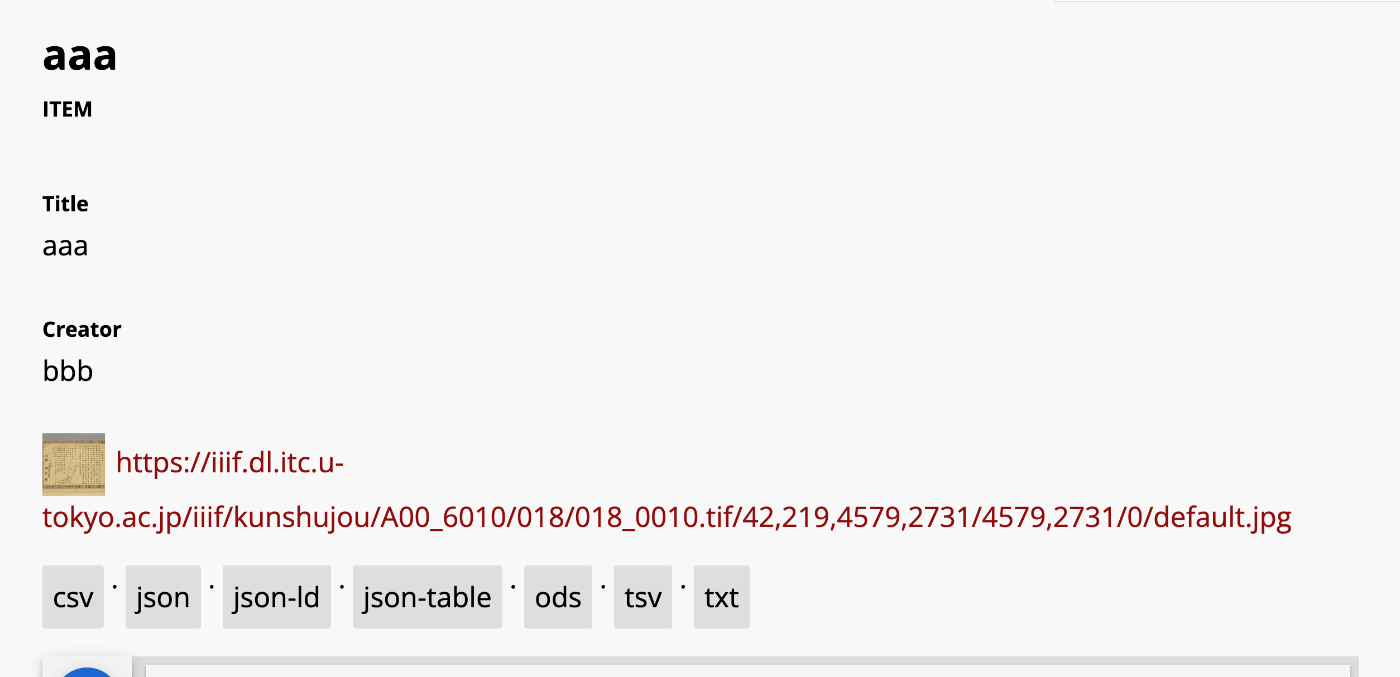
Copy the contents of the following JSON-LD obtained through the Omeka S export. { "@context": "https://omekas.aws.ldas.jp/xxx/omekas/api-context", "@id": "https://omekas.aws.ldas.jp/xxx/omekas/api/items/12", "@type": "o:Item", "o:id": 12, "o:is_public": true, "o:owner": { "@id": "https://omekas.aws.ldas.jp/xxx/omekas/api/users/1", "o:id": 1 }, "o:resource_class": null, "o:resource_template": null, "o:thumbnail": null, "o:title": "aaa", "thumbnail_display_urls": { "large": "https://omekas.aws.ldas.jp/xxx/omekas/files/large/4f57960c4471c954c6d3aac0a23bd441a6f4eb8b.jpg", "medium": "https://omekas.aws.ldas.jp/xxx/omekas/files/medium/4f57960c4471c954c6d3aac0a23bd441a6f4eb8b.jpg", "square": "https://omekas.aws.ldas.jp/xxx/omekas/files/square/4f57960c4471c954c6d3aac0a23bd441a6f4eb8b.jpg" }, "o:created": { "@value": "2023-07-26T22:52:31+00:00", "@type": "http://www.w3.org/2001/XMLSchema#dateTime" }, "o:modified": { "@value": "2023-10-17T06:56:16+00:00", "@type": "http://www.w3.org/2001/XMLSchema#dateTime" }, "o:media": [ { "@id": "https://omekas.aws.ldas.jp/xxx/omekas/api/media/13", "o:id": 13 } ], "o:item_set": [], "o:site": [ { "@id": "https://omekas.aws.ldas.jp/xxx/omekas/api/sites/1", "o:id": 1 } ], "dcterms:title": [ { "type": "literal", "property_id": 1, "property_label": "Title", "is_public": true, "@value": "aaa" } ], "dcterms:creator": [ { "type": "literal", "property_id": 2, "property_label": "Creator", "is_public": true, "@value": "bbb" } ] } Then, paste it into the Input Data form in EASY RDF. ...

[Omeka S Module Introduction] BulkExport: Adding Export Functionality to Item Detail Pages

[Omeka S Module Introduction] BulkExport: Adding Export Functionality to Item Detail Pages

Overview In the following article, I introduced how to bulk export data using the BulkExport module. This module also provides functionality to display an export button on item detail pages. I will introduce how to use this feature. Usage The installation method is the same as for general modules. It is also briefly explained in the article above. After activating the module, export links in various formats are displayed on item detail pages as shown below. ...

Disabling Autotune in Amazon OpenSearch Service

Disabling Autotune in Amazon OpenSearch Service

When attempting to change the instance type from t3.small.search to t3.medium.search on a development domain in Amazon OpenSearch Service, the following message was displayed. Autotune is not supported in t2/t3 instance types. Disable autotune or change your instance type. I could not find the Autotune setting in the UI, but the following page described how to do it using the CLI. https://docs.aws.amazon.com/opensearch-service/latest/developerguide/auto-tune.html#auto-tune-enable So I ran the following command. aws opensearch update-domain-config \ --domain-name my-domain \ --auto-tune-options DesiredState=DISABLED After that, I was able to successfully change the instance type. ...

Installing drush on Drupal Built with Lando

Installing drush on Drupal Built with Lando

I set up a Drupal development environment using Lando, referring to the following site. https://www.acquia.com/jp/blog/how-to-use-lando-for-building-drupal-local-environment For installing drush on it, the following was helpful. https://docs.lando.dev/drupal/getting-started.html#quick-start By running the following command, drush became available. # Install a site local drush lando composer require drush/drush I hope this serves as a useful reference for others.

How to Disable Twig Cache in Drupal 10.1.0 and Later

How to Disable Twig Cache in Drupal 10.1.0 and Later

The instructions were found at the following page. https://www.drupal.org/docs/develop/development-tools/disable-caching#s-disabling-twig-caching-the-easy-way Access the following path: /admin/config/development/settings Checking the boxes on the following screen disables the cache. I hope this is helpful for others.

Enabling HTTPS for Archivematica on EC2

Enabling HTTPS for Archivematica on EC2

Introduction In the following article, I described how to set up Archivematica on EC2. This time, we configure a custom domain and enable HTTPS. Custom Domain Configuration This time, we assign the domains matica.aws.ldas.jp and storage.aws.ldas.jp to the IP address. We use Route 53. Obtaining an SSL Certificate sudo su yum install epel-release yum install certbot ertbot certonly --webroot -w /usr/share/nginx/html -d matica.aws.ldas.jp -d storage.aws.ldas.jp Web Server Configuration: Nginx Installation vi /etc/nginx/conf.d/archivematica-and-storage.conf Configuration: ...

Trying the IIIF Content State API

Trying the IIIF Content State API

Overview I had the opportunity to try the IIIF Content State API, so this is a memo of the process. https://iiif.io/api/content-state/1.0/ The IIIF Content State API is described in Current Awareness-R as follows: “The IIIF Content State API” can generate links that specify in detail how an object should be displayed, including rotation angle and display position on the page image. https://current.ndl.go.jp/car/45832 Trying It Out The “Shueitai / Letterpress Printing Digital Library” provides the IIIF Content State API. ...

Trying Cantaloupe Access Control

Trying Cantaloupe Access Control

Overview This is a memo about trying Cantaloupe’s Access Control. https://cantaloupe-project.github.io/manual/5.0/access-control.html Bearer Authentication I referenced the following. https://cantaloupe-project.github.io/manual/5.0/access-control.html#Tiered Access All or Nothing Access This returns an error when the authentication information is incorrect. I configured it so that images are returned when the token is test, as shown below. def authorize(options = {}) header = context['request_headers'] .select{ |name, value| name.downcase == 'authorization' } .values.first if header&.start_with?('Bearer ') token = header[7..header.length - 1] if token == "test" return true end end return { 'status_code' => 401, 'challenge' => 'Bearer charset="UTF-8"' } end I created a Google Colab notebook to verify the above behavior. ...

Adding Values to info.json in Cantaloupe

Adding Values to info.json in Cantaloupe

Overview Referring to the following, I tried adding values to the info.json returned by Cantaloupe. https://cantaloupe-project.github.io/manual/5.0/endpoints.html Method Referring to the page above, I modified extra_iiif3_information_response_keys as follows. def extra_iiif3_information_response_keys(options = {}) { 'rights' => 'http://example.org/license.html', 'service' => [ { '@id': 'https://example.org/auth/login', '@type': 'AuthCookieService1', 'profile': 'http://iiif.io/api/auth/1/login', 'label': 'Log In' } ], 'exif' => context.dig('metadata', 'exif'), 'iptc' => context.dig('metadata', 'iptc'), 'xmp' => context.dig('metadata', 'xmp_string') } end As a result, I was able to obtain the following info.json. { "@context": "http://iiif.io/api/image/3/context.json", "id": "https://cantaloupe.aws.ldas.jp/iiif/3/converted.tif", ... "rights": "http://example.org/license.html", "service": [ { "@id": "https://example.org/auth/login", "@type": "AuthCookieService1", "profile": "http://iiif.io/api/auth/1/login", "label": "Log In" } ], "exif": { "tagSet": "Baseline TIFF", "fields": { "ImageWidth": 13300, "ImageLength": 10400, "BitsPerSample": 8, "Compression": 7, "PhotometricInterpretation": 6, ... This can likely be used in combination with license display and the IIIF Auth API. ...

Trying Cantaloupe Overlays

Trying Cantaloupe Overlays

Overview Let’s try the overlay feature provided by Cantaloupe. https://cantaloupe-project.github.io/manual/5.0/overlays.html BasicStrategy With BasicStrategy, overlays are applied based on the settings in cantaloupe.properties. As shown below, you can overlay an image on another image. I used the following image from Irasutoya. https://www.irasutoya.com/2020/12/blog-post_279.html Since I set position to bottom right in the configuration file described below, the specified image appeared in the bottom right as shown below. I modified overlays.BasicStrategy.enabled and overlays.BasicStrategy.image in cantaloupe.properties. ...

Enabling the Cantaloupe Admin Panel

Enabling the Cantaloupe Admin Panel

Overview Here is how to enable the admin panel for Cantaloupe. I was able to view server information as shown below. Configuration Edit the following section in cantaloupe.properties. # Enables the Control Panel, at /admin. endpoint.admin.enabled = true # false endpoint.admin.username = admin endpoint.admin.secret = <パスワード> As a result, if you access a URL like the following and the Basic authentication screen appears, the setup is complete. https://cantaloupe.aws.ldas.jp/admin Summary I hope this serves as a useful reference when using Cantaloupe. ...

Enabling HTTPS for Cantaloupe on EC2

Enabling HTTPS for Cantaloupe on EC2

Introduction In the following article, I described how to set up Cantaloupe on EC2. This time, I will configure a custom domain and enable HTTPS. Custom Domain Configuration This time, I will assign the domain cantaloupe.aws.ldas.jp to 54.172.71.20. When using Route 53, it can be configured as follows. Obtaining an SSL Certificate sudo su apt install certbot certbot certonly --standalone -d cantaloupe.aws.ldas.jp root@ip-172-31-62-61:/home/ubuntu# certbot certonly --standalone -d cantaloupe.aws.ldas.jp Saving debug log to /var/log/letsencrypt/letsencrypt.log Enter email address (used for urgent renewal and security notices) (Enter 'c' to cancel): xxx@gmail.com - - - - - - - - - - - - - - - - - - - - - - - - - - - - - - - - - - - - - - - - Please read the Terms of Service at https://letsencrypt.org/documents/LE-SA-v1.3-September-21-2022.pdf. You must agree in order to register with the ACME server. Do you agree? - - - - - - - - - - - - - - - - - - - - - - - - - - - - - - - - - - - - - - - - (Y)es/(N)o: Y - - - - - - - - - - - - - - - - - - - - - - - - - - - - - - - - - - - - - - - - Would you be willing, once your first certificate is successfully issued, to share your email address with the Electronic Frontier Foundation, a founding partner of the Let's Encrypt project and the non-profit organization that develops Certbot? We'd like to send you email about our work encrypting the web, EFF news, campaigns, and ways to support digital freedom. - - - - - - - - - - - - - - - - - - - - - - - - - - - - - - - - - - - - - - - - (Y)es/(N)o: Y Account registered. Requesting a certificate for cantaloupe.aws.ldas.jp Successfully received certificate. Certificate is saved at: /etc/letsencrypt/live/cantaloupe.aws.ldas.jp/fullchain.pem Key is saved at: /etc/letsencrypt/live/cantaloupe.aws.ldas.jp/privkey.pem This certificate expires on 2023-12-19. These files will be updated when the certificate renews. Certbot has set up a scheduled task to automatically renew this certificate in the background. - - - - - - - - - - - - - - - - - - - - - - - - - - - - - - - - - - - - - - - - If you like Certbot, please consider supporting our work by: * Donating to ISRG / Let's Encrypt: https://letsencrypt.org/donate * Donating to EFF: https://eff.org/donate-le - - - - - - - - - - - - - - - - - - - - - - - - - - - - - - - - - - - - - - - - Web Server Configuration: Installing Nginx apt install nginx vi /etc/nginx/sites-available/cantaloupe.aws.ldas.jp Configuration: ...

Created Notebooks Using NDLOCR and NDL Classical Japanese OCR ver.2

Created Notebooks Using NDLOCR and NDL Classical Japanese OCR ver.2

Notice 2026-02-24 ! The notebooks provided on this page will no longer be updated. For NDLOCR, “NDLOCR-Lite” has been released as a desktop application and command-line tool for easy use. Please use this going forward. https://github.com/ndl-lab/ndlocr-lite 2025-04-02 There is currently a bug. Please refrain from using it until the fix is complete. The bug has been fixed. 2025-03-21 For NDL Classical Japanese OCR, “NDL Classical Japanese OCR-Lite” has been released as a desktop application for easy use. Please use this going forward. ...

Handling "two factor auth enabled..." on PyPI

Handling "two factor auth enabled..." on PyPI

Overview Two-factor authentication is becoming mandatory on PyPI. https://blog.pypi.org/posts/2023-05-25-securing-pypi-with-2fa/ After setting up two-factor authentication and attempting to upload, the following error occurred. Uploading xxxx.whl 100% ━━━━━━━━━━━━━━━━━━━━━━━━━━━━━━━━━━━━━━━━ 22.2/22.2 kB • 00:00 • 65.2 MB/s WARNING Error during upload. Retry with the --verbose option for more details. ERROR HTTPError: 401 Unauthorized from https://upload.pypi.org/legacy/ User <アカウント名> has two factor auth enabled, an API Token or Trusted Publisher must be used to upload in place of password. Solution I had ~/.pypirc configured as follows. ...

Launching Cantaloupe, a IIIF Image Server, on EC2

Launching Cantaloupe, a IIIF Image Server, on EC2

Overview This is a reference guide on how to launch Cantaloupe, a IIIF image server, on EC2. https://cantaloupe-project.github.io/ Additionally, this article introduces an example of Delegate Methods for restricting image download sizes. Specifically, it addresses cases where an error occurs when attempting to retrieve a full-size image via /full/full/. https://cantaloupe-project.github.io/manual/5.0/access-control.html Setting Up Cantaloupe Creating an EC2 Instance I created an EC2 instance with the platform set to Ubuntu, instance type set to t2.medium, and storage set to 8 GB. ...